Book Review – The Hands-On Home

Today’s post is a review of a great book on keeping a natural, healthy home. I’ve already bought 3 copies of it – for myself, my mom, and my sister, and wanted to give you a peak into the book!

IMG_5918

The Hands-On Home is written by Erica Strauss, the author of my favourite blog – NW Edible Life. If you love food preservation, growing food, or eating food and are not reading this blog, you are missing out. Erica writes about all sorts of gardening, food preservation, and urban homesteading topics, and is always my go-to resource for when to plant my garden (she’s just north of me in Seattle), and she’s always good for a fun cocktail recipe too. I love the blog because her posts are not only educational, but she injects humour, and I feel like we would get along if I knew her in “real life.” Her book is extra special to me because I heard about it long before it came out, and tested some of her recipes in the early stages of book writing. I actually managed to get my name in the acknowledgements for the tiny bit of work I did! Fun! So I may be a bit biased in my love for this book, but here is my take, and a little bit more about what I like about the book.

IMG_5945

The Hands-On Home is organized by season, and by topics within each season. Within a season it features seasonal recipes for cooking, preservation, home care, and personal care. It also features some great year-round information like recipes that are great for all seasons, cleaning techniques and recipes for natural cleaners, food preparation and preservation techniques.  I like the seasonal organization of the book, because I can flip to winter, and make a dish that features ingredients that are actually in season in the winter, or get an idea of a food preservation idea for the winter. The personal care products are nicely organized by season as well, like a summer after-sun gel, or a winter lip balm, although many are also great across seasons.

IMG_5921

The contents for the summer preserving section.

IMG_5931

The Hands-On Home is also very well illustrated. The pictures are gorgeous and will leave you wanting to make every recipe in the book. So far all the recipes I’ve made have been delicious! From a Kamut salad with delicata squash and dried cherries, to homemade granola, or oven-roasted herb confit tomatoes, this book has recipes for everyone.

IMG_5938

One of the recipes I actually tested in the early stages that ended up in the book was this delicious shrimp dish with a fresh basil, corn, black beans, and avocado salad. So good!

IMG_5940

I’ve also been really into homemade personal care products lately, and I’ve enjoyed making many of the home and personal care recipes. So far I’ve made Erica’s lip balm, bath bombs, bath salts, laundry detergent, and bar soap. See my bars below! I’ve actually been making a lot of soap recently, and this was one of the favourites when my family tested my bars.

IMG_5932

So if you are looking for a great book with everything from DIY hair-styling wax to recipes for preserved mustard or lacto-fermented pico de gallo, you’ll love this book. I can’t wait until canning season rolls back around to try some more of the canning recipes!

*this post contains affiliate links, please see the “About the Blogger” page for more information

Ball FreshTech Canner – Not Just for Canning Anymore

IMG_2902

When Ball put out their FreshTech electric water bath canner this year, which I previously reviewed here, they also advertised it with some additional uses, beyond just using it as a canner. I thought I would probably just use it for canning, and those other uses were just a good marketing idea, but I’ve actually come to use it for quite a few other things so thought I’d share some of them with you in case you’ve been on the fence about buying one. Ball’s suggestions mostly revolve around making a big batch of something – which makes sense, a lot of us don’t have another pot this big, so it is good for a big batch of whatever you are making. It also comes with a steaming rack for steaming vegetables, but to me unless you are steaming a whole lot, using this giant pot maybe isn’t ideal. My ideas for it mostly revolve around the fact that it’s very easy to get the canner to stay at a set temperature. Unfortunately the dial doesn’t have temperatures on it, so if you want to know the exact temp you need a thermometer (this is the one I use most often), but it does maintain pretty much whatever temperature you are interested in. So here are some of my uses for it!

ball-canner-dial1

BEER!

Now if you are a pro, making all grain beer and being all fancy like, you probably won’t agree with this one, but I think the canner is awesome for making beer. Why? Well if you are making beer from malt extracts and a smaller amount of specialty grains, usually what you do is first steep some grains at around 170 F, then add the extract and bring your wort to a boil. Using my electric stove top, I often find myself overshooting the steeping temperatures, but using the canner has been much easier. Why? Because of the way the canner burner pulses on and off to maintain the temperature. Additionally, I just left the canning rack in the canner, and set my grain bag full of grain on top of it so I didn’t have to worry about it touching the bottom and melting or burning. Once you get your wort to your steeping temperature, turn the heat down until you hear the burner turn off, then it will just come back on in short bursts necessary to maintain that temperature. Worked like a charm. Then you have two options when you are done steeping. Either boil the wort also in the canning pot, or if you want to use your larger brew pot simply put it under the spout of the canner, open the spout and sparge your grains. Either way works great! And many of the “mini-mash” recipes that I have followed actually only tell you to boil about 3 gallons of the wort and top it off at the end anyways, so this is a great option for those recipes and for beginners not ready to invest in more equipment. Last time we brewed, we actually made one batch in the brew pot we have, and one in the canner because there is very little active time involved it was great – two brews in the same amount of time as one!

IMG_3062

Mmmm wort.

IMG_3206

 Making Stock

After thanksgiving I froze the turkey carcass to make stock with, and decided to do it with the canner this year. I am quite happy with how it turned out! I was a little concerned with whether anything would burn to the bottom (which it didn’t at all) so to be safe I actually left the rack in the canner, filled it with my bones and bits of meat, carrots, onions, celery and spices, and covered with water. Similarly to the way I’ve made stock in the crock pot before, I actually didn’t boil a ton of the water off, but rather let it just cook on a hot but not boiling temperature. I made sure that there was a ton of water in there so there was no chance of it cooking all off, and left it cooking for a full 24 hours. Turned out super well!

IMG_3234

Pasteurizing milk

Another possible use for the canner is pasteurizing milk. Weck actually markets their canner as a “pasteurizer.” If you have access to raw milk, and want to pasteurize it at home, you could do a nice big batch in the canner. Again, the pro here of the canner is the same as many of the other uses – I find it much easier not to overshoot the temperature. Use your canner as a double boiler with your largest pot. For pasteurization,  you want to either heat to 145 F for 30 minutes (reference here) or to 165 F for 15 seconds (reference here). The canner is large enough that you could easily use it as a double boiler for most sizes of large pot. Pictured is my 4.5 quart pot, but my larger stock pot is the same diameter and fits nicely also if I wanted to do a larger batch.

IMG_3156

Mulled Wine (and other hot beverages)

This one was inspired by Ball’s suggestion of apple cider, but the canner can be used for mulled wine too. The thing I like again is that you can just leave it on low and it will keep the wine warm, and you don’t have to worry about having a burner on. Plus it has a spout for serving!

FullSizeRender

Do you have the new Ball canner? What creative ways have you used it? Interested in purchasing one? – They have had a couple sales on amazon so keep your eyes peeled for after Christmas sales, or buy one for the canning junky in your life!

*this post contains affiliate links, please see the “About the Blogger” page for more information (Yes, if you buy the canner from amazon I will receive a small profit, but I would never recommend a product I don’t love just because of that!!)


Plum Sauce

mmmm plums. Last year I posted another plum sauce recipe, which was also delicious, but keeping with my desire to make every recipe from the Ball Complete Book of Home Preserving, I decided to try their recipe this year. The only thing I changed from what’s in Ball is to add allspice, and remove some of the sugar. Make it with a mix of plum varieties for extra fun sauce!

IMG_5618 copy

10 cups chopped pitted plums
3/4 cups finely chopped onion
2 tbsp chopped seeded chili pepper
1 cup cider vinegar
2 cups brown sugar
1 cup white sugar (optional in my opinion)
2 tbsp mustard seeds (I used 1 ish tbsp ground)
1 tbsp salt
2 cloves finely chopped garlic
1 tbsp finely chopped gingerroot
1/2 tsp allspice

To make it:

Dice the plums, pepper, onions, ginger, and garlic finely and combine everything except the plums in a large pot and bring to a boil. I thought 3 total cups of sugar sounded like too much, so left out the white sugar and decided I’d taste it and add in later if I wanted it sweeter. I didn’t end up adding in though, it’s plenty tasty without, so consider reducing it if you want a less sweet sauce; Ball tends to make things quite sweet.

IMG_5627 copy

Add the diced plums and return to a boil. Reduce heat and continue to simmer for a few hours, until it reaches a good plum sauce consistency. When you are getting close, prepare 4 pint jars, or 8 half pints.

IMG_5633 copy

Here it is reduced by about half, a few hours later.

IMG_5638 copy

Fill hot jars, leaving a half inch head space. Wipe rims, apply lids, and tighten finger tip tight. Process in a boiling water bath canner, covered by at least 1-2 inches of water, for 20 minutes. After 20 minutes, turn off heat, remove canner lid, wait 5 minutes, and remove jars to a hot pad or towel. Cool, check seals, label, and store.

IMG_5644 copy

Gorgeous!! And tasty.

IMG_5656

*this post contains affiliate links, please see the “About the Blogger” page for more information

Blackberry Raspberry Pie Filling

When I saw a recipe for raspberry pie filling in the Ball Complete Book of Home Preserving, I have to admit that I was fairly skeptical as to how well it would turn out. It’s a recipe with ClearJel, and if you’ve ever used ClearJel, you know what a gooey mess it can become. I was unsure how well I could maintain the integrity of such a delicate berry, but of course, that didn’t stop me – challenge accepted. So I thought what I’d try was just making one jar at a time. Since I had picked raspberries and blackberries on this particular day, I made a jar of raspberry, a jar of blackberry, and a jar of half and half. I am actually pretty happy with how it turned out! For the recipe I ended up following the extension publication, which was pretty much the same as Ball, but it gives amounts  for 1 or 7 quarts – Fruit Pie Fillings extension pub linked to here.

Ingredients (for just one quart):

3 1/3 cups raspberries or blackberries (or a combination)
1 cup sugar (I reduced to 1/2 cup)
1/4 cup + 1 tbsp ClearJel
1 1/3 cups cold water or fruit juice
1 tbsp + 1 tsp bottled lemon juice

Here’s how it’s made:

Prepare your canner, jars, and lids. Combine the sugar and ClearJel in a large pot and stir. Remember, you can safely reduce the ClearJel or sugar, if desired, so make one jar, see how you like it, and adjust accordingly next time. The lemon juice (added later), should not be reduced.

IMG_5531 copy

Add water or juice, and cook mixture over medium high heat. It will initially get thick in chunks, and will smooth out to look how it does below. For a few more pictures check out my Cherry Pie Filling recipe.

Once the mixture is thick and bubbling, add the lemon juice and boil for one more minute, stirring constantly to prevent burning.

IMG_5532 copy

Remove from heat, and gently fold in the berries.

IMG_5537 copy

Doing just one jar I was able to keep the berries fairly unsquished, but if you go for the full canner load of 7 quarts, I make no guarantees. I have done a full batch of blueberries though, and with their firmer texture it works beautifully. The blackberries might be ok too, but I have my doubts on the raspberries. However, mushy would still be tasty!

IMG_5539 copy

Immediately fill the hot quart jars, leaving a full 1 inch headspace, or perhaps even slightly more. ClearJel will expand a bit and you don’t want to risk jars not sealing over cramming in a couple extra berries. Wipe rims, apply lids, and tighten bands finger tip tight.

IMG_5541 copy

Process the jars in a boiling water bath canner for 30 minutes (0 – 1000 feet elevation).

IMG_5543 copy

After processing, remove the canner lid, wait 5 minutes, and remove the jars to a hot pad or towel. Cool 12-24 hours, check seals, label, and store. Below I have the raspberry on the left, blackberry on the right, and the 50:50 combo pie in the middle. Can’t wait to make these into pie!!

IMG_5547 copy

*this post contains affiliate links, please see the “About the Blogger” page for more information

Chocolate Raspberry Sundae Topper

Raspberries are, in the view of many people I know, so precious that it’s hard to even want to preserve them; it’s best to just gorge on them until your tongue hurts, and eat them fresh while they are in season. I can totally understand that perspective since it’s hard to preserve the delicate texture and the amazing fresh taste of raspberries, but since I picked few buckets full two weekends in a row, I wanted to preserve some of them. I made some homemade raspberry ice cream following this recipe from the blog the view from great island, and made this chocolate raspberry sundae topper from the Ball Complete Book of Home Preserving to go on top. It is deeeeelish and a great treat for chocolate lovers.

IMG_5615 copy

Ingredients:
1/2 cup unsweetened cocoa powder
1 package regular fruit pectin
4 1/2 cups crushed raspberries
4 tbsp lemon juice
6 3/4 cups sugar

Here’s how it’s made:

Prepare your canner, jars, and lids. This recipe yields 6-7 half pints. Combine the cocoa powder and pectin in a bowl and set aside.

IMG_5472 copy

Mash the berries and measure into a large pot. Add the lemon juice and stir.

IMG_5475 copy

Whisk in the pectin/cocoa mixture.

IMG_5478 copy

Bring to a boil over high heat, stirring constantly. Once at a full boil, add the sugar all at once, return to a boil, and boil hard for one minute.

IMG_5479 copy

So lovely, and delicious.

IMG_5488 copy

Fill your hot jars, leaving a 1/4 inch head space. Wipe rims, apply lids and bands, and tighten finger tip tight. Process in a boiling water bath canner, covered by at least an inch or two of water for 10 minutes. After 10 minutes, remove canner lid, wait 5 minutes, remove jars, cool, and store.

IMG_5489 copy

This sundae topper makes a delightful gift for the ice cream lover in your life. I bet it would also be really good on a light cake – I think I need to try it. The only thing I may change if I did this again would be to potentially reduce the pectin. It sets pretty firmly, which for a “sundae topper” seemed sort of unnecessary. Next time I might halve it for a less firm set.

Have any raspberries you’re wanting to preserve in a unique and interesting way? Try this out and let me know what you think!


Blackberry Cabernet Jam

Last weekend after picking a ton of blackberries I was thinking about what delicious blackberry creation I could come up with, and was reminded of the strawberry Pinot Noir jam that I made two summers ago. Blackberries and wine? Yes please! That sounds like a great idea. Blackberries are bold though, I thought to myself, they need a bolder wine, thus was born the blackberry Cabernet jam. This jam is a real time commitment, as it is pectin free, and has an entire bottle of wine in it. However, if you’re feeling slightly more impatient the Ball Complete Book of Home Preserving does have a berry wine jelly using liquid pectin that you could whip up faster. Alternatively, make a half batch and drink the other half of the wine.

Ingredients:
15 cups blackberries
2.5 cups sugar
One bottle of your favourite Cabernet Sauvignon or other bold wine
1 tbsp of lemon juice

IMG_5507 copy

Here’s what I did:

Prepare the canner, jars, and lids (and by prepare I really mean start pondering it, because you actually won’t need to prepare for like 4 more hours). Depending on how long you cook this jam, it will yield about 6-8 pints. Mash the berries to your preferred level of mashiness in a large pot, and add the sugar, wine, and lemon juice. Leave a small amount of wine in the bottom of the bottle to sip on while you bring the jam to a boil.

IMG_5509 copy

Bring to a boil over medium/high heat. Reduce and maintain a gentle boil for a good many hours, stirring occasionally. I think I ended up cooking this for nearly 5 hours. Be patient, or play with adding some liquid pectin of you want a firmer set. Near the end of the cook time, pay close attention to avoid any burning on the bottom of the pot.

IMG_5520 copy

Fill hot jars leaving 1/4 inch head space. Wipe rims, apply lids, and tighten bands finger tip tight. Process in a boiling water bath canner for 10 minutes.

IMG_5528 copy

Deeeeelicious. And oh so pretty. Now who wants to host a cocktail party or wine night so that I can bring some of this jam? 😉

IMG_5556 copy

A “berry” good weekend – things to do with strawberries

Believe it or not, strawberry season is wrapping up here next week! So sad! However, I did do a pretty good job taking advantage of the berries this year. We bought a chest freezer, so I’ve frozen a bunch, and I did some dehydrating, canning, and wine making with the rest last weekend. A berry good weekend indeed. For many of you, berry season is probably just beginning, but whether this is your last week, or first, here is some inspiration for things to do with your berries.

Strawberry Rhubarb Pie Filling – my first blog post ever, and still one of my favourite recipes. The universe is telling us to put these two awesome items together by having them mature at the same time – you should really listen.

20130822-212438.jpg


Strawberry Fruit Leather – Since this post, I’ve learned adding some apple sauce or other more fibrous fruit helps with the cracking and crispiness issue. But I also still love it with just strawberries.

20131025-225202.jpg


Strawberry jam – a classic favourite of course. Or on the wilder side, add some wine to your jam and try this strawberry pinot noir jam.

IMG_2031 copy

Strawberry wine – heck yes! It’s really not as hard as it seems by the length of the post. You should really really try it. Shorter, point form directions coming soon to entice you more, since not all of you have the attention span for this novel of a post.

IMG_4461 copy

Or a non-alcoholic beverage  (or alcohol optional I should say) – strawberry lemonade concentrate!

IMG_3736 copy

Got a couple handfuls left over still? Flavour some vinegar (or vodka? Post coming soon on that, but it’s basically the same as vinegar)

IMG_4704

Now go, quickly, before they are gone!! Pick some berries! Eat some berries! Can some berries! Dry some berries! Love the berries! And don’t forget to eat some fresh – sometimes it’s easy to get caught up in preservation.  And lay off the caffeine! (Oh wait, that one’s for me.)

Master Food Preserver Manual

I recently added a “resources” tab to my blog, to which I have been adding some of my favourite extension service publications, and products I love. In preparation for the upcoming preservation season, I had been thinking to myself, “how could I make this as useful and accessible to people as possible?” What I came up with was to provide you with all of the resources that are available in my Master Food Preserver notebook. When I started the MFP program last year, I got the notebook pictured below, which has a ton of different extension service publications complied into one handy (albeit giant) binder. So I wanted to make that virtually available to you in a well organized fashion, until I found out it is already available online! So exciting!! So if you are looking for basically all the publications that you need to safely prepare and preserve food safely at home click here. It’s all available free online on the OSU extension website – who knew! This is an amazing and FREE resource, check it out! The key was that it’s under faculty resources. All these publications are available online, but this is the first time I’ve seen them all organized together. Of course the tips for volunteers section isn’t important for you, but the rest of the chapters are nicely laid out and accessible. Enjoy, and happy preserving! 

20140429-211826.jpg

Do you refer to extension service publications? What’s your go-to source for recipes and instructions?

Product Review – Ball FreshTech Electric Water Bath Canner

I am super excited that my new electric water bath canner is here and I get to tell you all about it! You heard it here first people! If you haven’t seen this yet, Ball just came out with this new product, the FreshTech Electric Water Bath Canner. I got mine yesterday via preorder, and they are now in stock on amazon! Now, this is not to be confused with their other electric canner the Ball freshTECH Automatic Home Canning System, which in my opinion (although I actually haven’t used it), is not nearly as exciting of a product. It’s got half the capacity and is twice the price. And you’re restricted in many ways by their recipes. No thank you. But that’s not what we’re here for. So, let’s talk about this new electric water bath canner. Full disclosure, yes, if you buy it through the link above I will make a few bucks, but this is my honest to goodness review of the product.

Yes, it has some obvious pros, but I had a few other things in mind I also wanted to test, and I wanted to make some comparisons between it and a regular water bath canner, and also the Weck water bath canner (which I have not successfully been able to find for sale, but if you can it’s typically more expensive than the Ball one by nearly double).

ball canner

OK so let’s start with the obvious pros:
– You free up a burner (definitely a huge pro in my books – I am a notoriously large batch canner)
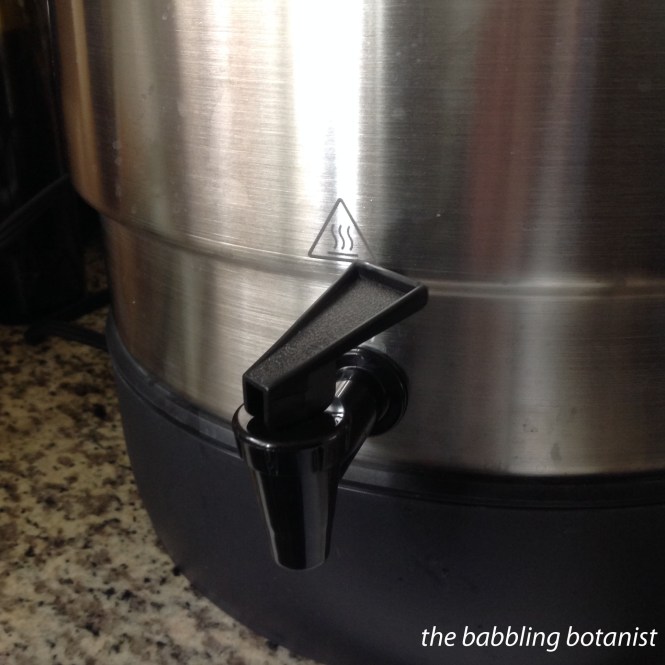
– There is a spout for draining the hot water
– Good capacity of 8 pints/ 7 quarts (more on this is a minute)
– Pretty light
– Nice heat resistant handles (including the lid handle)
– Supposedly more energy efficient, but I can neither confirm nor deny that
– Can be used for other things than canning (but of course so can a pot)

ball canner spout

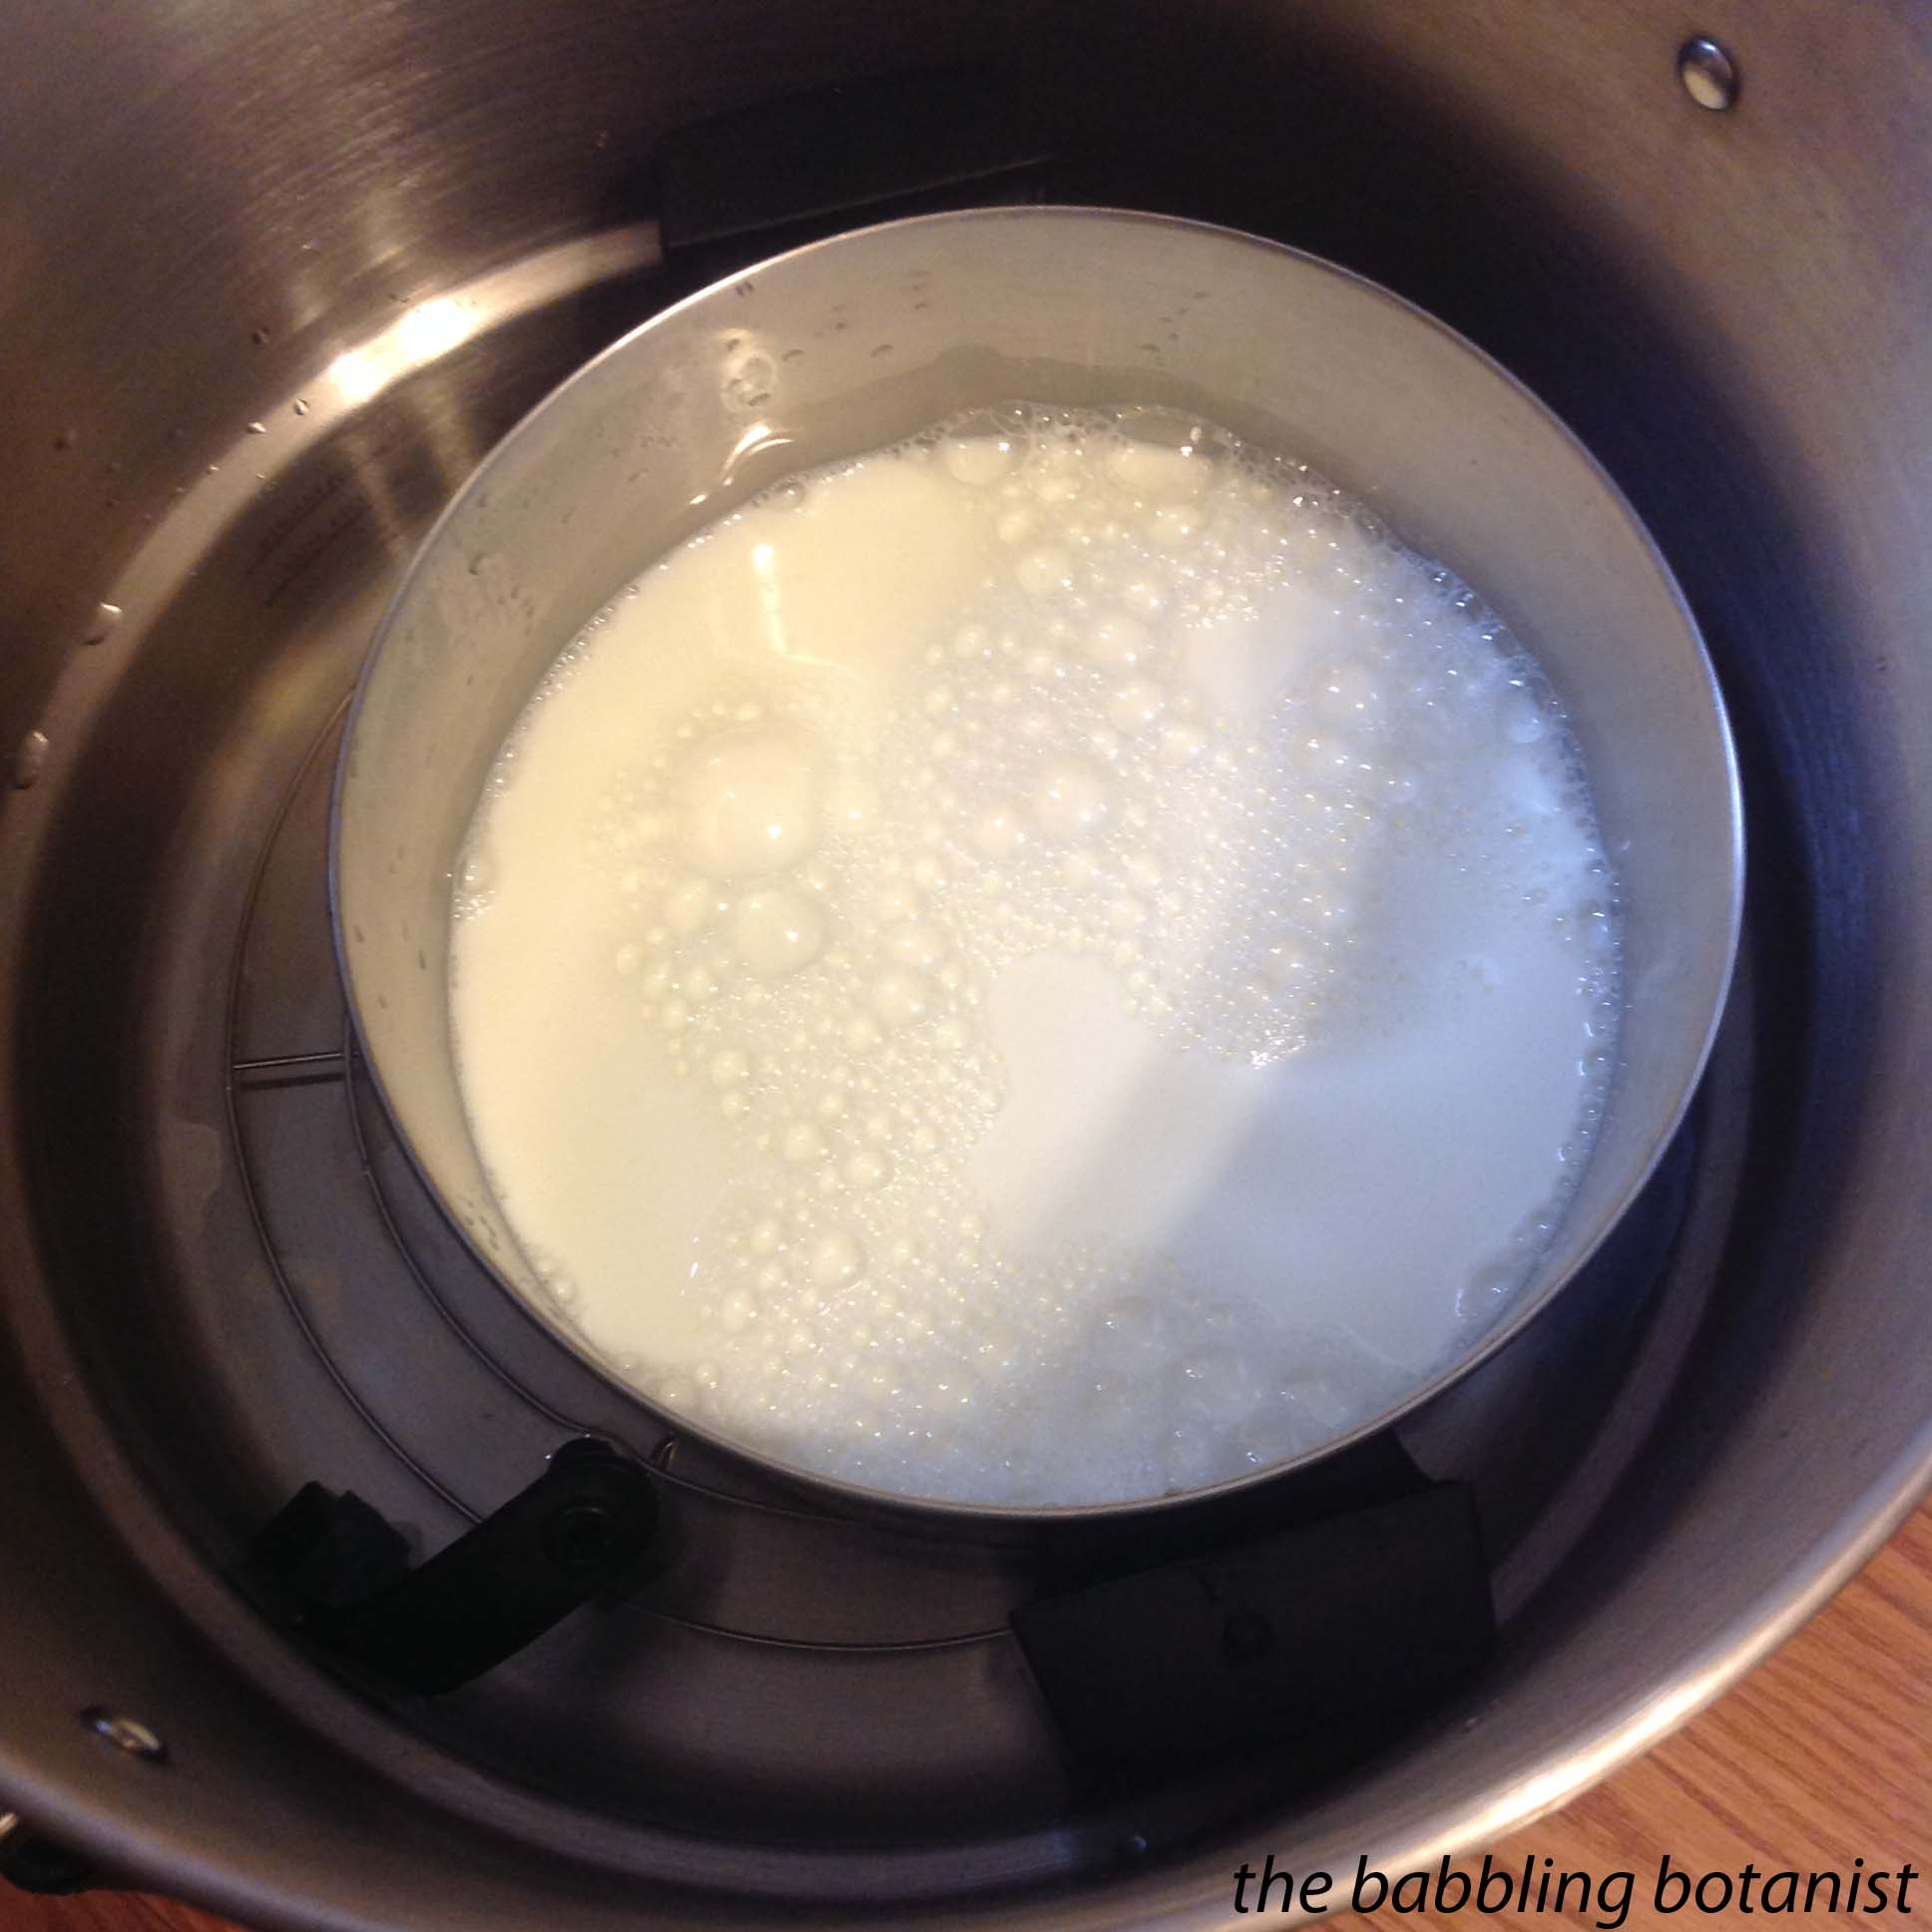
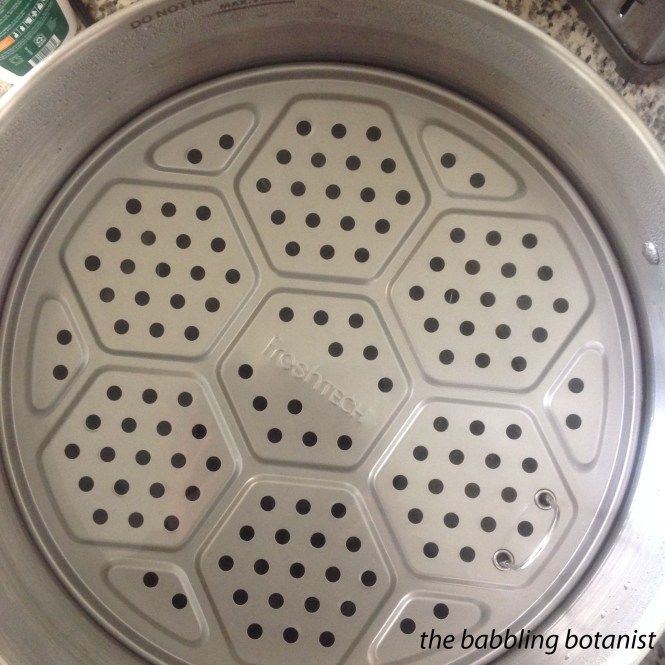
So those things are all well and good, but there are a few other things I was curious about. For one, I wanted to know if it heats up as fast as the canner does on the burner. Sadly, the short answer is no. But I’m not terribly upset about it, because I’ll just get it going sooner than I would the normal water bath canner. If you’re interested though, this is what I did. I filled each canner with jars, 95 F water, and turned them to high. My canner on the burner was at a full rolling boil in 36 minutes and the Ball canner took a full 57 minutes. So I was a bit bummed by that. Then I reread the instructions and they said that you were supposed to put the “steaming rack” (pictured below) on top of the jars and that actually helped it boil faster. Hmm OK if you say so, let’s try that. So I decided to try from “raw pack” temperature (140 F) to boil, and see how long that took, since I wasn’t spending another hour on this test. Luckily, I had also recorded the temperatures at 5 minute increments in run one so could compare. This time it took the burner canner 22 minutes and the Ball canner 36 minutes to go from 140 F to a full rolling boil. In comparison 140 to boil took 39 minutes without the “steaming rack” in there. Not sure that’s significantly better but I guess in theory it could help a bit. If you are hot packing (which I usually am), your water is around 180 F to begin with. To compare there, the burner canner went from 180 F to boil in 12 minutes, and the Ball canner too 21 minutes. So, take it or leave it, at least compared to my burner, the Ball was slower. However, if you have gas or a flat top range, I can’t be sure how it will compare. One time I canned on my neighbours flat top range and it took FOREVER to boil.

ball canner tray

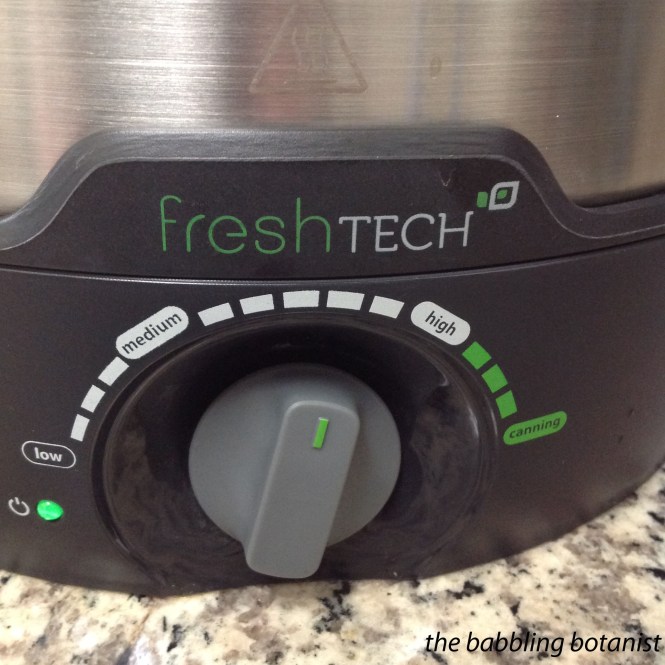
My next question was: can I maintain a specific temperature? Most specifically I wanted to know whether I could maintain 180-185 F for low temperature pasteurization of pickles. More on that here. I was a bit bummed that they weren’t actual temperatures on there, but if it maintains something pretty constant that’s OK in my books too. So I tested what it maintains at low, medium, and high (the canning setting is for a full boil), and I tested if I could get it to maintain 180 F easily. This experiment I’m pretty pleased with. For my unit (of course yours could differ), it maintains temperatures of 120 – 125 F at low, 145 – 150 F at medium, and 190 – 195 F at high. I was able to maintain 180 F about one and a half “ticks” below high, as in the picture below. Of course, I’m at sea level and other things could affect where your 180 F is, but this is going to make low temp pickling AWESOME. Big win on this one I’d say. You certainly still need a thermometer to be sure of the temperature, but this was so much easier than finagling with the burner setting. It can be very easy to overshoot 185 on the burner, which kind of defeats the purpose of low temp processing. The beauty of this canner is the heat turns off and on to maintain the temperature. You can hear it come on too, so if you were trying to find 180 you could easily turn it to high, and then turn it down when you were getting close. You’d hear the burner turn on and off so you could find that sweet spot. So excited for pickling now!

ball canner dial

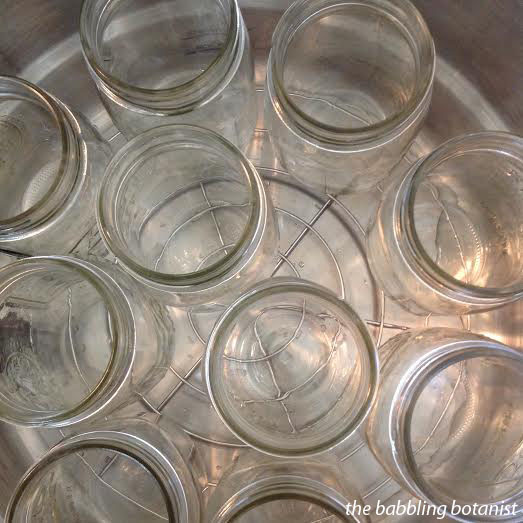
Another thing I was happy with was capacity. Like I mentioned, the other Ball autocanner has quite a small capacity. They list this one as 8 pints or 7 quarts, and they do mention in the manual that you can fit more than 8 pints, but they call the capacity 8 to allow for adequate water circulation around the jars. Pictured below I have 10 pints in there, and they didn’t seem super snug, so take it or leave it. I think that I will can with 9 in there on occasion – if I can fit 10, I’d say 9 have adequate circulation. It’s partially the nub from the spigot that’s the issue. The Weck does fit more, but like I said, good luck finding it, and it’s more $$.

ball canner jars

Overall, despite the slower heating time, I am happy with the purchase of this canner. I think that heating time may be the only real downside. The only other thing was that the rack on the bottom seemed like it could have been a tiny bit larger, but perhaps that would have made it harder to fit it past the nub for the spout. Not sure. But especially for me having a small kitchen, it’s going to be awesome to not have the canner on the stove. Or if I’m doing huge batches I can have one on the stove, rather than two. I may even use it on the kitchen table, and although that means I still have to lift it to the sink, I could drain some water into a pot or something, and I think it will be worth it. Thanks Ball, good invention, I’ve been waiting for something like this!

Think you’ll ditch your old canner for an electric one? Any burning questions about it before you invest? I am happy to answer.


*this post contains affiliate links, please see the “About the Blogger” page for more information


Chicken broth – two ways to make it and two ways to preserve it

The winter months definitely have less opportunities for food preservation than summer, but if you are itching for some canning, now can be a good time to stock up on bone broths. Yes, horrible, horrible pun intended. Making chicken broth is a great way to prevent any part of the chicken from going to waste, it’s good for you, and it’s way better than store-bought. Cook up a chicken or two, and hang onto the bones and scraps.

IMG_1283

Ingredients:
1 chicken
2 stalks celery
2 medium onions, quartered
10 peppercorns
2 bay leaves
1 tbsp salt

How it’s made:
Combine the bones and any leftover scraps of meat in a large stock pot with the rest of the ingredients and cover with water. These ingredients are as written in Ball, but you can be a bit flexible in making broth – you could also use a carrot if you want, throw in some parsley or garlic, or if you prefer, just make straight bone broth with no added vegetables. Bring to a boil, then reduce to a simmer. Now, just wait. Occasionally taste the broth; leave it simmering until it reaches the desired strength of flavour. Typically, I let it simmer for the better part of a day.

IMG_1289 (1) copy

A second way to make chicken broth is in the crock pot, and I can’t believe I didn’t think of it myself. I recently purchased 100 Days of Real Food, which is a great book by the way, and in it Lisa has a recipe for overnight chick stock in the crock pot. Dang, why did I never think of that?! Typically, I make a chicken for dinner, chuck the bones and leftovers in the refrigerator, and make the broth the next day because I don’t want to leave my burner on while I sleep (especially on my current stove – don’t get me started). This method is just brilliant because you can leave it over night and deal with it the next morning.

IMG_5222 copy

The next morning it looks and tastes so delicious!

IMG_5230 copy

To remove some of the fat more easily, cool the broth in the refrigerator, and then skim off the fat.

IMG_1299 copy

Strain off the bones and vegetables.

IMG_5232 copy

Broth can be preserved either through canning or freezing. If freezing, simply place the broth in a freezer safe container, leave some head space for expansion when it freezes, and place it in the freezer.

If canning it, prepare your pressure canner, jars and lids, and reheat the broth to boiling. Fill the jars, leaving an inch head space. Wipe the rims, apply the lids, and tighten the bands finger tip tight. Place the jars in the canner containing three quarts of hot water.

IMG_1310 copy

As an aside, broth can vary in colour by what you have in it, how well you strain it, and how long you cook it, but it’s really just a matter or personal preference. I generally don’t strain it until it’s super clear (like though cheese cloth, just through a fine strainer), but if you want it nice and clear go for it.

IMG_5235 copy

With all the jars in the canner, lock the lid in place and bring the water to a boil. Once a steady stream of steam is coming out of the canner, time 10 minutes of vent time, and then place the weight on the vent pipe. Bring the pressure to 11 psi (sea level with a dial gauge canner). Process pints for 20 minutes and quarts for 25 minutes. At the end of the processing time, turn off the heat and wait for the pressure to drop completely. Remove the weight, wait 10 more minutes, remove the canner lid, and remove the jars to a hot pad or towel. Cool 12-24 hours, remove bands, check seals, wipe clean, label and store.

IMG_1311

Ta-da! Way better than store bought!

*this post contains affiliate links, please see the “About the Blogger” page for more information