Spicy Tomato Vegetable Soup

I first made this soup back in the pressure canning week of my Master Food Preserver class, and I could not wait until tomato season rolled around so I could stock up on this deliciousness. This soup is so good, and I just love that every ingredient is in season right now, which means every ingredient I either grew or picked within 10 miles of my house. That’s the best! This recipe is from So Easy to Preserve, which by the way is now out with its newest edition if you’re looking to get your hands on that. I just ordered a couple copies for myself and others. 🙂

IMG_4342 copy

Ingredients:
6 cups chopped tomatoes
2 cups chopped tomatillos
1 cup chopped onion
1 cup chopped carrots
1 cup chopped red bell pepper
1 cup chopped green pepper
1/2 cup chopped and seeded hot pepper
6 cups whole kernel corn, uncooked
2 tsp chili powder
1 tsp cayenne pepper
1 tsp black pepper
1 tsp salt
1 tbsp hot pepper sauce
5 cups tomato juice
2 cups water

Here’s how we made it:

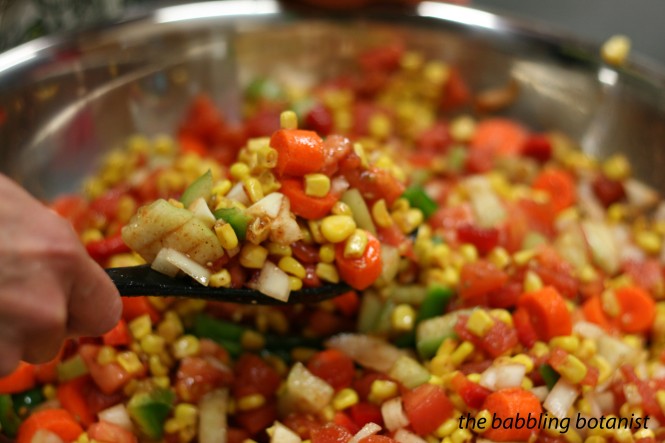
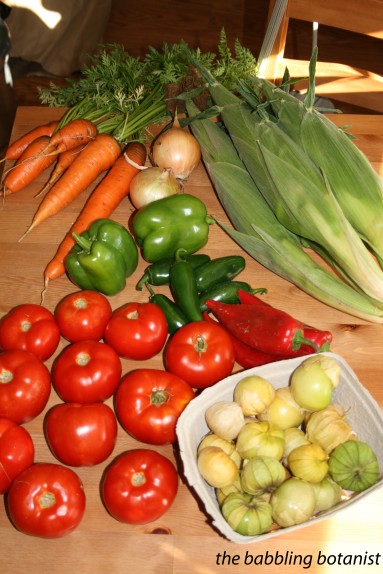
Chop, chop, chop, and chop some more. But really, that’s basically all there is to it. When I made this recipe at home by myself I got a hand cramp from too much chopping, so invite a friend over for goodness sake. For the tomatoes, core, blanch and peel them before chopping. For the tomatillos, remove them from the husk, wash and chop them without peeling. For the onions and carrots just peel and wash them and chop them into soup sized pieces. Wash and seed the peppers and use gloves to cut up the hot ones. For the corn, either cut it off the cob and measure 6 cups, or use frozen corn.
IMG_2576 copy

Combine all the veggies in a large stockpot. Add in the tomato juice, water, and all the seasonings. For the tomato juice, you can either make juice by pressing some tomatoes through a food strainer, or use store bought. I bet you can guess which one I prefer. I think that the ratio of solids to liquids in this soup is a bit off, so it could probably use more like 6 or 7 cups of tomato juice. And just to justify this, the reason I think it’s OK to adjust the recipe in this way is because these are the National Center’s soup recommendations. The processing is the same with whatever combo of foods you have, unless you add seafood, and they just say to cover with liquid. Plus, tomato juice is the most liquidy and most acidic ingredient in this recipe. Anyways, bring the soup to a boil, then reduce the heat and simmer for 15 minutes. While the soup is simmering, prepare your canner, jars and lids. This yields about 9 -10 pints of soup.

IMG_4346 copy

When it comes time to fill the hot jars, it’s important to follow these instructions for filling them to ensure safe processing. Using a slotted spoon, fill the jars about half full with solids. The head space for the soup is going to need to be a full inch, so when filling halfway, keep in mind that you should be filling it halfway to that point. After the jars are half full with solids, fill them with liquid, leaving an inch head space.

IMG_2621 copy

Such pretty jars.

IMG_2624 copy

Remove air bubbles, adjust head space, wipe rims, and apply the lids and bands, tightening to finger tip tight.  Place the jars in your pressure canner with 3 quarts of water and begin heating the canner. Once all the jars are in the canner, close and lock the lid and get the canner heated up. Once your canner starts to vent a steady stream of steam, continue to vent for 10 minutes. After the 10 minutes, apply the weight. Bring the canner up to 11 pounds of pressure (10 for weighted gauge; sea level). The processing time for this recipe is 60 minutes for pints or 75 minutes for quarts. Begin the timer once at or above the correct pressure, and maintain that pressure throughout the canning time. After the processing time is complete, turn off the burner and carefully remove the canner from the heat. Wait until the pressure is completely returned to zero and the safety nubbin thing drops. Remove the weight, wait 10 more minutes, and then remove the lid of the canner and remove your jars to a hot pad or towel.

IMG_2626 copy

While the jars can, eat any leftovers that you had.

IMG_2631 copy

Ta-da! Gorgeous soup. And so damn delicious. After 12-24 hours, remove the bands, check the seals, wipe clean, label and store. Then repeat a week later because this soup is super good.

IMG_2646 copy


*this post contains affiliate links, please see the “About the Blogger” page for more information
Carrot pulp crackers – save that juice waste!

For all you juicers out there who feel like you should be using that leftover pulp for something after you drink your delicious juice, this post is for you! Or, if you are just looking for a healthy cracker but don’t juice, shred up some carrots or other veggie for this recipe.

One thing that I hadn’t done yet with my juicing was to use the leftover pulp for something. I compost it, but it always seems kind of nasty and unappealing to me. Especially when I juice a bunch of things that are all mixed in there together, with chunks of peel and celery string that got caught. Eww. So I decided to brave just using the carrots first for crackers. I juiced all my carrots, set the pulp aside, and then juiced the rest. I recently had talked to a friend about making crackers from the pulp using flax or chia seeds, so I did a quick google search, found a few somewhat similar to what I was thinking, and made up a recipe – so here is what I came up with. Feel free to use whatever type of seed you like or whatever type of flour. Chia seeds are super good for you, so this seemed like a great way to eat them. Make these crackers gluten free if you want by blending up flax seeds, or using quinoa flour or something! Enjoy!

IMG_1826

Ingredients:
3 cups carrot pulp
1/3 cup flour
2 tablespoons chia seed
2 tablespoons sesame seed
1-2 tablespoons olive oil
1 or more teaspoons garlic powder
1/2 teaspoon salt
1/2 teaspoon pepper
1/2 teaspoon paprika

Here’s what I did:
Juice a bunch of carrots and save the pulp. Mix it with all the other ingredients. Definitely spice it to taste with whatever you like, I think it could use more salt or more garlic powder.

IMG_1752 copy

Spread it out on a plastic dehydrator tray. Flatten down with the back of a spoon.

IMG_1759 copy

Dry at 135 F for 6 or so hours, until it is dry. I think it was around 6 hours for me with only one tray full, so it will be longer if you make a thicker layer or do multiple trays. I think the best way to do these would be to buy more dehydrator trays (those plastic inserts for fruit leather and what have you) then save a few days of pulp in the freezer and make a bigger batch. I have this dehydrator, which I am super happy with, but if you don’t have one, try this on the lowest setting in your oven.

IMG_1791 copy

Mmmm crispy crackers. Break them up into pieces and eat. They are good with hummus as in the first picture above 🙂 Next up I’d like to try some different spice mixes and maybe make them with beet pulp for a pretty purple cracker!!

IMG_1792 copy

Do you use your pulp when you juice? I’d love to hear about more ideas!


Pickled Carrots

A few months ago I made pickled carrots with my very last garden harvest of the season. Taking these tasty morsels to a ladies night recently reminded me I still haven’t posted the recipe. Pickling is one of the easiest things in canning, yet so satisfying and cost efficient if you love pickled goodies. I highly recommend it. If you have that winter canning itch right now then heck, get some carrots from the grocery store to make these bad boys, ain’t no law against that!

carrot1

This recipe comes from the Ball Complete Book of Home Preservation, with some slight additions to the spices. Remember, you can change the spices to suit your taste, but don’t mess with the vinegar to water ratio of tested recipes.

Ingredients:
5 pounds carrots
6 cups white vinegar
2 cups water
1/2 cup pickling/canning salt
8 cloves garlic
Dill – fresh heads are great if you have it, or seeds
Hot pepper flakes
Mustard seed
Whole Peppercorns

Here’s how it’s done:

Carrots obviously grow underground, so the hardest step is getting them clean. Buying a cheapo nail brush was definitely worth it! Especially if you grew your own and they are caked with mud.

carrot2 copy

Well hello there good lookin’.

carrot3

Chop them up into the size you prefer. We did sticks but you can certainly do coins if you prefer. Don’t do them too thin or they can get soggy, but this recipe has a pretty short canning time so they don’t get really soft which is nice.

Prepare the canner, and about 7 or 8 pint jars. While that is heating, combine the vinegar, water and salt in a large pot and bring to a boil over medium high heat.

carrt4 copy

Grab a hot jar, and add whatever spices you like. I didn’t really measure my spices out, but did a clove or two of garlic per jar, along with a few shakes of dill seed, peppercorns, mustard seed and hot pepper flakes (around a half teaspoon of each). Combine whichever flavours you like the best. If you have fresh dill, do two heads per jar. Then pack in the carrots nice and tight, and pour in the hot vinegar mixture, leaving a half inch head space. Remove any bubbles trapped between the carrots. Wipe rims, place lids on the jars and tighten the bands finger tip tight.

carrot5 copy

Place the jars in the canner, ensuring they are covered by at least 1-2 inches of water. Bring to a full rolling boil and process for 10 minutes. When the ten minutes in up, turn off the heat, remove the canner lid, wait 5 minutes and remove the jars to a towel or hot pad. mmm mmm pickled carrots. Wait 12-24 hours for them to cool, remove the bands, check the seals, label and store. Wait a few weeks for the full pickled goodness to permeate the carrots, then enjoy.

carrot6 copy

*This post contains affiliate links. Check out the “About the Blogger” page for more information.