Packing that Perfect Pickle Punch – Ten Tips for Firm Quick Pickles

There is nothing worse than opening a jar of homemade pickles, biting into one, and finding that they are all soggy and nasty. Blech! OK, nothing worse might be slight hyperbole, but you know what I mean. Many MFPs I know don’t even like making homemade pickles because they get so soft. But alas, I am here to help! Here are my top ten tips for keeping pickles firm and crispy – from the least, to most useful (in my humble opinion – I did reorder quite a few times). This is the publication where I got some of this info – here.

IMG_5660 copy

10. Always use cucumber varieties meant for pickling – a pickling cucumber and cucumber for your salad were bred for different purposes.

9. Don’t bother with alum. OK this one is more of a tip of what not to do, but some recipes you will see, especially online or in older pubs, still call for alum. It actually doesn’t do much for your quick pickles, but may be somewhat useful in fermented pickles. So skip the alum and try #4 instead if you want.

8. Pickling lime.  The calcium in lime will help firm pickles. However, lime also lowers the acidity, so you have to soak cucumber in water multiple times following the soaking in lime to remove the excess lime for safety. It does really work, but to me it’s too much work.

7. Soak cucumbers in ice water. This helps firm the veggies as well, I could postulate on why but couldn’t find a good source for why it works. Perhaps it hydrates them, and the cooling keeps them firm somehow too. Ahem, because science.

6. Grape Leaves. Some people swear by using a grape leaf in each jar of pickles for keeping them firm, but apparently a grape leaf’s tannins keep the cucumbers firm by counteracting the enzymes found in the blossom end (see number 5). Thus, if you removed that the grape leaf may not add any more. But maybe you missed a blossom end, who knows.

5. Remove the blossom end. When your cucumber is growing, the bottom end of it is called the blossom end (where the flower was). Trim this end off of your cucumbers, as it contains enzymes that soften pickles. Just a little sliver off the end takes care of those enzymes.

4. Pickle crispPickle crisp is a Ball product, but I’m sure others make it too, as it is simply calcium chloride. Pickle Crisp helps keep pickles firm because the calcium helps firm the pectin in the cucumber, the same way lime does.

3. Don’t pickle over-mature cucumbers – start with a good quality veggie. Yes, sometimes the garden gets away from us and there are suddenly some big ole cucs on the vine and we are tempted to pickle them anyways. Don’t bother, unless you like mush. Big cucumbers may be hollow, or just be softer in the middle where the seeds are growing. Chop those up for your salad. Yes, I realize what I said in #10, but it works in this direction.

2. Pickle immediately. If you have your own garden this is easier, but do your best to pickle cucumbers as soon after picking them as you can. If buying them, ask the farmer when they were picked, or at least process them as soon after buying them as you can. Cucumbers will lose their firmness the longer you wait. Within 24 hours is ideal.

1. Low temperature pasteurization. To me this is the number 1 way to keep pickles firm, and often one overlooked because a lot of people don’t know it’s a thing. It might not be more important than using a good quality cuc to start with, but I put it first because so many people don’t know about it. Basically, overprocessing pickles can cause them to become soft. With low temp processing, you can process the recipes from this publication PNW 355 at 180-185 F instead of a full rolling boil. It works, it really works. For more on that see my experiment from last year – here.

Get picklin’!

Product Review – Ball FreshTech Electric Water Bath Canner

I am super excited that my new electric water bath canner is here and I get to tell you all about it! You heard it here first people! If you haven’t seen this yet, Ball just came out with this new product, the FreshTech Electric Water Bath Canner. I got mine yesterday via preorder, and they are now in stock on amazon! Now, this is not to be confused with their other electric canner the Ball freshTECH Automatic Home Canning System, which in my opinion (although I actually haven’t used it), is not nearly as exciting of a product. It’s got half the capacity and is twice the price. And you’re restricted in many ways by their recipes. No thank you. But that’s not what we’re here for. So, let’s talk about this new electric water bath canner. Full disclosure, yes, if you buy it through the link above I will make a few bucks, but this is my honest to goodness review of the product.

Yes, it has some obvious pros, but I had a few other things in mind I also wanted to test, and I wanted to make some comparisons between it and a regular water bath canner, and also the Weck water bath canner (which I have not successfully been able to find for sale, but if you can it’s typically more expensive than the Ball one by nearly double).

ball canner

OK so let’s start with the obvious pros:
– You free up a burner (definitely a huge pro in my books – I am a notoriously large batch canner)
– There is a spout for draining the hot water
– Good capacity of 8 pints/ 7 quarts (more on this is a minute)
– Pretty light
– Nice heat resistant handles (including the lid handle)
– Supposedly more energy efficient, but I can neither confirm nor deny that
– Can be used for other things than canning (but of course so can a pot)

ball canner spout

So those things are all well and good, but there are a few other things I was curious about. For one, I wanted to know if it heats up as fast as the canner does on the burner. Sadly, the short answer is no. But I’m not terribly upset about it, because I’ll just get it going sooner than I would the normal water bath canner. If you’re interested though, this is what I did. I filled each canner with jars, 95 F water, and turned them to high. My canner on the burner was at a full rolling boil in 36 minutes and the Ball canner took a full 57 minutes. So I was a bit bummed by that. Then I reread the instructions and they said that you were supposed to put the “steaming rack” (pictured below) on top of the jars and that actually helped it boil faster. Hmm OK if you say so, let’s try that. So I decided to try from “raw pack” temperature (140 F) to boil, and see how long that took, since I wasn’t spending another hour on this test. Luckily, I had also recorded the temperatures at 5 minute increments in run one so could compare. This time it took the burner canner 22 minutes and the Ball canner 36 minutes to go from 140 F to a full rolling boil. In comparison 140 to boil took 39 minutes without the “steaming rack” in there. Not sure that’s significantly better but I guess in theory it could help a bit. If you are hot packing (which I usually am), your water is around 180 F to begin with. To compare there, the burner canner went from 180 F to boil in 12 minutes, and the Ball canner too 21 minutes. So, take it or leave it, at least compared to my burner, the Ball was slower. However, if you have gas or a flat top range, I can’t be sure how it will compare. One time I canned on my neighbours flat top range and it took FOREVER to boil.

ball canner tray

My next question was: can I maintain a specific temperature? Most specifically I wanted to know whether I could maintain 180-185 F for low temperature pasteurization of pickles. More on that here. I was a bit bummed that they weren’t actual temperatures on there, but if it maintains something pretty constant that’s OK in my books too. So I tested what it maintains at low, medium, and high (the canning setting is for a full boil), and I tested if I could get it to maintain 180 F easily. This experiment I’m pretty pleased with. For my unit (of course yours could differ), it maintains temperatures of 120 – 125 F at low, 145 – 150 F at medium, and 190 – 195 F at high. I was able to maintain 180 F about one and a half “ticks” below high, as in the picture below. Of course, I’m at sea level and other things could affect where your 180 F is, but this is going to make low temp pickling AWESOME. Big win on this one I’d say. You certainly still need a thermometer to be sure of the temperature, but this was so much easier than finagling with the burner setting. It can be very easy to overshoot 185 on the burner, which kind of defeats the purpose of low temp processing. The beauty of this canner is the heat turns off and on to maintain the temperature. You can hear it come on too, so if you were trying to find 180 you could easily turn it to high, and then turn it down when you were getting close. You’d hear the burner turn on and off so you could find that sweet spot. So excited for pickling now!

ball canner dial

Another thing I was happy with was capacity. Like I mentioned, the other Ball autocanner has quite a small capacity. They list this one as 8 pints or 7 quarts, and they do mention in the manual that you can fit more than 8 pints, but they call the capacity 8 to allow for adequate water circulation around the jars. Pictured below I have 10 pints in there, and they didn’t seem super snug, so take it or leave it. I think that I will can with 9 in there on occasion – if I can fit 10, I’d say 9 have adequate circulation. It’s partially the nub from the spigot that’s the issue. The Weck does fit more, but like I said, good luck finding it, and it’s more $$.

ball canner jars

Overall, despite the slower heating time, I am happy with the purchase of this canner. I think that heating time may be the only real downside. The only other thing was that the rack on the bottom seemed like it could have been a tiny bit larger, but perhaps that would have made it harder to fit it past the nub for the spout. Not sure. But especially for me having a small kitchen, it’s going to be awesome to not have the canner on the stove. Or if I’m doing huge batches I can have one on the stove, rather than two. I may even use it on the kitchen table, and although that means I still have to lift it to the sink, I could drain some water into a pot or something, and I think it will be worth it. Thanks Ball, good invention, I’ve been waiting for something like this!

Think you’ll ditch your old canner for an electric one? Any burning questions about it before you invest? I am happy to answer.


*this post contains affiliate links, please see the “About the Blogger” page for more information


Pickling experiment – the results are in!

IMG_4009 copy

In case you missed it, a few weeks ago I wrote a post about two ways that you can keep your pickles good and crispy when making quick pickles. That post can be found here, and if you missed it just head over and read that, I pasted this entire post there as well. So, I know you’ve been on the edge of your seat wondering what the results of this experiment would show, so here they are. As a reminder, what I did was 5 different pickles. The pickles were all the same spices and brine, it was the processing that differed. The first 4 were all canned as slices, the fifth was canned whole and sliced for the taste test so people couldn’t tell which one was canned whole. I randomly assigned them to a number 1 though 5 for people to taste test.

1. Boiling water bath, no pickle crisp
2. Low temperature pasteurization, no pickle crisp
3. Low temperature pasteurization with pickle crisp
4. Boiling water bath with pickle crisp
5. Low temperature pasteurization with pickle crisp canned whole

For this taste test I had 17 people test the pickles and rate them from least to most crisp. I wasn’t entirely sure how to analyze the data from the taste test, but some of the results are pretty obvious and exciting. I am going to just give you a few summary statistics that I really think give a pretty clear answer, and I’ve also included all the ratings in case you are really that interested. First off, I wanted to show a picture of the four sliced ones, because even visually some of them looked more crisp, at least to me. Below the jars are in the order listed above, so the two ends were boiled, and the middle two were processed at low temperatures. Can you see a difference? This picture was taken 5 weeks after processing. I think that even visually the boiled ones look soggier. They are a different colour and more translucent.

IMG_4371

So how did it break out in terms of numbers? The first obvious result was that 16/17 people put sample 5 as the most crisp sample. So, by canning your pickles whole, with low temperature pasteurization, you get a very crunchy, firm product. Great! Now let’s ignore number 5 for a second since it had an additional variable of being canned whole. 10/17 people chose sample 1 as the softest, and 6/17 chose sample 4 as the softest. This totals to 16/17 people chosing one of the boiled ones as the soggiest. Additionally, of the sliced ones, 13/17 people selected sample 3 as the most crisp, which was the low temperature with pickle crisp sample. Now, I didn’t run any actual stats, but I feel pretty confident saying this: Low temperature pasteurization for the win!! There was not one person that had sample 1 (boiled, no pickle crisp) as anything other than the soggiest or second soggiest. I also thought it was really interesting that Janice, our canning teacher, rated them in the exact order that I would predict. From soggiest to crispest: boiled without pickle crisp, boiled with pickle crisp, low temperature without pickle crisp, low temperature with pickle crisp, low temp with pickle crisp canned whole. Pretty fun! So the method of processing, low temp versus boiling, was detectable by most people. Some people could detect a difference with the pickle crisp, but this result was not as ground breaking. I’d like to test it again, with more people and try doing a boiled one canned whole and a few other things, but I think for now it’s safe to say I will be canning the rest of my pickling cucs at low temps and using pickle crisp. They still turn out well if you don’t can them whole, even though most people picked that for ultimate crispness, but you can also fit less in a jar. So there ya have it! Go can some pickles at 180 F!!

In case you’re crazy like me, here’s everyone’s ratings (least to most crunchy/crisp):

1 4 2 3 5
4 1 2 3 5
4 1 3 2 5
1 2 4 5 3
2 1 3 4 5
1 2 4 3 5
1 2 4 3 5
4 1 2 3 5
4 1 2 3 5
1 2 4 3 5
4 1 2 3 5
1 3 2 4 5
1 4 2 3 5
1 4 2 3 5
1 4 2 3 5
4 1 2 3 5
1 2 4 3 5

Quick Dill Pickles – low temperature pasteurization and an experiment

Oh the dill pickle. The pickled cucumber is a special enough pickle that we simply call it a pickle. A pickled beet is a pickled beet, and a carrot that has been pickled is a pickled carrot, but a pickled cucumber, well that is just a pickle. Where was I going with this? Oh now I’m in a pickle. Anyways, is there anything better than biting into a pickle and hearing that crunch… aww this is a good one. On the flip side, isn’t it awful to bite into a pickle and find that it’s completely soft? So dissatisfying. I actually was never a huge fan of pickles until recently, but I can remember my grandpa always having a pickle on the side of a grilled cheese sandwich. I wish he was here today to judge in this pickle experiment I am about to tell you about. So how do you achieve the perfect pickle? Well, there are a few options I sought to test.
IMG_3988 copy

One way to make pickles is through the process of fermentation, but this type of pickling will be addressed in a later post. The reason for that is because they produce a different product in many ways than making a quick pickle, so for this experiment I wanted to test two of the most common methods of crisping quick pickles – those that are placed in vinegar and processed immediately.

Pickle Crisp
Pickle crisp is a product put out by ball, but I’m sure other brands sell it as well. All it contains is calcium chloride, which is supposed to help maintain the firmness of pickles. You simply add a very small amount to each jar when you are packing them. Quick, easy, and just calcium chloride.

Low temperature pasteurization
Generally, when we process foods in jars to make them shelf stable, we do so in a boiling water bath canner, with the water at a full rolling boil (or of course in a pressure canner for low acid foods). Quick pickles of all types are traditionally made this way, and most canning book instructions will tell you to do it that way. However, when some extension service or food science folks somewhere (I forget the exact details of Janice’s anecdote) started digging deeper into how pickles are processed industrially, they discovered something very interesting. Pickles were being processed at lower temperatures, which can help maintain that crispy, crunchy texture that we all love about pickles. So, it was time for some science! Can we safely process at lower temperatures at home? Yes, it turns out we can. Maintaining the temperature between 180-185F for 30 minutes is a safe way to process certain tested recipes, all of which can be found in PNW 355. To process your pickles at low temperatures, there are a few things that are a bit different. First, you pack them as you would normally, then place the jars in a half filled canner with warm water (120-140F). Then add hot water, until an inch above the jars, and heat the canner to 180F and start the timer. Try not to exceed 185F or it sort of defeats the purpose of low temperature pasteurization. The frustrating part can be that you have to watch it a bit more closely than when you are processing in boiling water, because you don’t want to drop below 180F or go above 185F. Unless you have a sweet electric canner with set temperatures, like the one that OSU extension has for classes (which by the way is impossible to find on sale anywhere), you need a thermometer, like this long one to check the temperature, or this sweet one with an alarm that goes off when you reach the set temperature. Then all you do is process them for 30 minutes, removing them right at the end of 30 minutes will no additional wait time like in boiling water.

IMG_4009 copy

OK, so on to the making of the pickles. These are the ingredients I used in every jar. Then my experiment consisted of processing some of the jars using the traditional boiling water method, and some using low temperature pasteurization. Then some of those jars had pickle crisp and some did not. Finally, I made a jar also of whole pickles to see if they stay crisper than slices.

Ingredients:
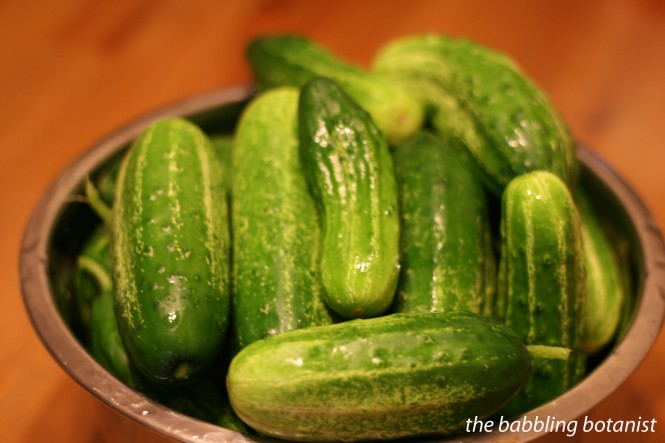
4 lbs pickling cucumbers
14 cloves of garlic
14 heads of dill
28 peppercorns
hot pepper flakes to taste or a dried pepper
3 cups water
3 cups vinegar (5%)
1/4 cup pickling/canning salt

Here’s what I did:

Make the brine by combining the water, salt and vinegar in a saucepan and bringing it to a boil to dissolve the salt. I like to either do this after I see how many jars I filled, or just make a bit extra since I always seem to need more. Place 2 cloves of garlic, 2 heads of dill, 4 or so peppercorns and the red pepper flakes in each jar. To prepare your cucumbers, cut a little slice off the blossom end. This is important for firmness as well, as there is an enzyme in the blossom end that can soften the pickles. Cut them how you like, or leave them whole. Spears, coins,  slicers, you decide. I also am doing a comparison with ones that were processed whole versus sliced to see if that makes a difference for crispness. Pack the cucumbers into the jars. Cover with brine, leaving a half inch head space. Remove air bubbles with a plastic or wooden utensil and adjust head space as needed. If adding calcium chloride, add 1/8 tsp per pint jar, or 1/4 tsp per quart jar.

IMG_4001 copy

Wipe the rims, apply the lids and bands, and process either for 10 minutes (pints) or 15 minutes (quarts) in a boiling water bath, or for 30 minutes using low temperature pasteurization as described above. After removing the jars from the canner, let them cool 12-24 hours, remove bands, wipe them down, and store for a few weeks before eating them. I took them to canning class a few weeks later and had the students do a blind taste test – read on for the results! Which pickle was the ultimate pickle!?

IMG_4005

Have you ever tried low temperature pasteurization? Do you have a different secret to super cripsy pickles? Let us know! Or if you’ve had trouble getting your pickles to stay crispy I’d love to hear stories if any one else wants to replicate this experiment. Make some pickles, have a tasting party in a few weeks, and let us know what your friends liked best. Happy pickling!
IMG_4012

September update – experiment results!

So, I know you’ve been on the edge of your seat wondering what the results of this experiment would show, so here they are. As a reminder, what I did was 5 different pickles. The pickles were all the same spices and brine, it was the processing that differed. The first 4 were all canned as slices, the fifth was canned whole and sliced for the taste test so people couldn’t tell which one was canned whole. I randomly assigned them to a number 1 though 5 for people to taste test.

1. Boiling water bath, no pickle crisp
2. Low temperature pasteurization, no pickle crisp
3. Low temperature pasteurization with pickle crisp
4. Boiling water bath with pickle crisp
5. Low temperature pasteurization with pickle crisp canned whole

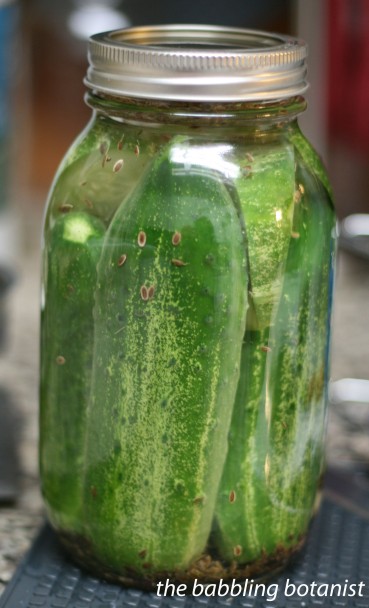
For this taste test I had 17 people test the pickles and rate them from least to most crisp. I wasn’t entirely sure how to analyze the data from the taste test, but some of the results are pretty obvious and exciting. I am going to just give you a few summary statistics that I really think give a pretty clear answer, and I’ve also included all the ratings in case you are really that interested. First off, I wanted to show a picture of the four sliced ones, because even visually some of them looked more crisp, at least to me. Below the jars are in the order listed above, so the two ends were boiled, and the middle two were processed at low temperatures. Can you see a difference? This picture was taken 5 weeks after processing. I think that even visually the boiled ones look soggier. They are a different colour and more translucent.

IMG_4371

So how did it break out in terms of numbers? The first obvious result was that 16/17 people put sample 5 as the most crisp sample. So, by canning your pickles whole, with low temperature pasteurization, you get a very crunchy, firm product. Great! Now let’s ignore number 5 for a second since it had an additional variable of being canned whole. 10/17 people chose sample 1 as the softest, and 6/17 chose sample 4 as the softest. This totals to 16/17 people chosing one of the boiled ones as the soggiest. Additionally, of the sliced ones, 13/17 people selected sample 3 as the most crisp, which was the low temperature with pickle crisp sample. Now, I didn’t run any actual stats, but I feel pretty confident saying this: Low temperature pasteurization for the win!! There was not one person that had sample 1 (boiled, no pickle crisp) as anything other than the soggiest or second soggiest. I also thought it was really interesting that Janice, our canning teacher, rated them in the exact order that I would predict. From soggiest to crispest: boiled without pickle crisp, boiled with pickle crisp, low temperature without pickle crisp, low temperature with pickle crisp, low temp with pickle crisp canned whole. Pretty fun! So the method of processing, low temp versus boiling, was detectable by most people. Some people could detect a difference with the pickle crisp, but this result was not as ground breaking. I’d like to test it again, with more people and try doing a boiled one canned whole and a few other things, but I think for now it’s safe to say I will be canning the rest of my pickling cucs at low temps and using pickle crisp. They still turn out well if you don’t can them whole, even though most people picked that for ultimate crispness, but you can also fit less in a jar. So there ya have it! Go can some pickles at 180 F!!

In case you’re crazy like me, here’s everyone’s ratings (least to most crunchy/crisp):

1 4 2 3 5
4 1 2 3 5
4 1 3 2 5
1 2 4 5 3
2 1 3 4 5
1 2 4 3 5
1 2 4 3 5
4 1 2 3 5
4 1 2 3 5
1 2 4 3 5
4 1 2 3 5
1 3 2 4 5
1 4 2 3 5
1 4 2 3 5
1 4 2 3 5
4 1 2 3 5
1 2 4 3 5

*this post contains affiliate links, please see the “About the Blogger” page for more information

Quick pickles- low temperature pasteurization on Punk Domestics

Dilly (and Basil!) Beans

The beans are coming in hot, so I was perusing my PNW 355 publication on pickling to check out their recipe for dilly beans. I was kind of surprised to see “fresh dill or basil sprigs” in the ingredients. Dilly beans made with basil?! Well consider me intrigued. So I went out and picked some basil from the garden to test this out. In some jars I put basil, in some I put dill, and in some I put both. We’re living on the edge here people! I’ll let ya know how the basil taste in a couple weeks, the dill I know is good!

IMG_4065 copy

Ingredients (for about 8 pints):
4 lbs Beans (about a half pound per pint)
4 cups white vinegar (5% acidity)
1/2 cup pickling/canning salt
4 cups water
8-16 fresh sprigs of dill or basil
8 cloves garlic
1 tsp of hot red pepper flakes (if you want)

Beautiful fresh dill and basil.

IMG_4073

One thing that I love about this recipe is that it is a raw pack. For the recipe in Ball, you make the brine, and then you toss the beans into the brine for a bit and hot pack the jars. This is fine if you want to do it that way, but I find it really hard to pack my jars nicely with a hot pack. And I don’t see a need to soften beans either. Anyway, place some basil and/or dill in each jar, along with the garlic. What I typically do is hold a jar sized bean in my hand (you need a half inch head space) and snap my beans to match the reference one. Then I pack the nice perfect ones into jars (the bottom ones below) and the “nubbin bits” go into another jar. The nubbin ones are good for snacking on or for salads, but the whole ones are nice to have also for drinks and things, so it works great to make both.

IMG_4074

Once all your jars are packed, make the brine by combining the water, vinegar and salt in a saucepan and bringing it to a boil. I like to make it after I fill the jars so I can see how many jars I have and make more brine if I need to. If you want a spicy bean, you can add the red pepper flakes to the brine, or you can just add the flakes to the jar. I added them to the jar in this case because I wanted to make some of them hotter than others to decide what I like best, because last time I made these I wanted them hotter. Fill your jars with brine, use a plastic or wooden utensil to remove any trapped air bubbles from between the beans, adjust brine to a half inch head space, wipe the rims and apply the lids and bands. Tighten finger tip tight and place the jars in the canner.

IMG_4082 copy

Process in a boiling water bath canner, covered by at least 1-2 inches of water for 10 minutes. The publication actually lists 5, but I have never seen that before except for jams and jellies, and your stuff should all be sanitized if you do that short of a time, so I did 10 minutes just to be safe. After 10 minutes is up, turn off the heat, remove the canner lid, wait 5 minutes and remove the jars to a hot pad or towel. Cool 12-24 hours, remove bands, wipe, label and store. Let them pickle for a little while before digging in!

IMG_4115 copy


Refrigerator Dill Pickles

The beginning and end of pickle season is the perfect time for making refrigerator pickles. My pickling cucumbers are starting to come in, but not in such huge numbers that I want to pull out the canner and process them, so the refrigerator pickle is really the way to go. These pickles also have the benefit of being so quick to make, and are often the crispest pickles you’ll have all year, since they don’t get processed in the canner.

IMG_3968

This recipe is sort of from Ball, but I do it a bit differently, so you are also welcome to check out their recipe if you prefer.

Ingredients (for 1 quart jar):
1 cup water
1 cup vinegar (5% acidity, white or cider are great)
3 tbsp pickling or canning salt
2-4 cloves garlic
2-4 heads of dill or 1 tbsp seed
2-3 tsp mustard seed
1 tsp peppercorns
hot pepper flakes if you want hot pickles

Here’s how I made them:

Pick your cucumbers, wash them and make the pickles as soon as possible for the crispest pickles. Always remove a slice off the blossom end, because it contains enzymes that can soften your pickles. Slice your cucumbers however you desire. If you do spears or try and do whole cucumbers you will use more brine than if you do slices and pack them tightly of course, so usually I cut up my cucs to see about how much I have, then make a little extra brine just in case.

IMG_3953 copy

Combine the water, vinegar and salt in a saucepan and bring to a boil to dissolve the salt. If you want your pickles a little sweeter, add a tablespoon of sugar too. Remove from heat.

Heat your jars up a bit so they don’t break when you add in the brine. I just wash them in really hot tap water then leave them full of hot water while I get out the spices and peel the garlic. Then, empty the water. In each jar place whatever spices you desire. My ingredient list is what I do, but feel free to explore. Use the ratios provided of vinegar, water and salt, but do whatever you like with the spices. Don’t like garlic? (you’re crazy!!) then don’t add any. Want it really dilly? Add more heads of dill, or use both fresh and seeds. Want it spicy? Add a tsp or so of red pepper flakes. Have a pre-mixed pickling spice? Great, just use a tablespoon or so of that.

IMG_3957

Fill the cucumbers into the jars, packing them in fairly tightly. Pour the brine into the jars to cover the cucumbers. Just make sure you either let the brine cool a little, and/or have nice warm jars still, because otherwise you could have jar breakage. The alternative (how Ball does it) is to heat up the brine with some spices in it, then throw the cucumbers in there after boiling it and let that cool to room temperature, then fill the jars. Your choice. If you did it my way, let the jars cool to room temperature, about a half hour or so, then refrigerate. I like to give the jars a bit of a shake a few times too, to distribute the spices more. You can also shake it up a bit every couple days, but it’s not essential. Enjoy the pickles after waiting 2 weeks, and within about 3 months of making them for best quality.

IMG_3962 copy

*this post contains affiliate links, please see the “About the Blogger” page for more information

Sauerkraut

Sauerkraut is actually surprisingly easy to make, as it turns out. All you need is cabbage, pickling/canning salt, and a little bit of patience.

The first thing you need to do is prepare the cabbage. Wash it, remove the outer leaves, cut it in 4 and shred it. This can be done either by chopping it by hand, in a food processor, or with a mandolin.

IMG_2103 copy

If you are doing it by hand it is a little harder to get nice even shreds, which is why I really liked using the mandolin for this purpose. Plus it gets to be a crazy cabbagey mess pretty fast.

IMG_2101 copy

In clean and sterilized container, combine 5 pounds of cabbage with 3 tablespoons of salt. Sprinkle the salt evenly over the cabbage, and with clear hands mix it in well. Leave it until it starts to wilt, and release its juices. At the very least 15 minutes. Don’t reduce the salt in the recipe.

IMG_2104 copy

Next you want to transfer it into the container you plan to ferment it in. In class, and when I made it at home later, we just used large mason jars. I think this is easier than a pickling crock, but it’s up to you. The crock is of course nice for a gigantic batch. Push the cabbage tightly into the jar or crock, getting it to release more liquids. It should release enough that you don’t need added brine, but if you do, top it off with a brine that is 4.5 teaspoons of salt for every 4 cups of water. Leave at least 4-5 inches of headspace in your pickling vessel.

IMG_2152 copy

The thing that I liked about doing it in the jars was what we did next. We filled a plastic bag with the brine, and placed that in the top of the jar to hold the cabbage down. With the crock you need to weight it down with a plate or something, and it just seemed a little more difficult. The bag trick totally rocks. If you start to get a bit of scum, just remove the bag, wash it, clean out the scum, and put it back in. It seemed to me like you got a lot less though too with this bag method. Ball says you’ll have to skim it daily, and like this that is definitely not the case.

IMG_2453

Now comes the patience part. Fermenting your cabbage will take a few weeks, so now we wait, and let the magic happen! OK, it’s not magic, it’s science! Bacteria will get to work on that cabbage, making the lactic acid that give sauerkraut its tart flavour. It can take up to 6 weeks, so be patient. Keep it at room temperatures, about 70-75F (21-23C).

IMG_2157 copy

The way that you know your sauerkraut is ready is that it will be sour when you taste it. Do not can it until it tastes sour, or it is not acidic enough, and not safe to can. As you can see below, when it’s done it is a little lighter in colour, and loses a bit of the green colour.

IMG_3252 copy

So now that it’s done what do you do? Well you have a few options. It keeps for a few months just fine in the fridge, so that’s a good option, especially if you only made a small batch as I did at home. I did 4 cabbages and filled 3.5 quart jars to give you an idea of how much it compacts. You can also can it though, if you so desire. It can be raw or hot packed. For both, prepare the canner, jars and lids. For the raw pack, you pack the kraut into hot jars, remove air bubbles, leave a half inch headspace, and process pints for 20 minutes and quarts for 25 minutes in a boiling water bath canner. If you hot pack it, you bring it to a simmer with the brine over medium high (don’t boil), then fill the jars, again leaving a half inch head space and removing bubbles. For the hot pack though, you only need to process 10 minutes for pints and 15 for quarts, since you already warmed it up. For both of course process at a full rolling boil with the jars covered by at least 1-2 inches of water. After the processing time is done, turn off the heat, remove the canner lid, wait 5 minutes and remove the jars. I have no pictures, however, because I plan to just keep it in the fridge. So, there you have it – you can choose from three ways to store it, and it’s super easy to make. Now get out there and kraut!

Master Food Preserver Class – Week 4

Week 4 of Master Food Preserver class was all about pickling!

IMG_2807 copy

What is pickling anyway? Well Janice, our awesome instructor, had a funny quote up on the board: “A pickle is a cucumber soured by a jarring experience.” HA! Well, I was entertained at least. But this is not entirely true; A pickle doesn’t need to be a cucumber, and it doesn’t always need to be jarred either! In fact, there wasn’t one cucumber in class, we did all sorts of other types of pickles instead. Pickling is basically the process of adding a high concentration of acid to a food to prevent the growth of microorganisms.

There are 4 basic types of pickles – you can pickle a lot more things than just cucumbers!
– Fresh pack or quick pickles
– Brined of fermented pickles
– Fruit pickles
– Relishes and Chutneys

Quick pickles are made when you combine the ingredients and immediately process, versus a fermented pickle that sits for a few weeks and ferments, producing its own acids. Fermentation in vegetables and fruits is the anaerobic breakdown of sugars into acid. In veggies, naturally present bacteria breaks down the sugars, and in fruits, it is yeast that converts the sugar first to alcohol, then to acid. The acid formed is lactic acid, as opposed to the acetic acid from vinegar which we use in quick pickles.

Relishes are seasoned sauces made from chopped fruits or veggies, and chutneys are fruit relishes with fruits and/or veggies and nuts. They are a sweet and sour blend of vinegar and spices.

The first thing we did in class was asparagus pickles. This is a fresh pack or quick pickle, because what we did was combine the asparagus with spices, water, vinegar and salt, put it into jars, and immediately process it in a boiling water bath canner.

Asparagus ready to be pickled.

IMG_2653 copy

Mmmm. Now we wait a few weeks for them to absorb that vinegary deliciousness.

IMG_2721 copy

We then split into four groups and each made a different pickled product. One group was in charge of this mango chutney.

IMG_2667 copy

Chutneys are a little weird to me. I haven’t actually tried it yet, but I will let you know if I find an amazing use for my jar of this.

IMG_2694 copy

All prepared and in the jars.

IMG_2714 copy

Another group made this corn relish.

IMG_2699 copy

I was on team beet pickle. If you know me you know I love me some beets.

IMG_2659

It looks like a bit of a murder scene when you cut up beets. Especially precooked ones.

IMG_2677 copy

I would definitely recommend gloves, unless you love having red hands. It doesn’t really bother me, but it does stain quite nicely. Helps you understand the term “beet red” 😉

IMG_2681

I would not recommend doing this in half pints. This was simply so that the whole class got a jar to take home. Go pints or even quarts for sure. If you are looking for a recipe, I actually posted one a little while ago here.

IMG_2693 copy

And finally, we pickled some onions.

IMG_2662 copy

They made for a pretty attractive pickle.

IMG_2688 copy

Pretty good haul! I never really used to be a big fan of pickles, but they sure are growing on me.

IMG_2800 copy

OK now that you’ve enjoyed the picture show, we’ll finish with some pickling rules:
– Always use at least a 1:1 ratio of water to vinegar making quick pickles. It’s not safe to use less vinegar or more water. If it’s too tart for your taste, add a teeny bit of sugar
– Use vinegar with 5% acidity, there are some tricky brands out there that are only 4%
– When making fermented pickles, don’t reduce the salt. And if you want to can it, don’t do so until they have a sour flavour.
– Always use pickling/canning salt rather than regular table salt
– You can swap the type of vinegar, as long as it is 5% acidity. Some people prefer the milder flavour of cider vinegar, go for it!
– The spices can be changed to taste. Adding more garlic or dill to your pickles is a-ok. This is one thing that is not a safety issue.

The last thing we did on pickling day was make flavoured vinegar. And this is a nice way to end, because as Janice said – there are no rules. When you make flavoured vinegar, it’s basically safe to chuck in whatever you like. Buy some cheap white wine vinegar in bulk and flavour it yourself by filling a jar with whatever spices you like and cover with vinegar. We tried some delicious berry ones as well, and I am super excited to make some this summer for some delicious vinaigrette. These are fine stored at room temperature. Once they have steeped to your satisfaction, they can also be processed in a boiling water bath canner if you really want to.

IMG_2673 copy

My white wine vinegar, full of herbs, and a chive flower.

IMG_3260 copy

Countin’ your cans… for bragging rights, and a purpose

OK, so it may seem like I’m just doing this post to brag about the abundance of goodies in my overflowing pantry, but I swear there is also a purpose beyond making you jealous of me. Why keep a tally of how much you can each year? Well I’ll tell you why. My first year canning, I discovered in February that I only had three jars of salsa left! THE HORROR! I couldn’t make more until August! I never should have shared that red gold with anyone; it is too delicious. So last year, I canned 82 pints of it. HA! That’s not even hyperbole – but, when I do salsa I go big with the batches and split it with a friend, so 40 or so of those went into my pantry. Point is, are 40 pints of salsa going to get me through until I can make more? So far so good! I’ll let you know if it lasts. So, to get to my point at last. Do you have any idea how many jars of something you eat in a year? Are you always kicking yourself come late winter saying, “I wish I canned more ____!!”? This year keep a tally with me. I promise it’s not a contest, but if it were I think I’d place pretty well 😉 Here’s my canning closet in early November, when the bulk of the real canning season was over.

canning closet
Here she is, the 2013 canning list, just shy of 500 jars

Jams – 95
16 half pints strawberry jam
17 half pints strawberry rhubarb jam
6 half pints raspberry jam
9 half pints blueberry jam
8 half pints fig strawberry jam
8 half pints apricot jam
8 pints strawberry Pinot noir jam
6 pints blackberry cinnamon tequila jam
17 pints spiced cranberry jam

Who in their right mind needs 95 jars of jam!? No one, absolutely no one! Now having said that, these make excellent gifts. 5 went to my nana for her birthday, many went to family members for Christmas, a few went as wedding presents etc. You can have too much jam, but you’ll never have it go to waste.

Pie Filling
11 quarts strawberry rhubarb pie filling
17 quarts blueberry pie filling

Ya eating 28 pies is a lot, but when you are scrambling two hours before a potluck wondering what the heck to bring, man will you be glad for home canned pie fillings.

Pickles and Relishes
28 pints pickles
7 pints pickled asparagus
14 pints pickled carrots
6 quarts pickled beets
8 pints spicy dilly beans
8 pints zesty zucchini relish

You can never have too many pickled goods. They make a good snack, a nice treat to bring to ladies wine night, or a great topping. And this is coming from someone who a few years ago would pick the pickles off her burgers at a restaurant.

Fruits and Fruit Juices
15 quarts peaches in syrup
7 pints applesauce
5 quarts cranberry juice
10 pints of strawberry lemonade concentrate

I need to get more into fruit things, this area is actually kind of lacking for me. But dang I really like making the juices, SO GOOD.

Tomato Products
82 pints salsa
10 pints salsa verde
29 pints tomato sauce
8 quarts crushed tomatoes
5 pints country western ketchup

My favourite category for sure – always can have more tomatoes!

Pressure Canning
14 pints beans
64 half pints tuna
10pints chicken stock
6 quarts pressure canned beets
20 half pints corn

Always great to have these things on hand for a quick meal!

Overall, I think I need to add more savoury to my sweet this year, but I’m pretty proud of this list! What canned goods do you always run out of first? Keep track with me this year so you can better gauge how much you eat, and how much to make of your favourites.

Pickled Carrots

A few months ago I made pickled carrots with my very last garden harvest of the season. Taking these tasty morsels to a ladies night recently reminded me I still haven’t posted the recipe. Pickling is one of the easiest things in canning, yet so satisfying and cost efficient if you love pickled goodies. I highly recommend it. If you have that winter canning itch right now then heck, get some carrots from the grocery store to make these bad boys, ain’t no law against that!

carrot1

This recipe comes from the Ball Complete Book of Home Preservation, with some slight additions to the spices. Remember, you can change the spices to suit your taste, but don’t mess with the vinegar to water ratio of tested recipes.

Ingredients:
5 pounds carrots
6 cups white vinegar
2 cups water
1/2 cup pickling/canning salt
8 cloves garlic
Dill – fresh heads are great if you have it, or seeds
Hot pepper flakes
Mustard seed
Whole Peppercorns

Here’s how it’s done:

Carrots obviously grow underground, so the hardest step is getting them clean. Buying a cheapo nail brush was definitely worth it! Especially if you grew your own and they are caked with mud.

carrot2 copy

Well hello there good lookin’.

carrot3

Chop them up into the size you prefer. We did sticks but you can certainly do coins if you prefer. Don’t do them too thin or they can get soggy, but this recipe has a pretty short canning time so they don’t get really soft which is nice.

Prepare the canner, and about 7 or 8 pint jars. While that is heating, combine the vinegar, water and salt in a large pot and bring to a boil over medium high heat.

carrt4 copy

Grab a hot jar, and add whatever spices you like. I didn’t really measure my spices out, but did a clove or two of garlic per jar, along with a few shakes of dill seed, peppercorns, mustard seed and hot pepper flakes (around a half teaspoon of each). Combine whichever flavours you like the best. If you have fresh dill, do two heads per jar. Then pack in the carrots nice and tight, and pour in the hot vinegar mixture, leaving a half inch head space. Remove any bubbles trapped between the carrots. Wipe rims, place lids on the jars and tighten the bands finger tip tight.

carrot5 copy

Place the jars in the canner, ensuring they are covered by at least 1-2 inches of water. Bring to a full rolling boil and process for 10 minutes. When the ten minutes in up, turn off the heat, remove the canner lid, wait 5 minutes and remove the jars to a towel or hot pad. mmm mmm pickled carrots. Wait 12-24 hours for them to cool, remove the bands, check the seals, label and store. Wait a few weeks for the full pickled goodness to permeate the carrots, then enjoy.

carrot6 copy

*This post contains affiliate links. Check out the “About the Blogger” page for more information.