Ball FreshTech Canner – Not Just for Canning Anymore

IMG_2902

When Ball put out their FreshTech electric water bath canner this year, which I previously reviewed here, they also advertised it with some additional uses, beyond just using it as a canner. I thought I would probably just use it for canning, and those other uses were just a good marketing idea, but I’ve actually come to use it for quite a few other things so thought I’d share some of them with you in case you’ve been on the fence about buying one. Ball’s suggestions mostly revolve around making a big batch of something – which makes sense, a lot of us don’t have another pot this big, so it is good for a big batch of whatever you are making. It also comes with a steaming rack for steaming vegetables, but to me unless you are steaming a whole lot, using this giant pot maybe isn’t ideal. My ideas for it mostly revolve around the fact that it’s very easy to get the canner to stay at a set temperature. Unfortunately the dial doesn’t have temperatures on it, so if you want to know the exact temp you need a thermometer (this is the one I use most often), but it does maintain pretty much whatever temperature you are interested in. So here are some of my uses for it!

ball-canner-dial1

BEER!

Now if you are a pro, making all grain beer and being all fancy like, you probably won’t agree with this one, but I think the canner is awesome for making beer. Why? Well if you are making beer from malt extracts and a smaller amount of specialty grains, usually what you do is first steep some grains at around 170 F, then add the extract and bring your wort to a boil. Using my electric stove top, I often find myself overshooting the steeping temperatures, but using the canner has been much easier. Why? Because of the way the canner burner pulses on and off to maintain the temperature. Additionally, I just left the canning rack in the canner, and set my grain bag full of grain on top of it so I didn’t have to worry about it touching the bottom and melting or burning. Once you get your wort to your steeping temperature, turn the heat down until you hear the burner turn off, then it will just come back on in short bursts necessary to maintain that temperature. Worked like a charm. Then you have two options when you are done steeping. Either boil the wort also in the canning pot, or if you want to use your larger brew pot simply put it under the spout of the canner, open the spout and sparge your grains. Either way works great! And many of the “mini-mash” recipes that I have followed actually only tell you to boil about 3 gallons of the wort and top it off at the end anyways, so this is a great option for those recipes and for beginners not ready to invest in more equipment. Last time we brewed, we actually made one batch in the brew pot we have, and one in the canner because there is very little active time involved it was great – two brews in the same amount of time as one!

IMG_3062

Mmmm wort.

IMG_3206

 Making Stock

After thanksgiving I froze the turkey carcass to make stock with, and decided to do it with the canner this year. I am quite happy with how it turned out! I was a little concerned with whether anything would burn to the bottom (which it didn’t at all) so to be safe I actually left the rack in the canner, filled it with my bones and bits of meat, carrots, onions, celery and spices, and covered with water. Similarly to the way I’ve made stock in the crock pot before, I actually didn’t boil a ton of the water off, but rather let it just cook on a hot but not boiling temperature. I made sure that there was a ton of water in there so there was no chance of it cooking all off, and left it cooking for a full 24 hours. Turned out super well!

IMG_3234

Pasteurizing milk

Another possible use for the canner is pasteurizing milk. Weck actually markets their canner as a “pasteurizer.” If you have access to raw milk, and want to pasteurize it at home, you could do a nice big batch in the canner. Again, the pro here of the canner is the same as many of the other uses – I find it much easier not to overshoot the temperature. Use your canner as a double boiler with your largest pot. For pasteurization,  you want to either heat to 145 F for 30 minutes (reference here) or to 165 F for 15 seconds (reference here). The canner is large enough that you could easily use it as a double boiler for most sizes of large pot. Pictured is my 4.5 quart pot, but my larger stock pot is the same diameter and fits nicely also if I wanted to do a larger batch.

IMG_3156

Mulled Wine (and other hot beverages)

This one was inspired by Ball’s suggestion of apple cider, but the canner can be used for mulled wine too. The thing I like again is that you can just leave it on low and it will keep the wine warm, and you don’t have to worry about having a burner on. Plus it has a spout for serving!

FullSizeRender

Do you have the new Ball canner? What creative ways have you used it? Interested in purchasing one? – They have had a couple sales on amazon so keep your eyes peeled for after Christmas sales, or buy one for the canning junky in your life!

*this post contains affiliate links, please see the “About the Blogger” page for more information (Yes, if you buy the canner from amazon I will receive a small profit, but I would never recommend a product I don’t love just because of that!!)


Tomato Wine

Yes indeeeedy, you did read the title of the post correctly! Today we’re talking about making wine from tomatoes. Turns out that you can ferment pretty much anything. My tomato wine adventure actually took place last year, but now that I’ve had a chance to try it I’m ready to share. Last year when I had so so many tomatoes in late summer/early fall (over 300 pounds from my little garden!) I was looking for ideas on what else to do with them. I made so much sauce and salsa and wanted to try some new ideas. Of course I thought to myself, “I bet I could make wine out of these.” Turns out there is a guy that commercially makes it (as I found on this blog), and I also found a smattering of recipes online on how to make it. So here’s what I ended up trying based on a few things I saw, and based on my experiences with fruit wines. It turned out pretty nicely!

IMG_4650 copy

4-5 pounds of tomatoes – the sweeter the variety the better
3 lbs dextrose
2 tsp acid blend
1/2 tsp pectic enzyme
1/2 tsp diammonium phosphate
1 tsp yeast nutrient
2 campden tablets
Lalvin K1-V1116 yeast    

For full and complete procedures, see my post on making fruit wine. But here is the short version of what I did to make it.

Combine all ingredients except the yeast in a sanitized primary fermenter. Mash up the tomatoes a little bit. Put on the lid and wait a day.

IMG_4652 copy

After 24 hours add the yeast. You only need about half the package. Put the lid back on and let it ferment away. Punch the cap daily with a sanitized spoon, and after about 5-7 days when the cap is broken up a lot and fermentation is starting to slow, strain off the solids, and move to secondary fermentation. Allow the wine to sit until all solids settle out and it becomes clear, and fermentation ceases. Bottle, age a few months, and enjoy!

IMG_4658 copy

Again, this is the super short version of how to do this, so if you want to try another fruit or get more details, click here. Now, I know what you’re thinking. How does it taste? Will I like it? Well, it’s actually a really interesting flavour. I’ve only had one bottle so far, but basically it tastes like white wine when it first hits your tongue, then you get the tomato flavour after that. Its faint, but is definitely there and tastes mildly like tomato juice. It’s also a bit more acidic than white wine, or at least mine seems that way. The blogger I cited above said she would have just thought it was a white grape wine, but I can’t say I fully agree with that. However, the flavour would also vary depending on what variety of tomato you used, and that wine maker was a professional. It’s not the kind of wine where you would probably want to drink a few big glasses of it, or maybe it will be, but it’s a nice compliment to a tomato based meal, and could also be used in cooking in place of white wine. 

Are you going to try it?

IMG_5784

*this post contains affiliate links, please see the “About the Blogger” page for more information


Blackberry Cabernet Jam

Last weekend after picking a ton of blackberries I was thinking about what delicious blackberry creation I could come up with, and was reminded of the strawberry Pinot Noir jam that I made two summers ago. Blackberries and wine? Yes please! That sounds like a great idea. Blackberries are bold though, I thought to myself, they need a bolder wine, thus was born the blackberry Cabernet jam. This jam is a real time commitment, as it is pectin free, and has an entire bottle of wine in it. However, if you’re feeling slightly more impatient the Ball Complete Book of Home Preserving does have a berry wine jelly using liquid pectin that you could whip up faster. Alternatively, make a half batch and drink the other half of the wine.

Ingredients:
15 cups blackberries
2.5 cups sugar
One bottle of your favourite Cabernet Sauvignon or other bold wine
1 tbsp of lemon juice

IMG_5507 copy

Here’s what I did:

Prepare the canner, jars, and lids (and by prepare I really mean start pondering it, because you actually won’t need to prepare for like 4 more hours). Depending on how long you cook this jam, it will yield about 6-8 pints. Mash the berries to your preferred level of mashiness in a large pot, and add the sugar, wine, and lemon juice. Leave a small amount of wine in the bottom of the bottle to sip on while you bring the jam to a boil.

IMG_5509 copy

Bring to a boil over medium/high heat. Reduce and maintain a gentle boil for a good many hours, stirring occasionally. I think I ended up cooking this for nearly 5 hours. Be patient, or play with adding some liquid pectin of you want a firmer set. Near the end of the cook time, pay close attention to avoid any burning on the bottom of the pot.

IMG_5520 copy

Fill hot jars leaving 1/4 inch head space. Wipe rims, apply lids, and tighten bands finger tip tight. Process in a boiling water bath canner for 10 minutes.

IMG_5528 copy

Deeeeelicious. And oh so pretty. Now who wants to host a cocktail party or wine night so that I can bring some of this jam? 😉

IMG_5556 copy

A “berry” good weekend – things to do with strawberries

Believe it or not, strawberry season is wrapping up here next week! So sad! However, I did do a pretty good job taking advantage of the berries this year. We bought a chest freezer, so I’ve frozen a bunch, and I did some dehydrating, canning, and wine making with the rest last weekend. A berry good weekend indeed. For many of you, berry season is probably just beginning, but whether this is your last week, or first, here is some inspiration for things to do with your berries.

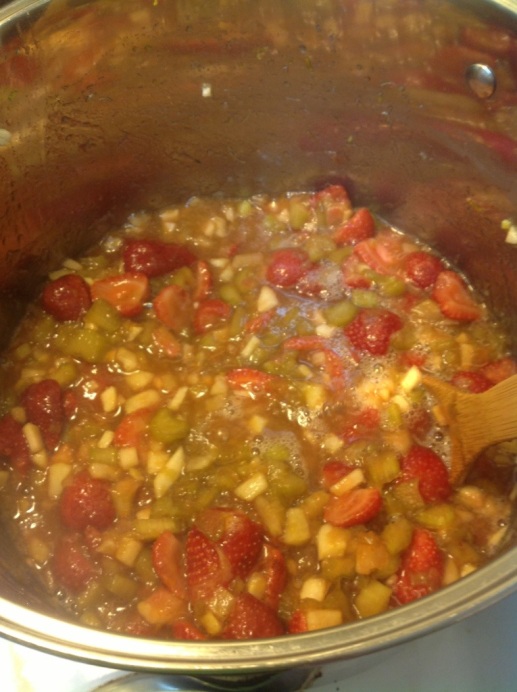
Strawberry Rhubarb Pie Filling – my first blog post ever, and still one of my favourite recipes. The universe is telling us to put these two awesome items together by having them mature at the same time – you should really listen.

20130822-212438.jpg


Strawberry Fruit Leather – Since this post, I’ve learned adding some apple sauce or other more fibrous fruit helps with the cracking and crispiness issue. But I also still love it with just strawberries.

20131025-225202.jpg


Strawberry jam – a classic favourite of course. Or on the wilder side, add some wine to your jam and try this strawberry pinot noir jam.

IMG_2031 copy

Strawberry wine – heck yes! It’s really not as hard as it seems by the length of the post. You should really really try it. Shorter, point form directions coming soon to entice you more, since not all of you have the attention span for this novel of a post.

IMG_4461 copy

Or a non-alcoholic beverage  (or alcohol optional I should say) – strawberry lemonade concentrate!

IMG_3736 copy

Got a couple handfuls left over still? Flavour some vinegar (or vodka? Post coming soon on that, but it’s basically the same as vinegar)

IMG_4704

Now go, quickly, before they are gone!! Pick some berries! Eat some berries! Can some berries! Dry some berries! Love the berries! And don’t forget to eat some fresh – sometimes it’s easy to get caught up in preservation.  And lay off the caffeine! (Oh wait, that one’s for me.)

Small Batch Homemade Fruit Wines

Making homemade fruit wine is such a satisfying experience – watching your fruit transform into something completely new and delicious. The length of this post may make it seem like a difficult process, but it’s really not that hard to make a small, gallon batch. So pour yourself a glass of wine, settle in, and read on. For the printer friendly version, click here.

IMG_3768 copy

Last winter we decided to try our hand at home brewing. We started with beer, and you can read our first brews adventure here. Then we tried some kit wines which you can read about in this post. The next stage of the adventure was to try some small batches of fruit wines, which we started this spring. They are actually surprisingly delicious! And I say surprising because I normally am not a lover of fruit wines because I find them too sweet. However, these “first wine” recipes, copied with permission from Joel, the owner of our local brew store, Corvallis Brewing Supply, are designed to be dry wines and they are really tasty.

IMG_4660

Before I get into the details of how to get brewing, I just wanted to quickly (ish) list and describe the ingredients that you will be adding to your wine and why. These can all be purchased at your local brew store (if you have one) or by clicking on the links attached to them. Skip ahead if you just want the hows and not the whys.

Fruit! – OK this one is obvious, but the one thing I wanted to point out is that you can use fresh or frozen fruit for this. Use only the best quality fruit. Nasty fruit will make nasty wine.
Yeast – These little guys are what is going to turn the sugars in your fruit into alcohol. There are a large number of yeasts available on the market, but you don’t just want to use bread yeast for making wine. They are cheap, so buy a packet of the kind called for in your recipe. A few common ones for wine are Montrachet, K1V-1116, Cote de Blancs or Lalvin D-47.
Dextrose – Dextrose is fermentable sugar that is added to feed the yeast and produce alcohol. Some fruits don’t have as much sugar content as others, so extra sugar is added to balance the sugar and acidity and produce a good product. Grapes, for example, require a lot less added sugar than cane berries, such as raspberries and blackberries. This is due to the properties of the berries themselves. Table sugar, which is sucrose, can be used instead of dextrose, but it can produce a different quality product. Dextrose is a simpler sugar that can be broken down faster by the yeast, which can lead faster fermentation and to a crisper and cleaner tasting end product. I haven’t personally done a side by side comparison yet, but when I do I will let you know what people preferred. I’ve only so far tasted wines using dextrose. When using table sugar in a recipe that calls for dextrose, use 0.8 pounds for every pound of dextrose that is required.
Pectic Enzyme – This is added to your fruit wines because it will help break the fruits down and make the sugars available to the yeast to ferment. Pectin is a compound found in plants cell walls, and what this enzyme does it help to digest that for the yeast, making more sugars available. You could certainly still make wine without it, but it aids in the process. It also can help produce a clearer product by digesting the pectins.
Yeast Nutrient – This is added to give some other nutrients to your yeast so that they aren’t surviving on sugar alone. It contains vitamins and minerals, think of it as giving your yeast a multivitamin. I like the way Joel put it – think about how you would feel if all you ate was sugar. This is why you add some nutrient.
Diammonium Phosphate – This is another thing that is just a helpful nutrient to give your yeast. It’s a nitrogen source which helps the yeast along. If you are getting a rotten egg type smell from your wine, it could be because you should have added some D.A.P. Some recipes do not call for it, and I think it’s one of those things that’s not always necessary, but it only takes a very small amount so I figure why not use it. Also, as a side note, some of the things labelled “yeast nutrient” on amazon and elsewhere have this in them already, so check the ingredients to see what you’ve got.
Campden Tablets – These tablets are made of Potassium Metabisulfite, and they serve a couple really important purposes. They are not something you want to be leaving out of your recipe. Sulphites in your wine prevent a few things – the growth of bacteria and wild yeasts and oxidation of your wine. All things that you really don’t want to have happen. But as a sad side note, the suphites in wine are often the thing that give people that red wine headache. Fortunately I don’t have that issue.
Acid blend – This is a combination of three acids – citric, tartaric and malic, which come from citrus, grapes and apples. They are used to lower the pH of the wine and give the wine balance.

DONE! I know that was a lot of ingredient listing, so I’m sorry if that bored you, but I for one don’t like blindly throwing things into a recipe not knowing what they are for, so I wanted to lay out for you why we need a tiny amount of a bunch of different things. So there we go. Now on to the making of the wine. In the table below are 8 options for good first recipes to try. Already have one of these fruits in the freezer? Awesome! What are you waiting for!?!

Each of the recipes below makes a gallon of wine. They all have the same ingredients, just in slightly different proportions based on how acidic the fruit is, and based on its relative sugar content. The method will be the same for whichever recipe you try. And as a side note, before you begin I highly recommend keeping a brewing journal of dates and ingredients etc. Especially when you are brewing multiple things at a time. I must confess that I am currently not 100% sure which jug is blueberry wine and which is blackberry.

wine table

Home made wine is really not a lot of work, you actually only have a few active days when you are doing something to the wine, and the rest is a waiting game. Considering that the cheapest fruit wines I really ever see are $25 and you can make a pretty good wine at home for far less than that, I think it’s well worth it. So here is how it’s made:

Day 1:

On the first day what you’ll be doing is preparing the fruit and mixing all the ingredients together except for the yeast. Remember, when picking fruit only use the best quality fruit. Crappy fruit will make crappy wine. Also use nice ripe fruit, but not overripe. Think about when you taste a berry that’s not quite ripe. It is less sweet because it does not have as many sugars as when it is fully ripe, so a fully ripe berry will make a better wine.

Step 1: Clean and sanitize your equipment. All you’ll really need day 1 is the primary fermenter and maybe a masher or spoon to stir with. For the dos and don’ts of what to use as a fermenter, head here. I made mine, and the reason for that was because I planned to do a bunch of small one gallon batches, and we own only a huge 8.5 gallon primary fermenter for beer, so it made sense to have a little one too. Anyways, that can be sanitized either by dissolving a campden tablet in a gallon of water and letting it sit for a few minutes, or I like this sanitizer. While the equipment is drying, prepare the fruit.

Step 2: Give your fruit a good wash, check for any bad spots and remove them, and remove any stems and pits. Things like strawberries, blueberries and raspberries basically just need a good wash. For the peaches I would blanch and peel them first. Chop and remove the pits and place them in your primary fermenter.

IMG_4221 copy

I like to then give the fruit a light mash to release the juices.

IMG_4225 copy

Step 3: The next thing you’ll do combine all the ingredients except for the yeast. I top it off with water to just above 1 gallon in my 1.5 gallon fermenter (4.5-5 quarts), but go ahead and top the water up to 1.25 gallons if you’re using a larger fermenter. Give it a stir to dissolve the powders and cover it. Leave it for 24 hours. This gives the campden tablets time to kill yeasts and bacteria already in there, and the pectic enzyme to start breaking down the fruit for the yeast you’ll add the next day. Don’t wait longer than 24 hours though, or you may have your ingredients spoil. You need to get the fermentation going or other things will colonize your fruit. And that is just plain nasty. And sad.

IMG_3800 copy

Day 2: 

On day 2, you will open up your primary fermenter and pitch the yeast. Half of those 5 g packets is enough, so if you are planning on making another wine with the same yeast in the near future save the other half in the fridge. All you need to do is sprinkle the yeast on and close the lid back up. Make sure you have an airlock on your fermenter, and fill it will sanitizer or alcohol.

IMG_3805

Now we wait for a few days. Within 12-24 hours you will notice bubbles coming from the airlock as fermentation begins. You can probably hear the yeast working too.

Day 2 or 3:

About 12 hours after you add your yeast, you want to give it a little stir. Sanitize a spoon and stir the must (that’s what wine that’s not wine yet is called).

IMG_3950 copy

Days 2-5:

While your wine is fermenting, you will notice that the fruit is constantly floating to the top. To make sure that all the fruit gets fermented, and you don’t get massive air bubbles building up underneath the fruit, you need to break that mass up a couple times a day. This is called “punching the cap.” This is my favourite stage in the process, not only because of its silly name, but also because every day you get to open the lid and smell the fermentation in progress. Using a sanitized spoon or masher, gently punch the cap, then place the lid back on. This is also a great time to make sure you don’t have any weird or nasty smells. It should smell strongly alcoholic but not like acetone, or rotting eggs, or burning rubber, or anything weird. Take note if it has any unappetizing or strange odours.

IMG_3836 copy

 Day 5ish: 

Around the fifth or so day, you’ll notice the cap not floating quite as much, and the bubbles have begun to slow in frequency. At this stage it is time to strain off the solids. There are a couple of ways that you can do this, but this is the setup I have rigged up. If you are only doing one gallon, just straining it without additional equipment is reasonably easy. If you have a full 3-5 gallon batch going, a fruit press or something more suited to 20 or so pounds of fruit may be necessary.

What I do is use a funnel (it’s actually the hopper from my food strainer) covered in a dampened layer of muslin, and strain the wine into a half gallon jar. This funnel happens to fit perfectly into the mouth of the half gallon jar.

Clean and sanitize the funnel, 2 half gallon jars and a one gallon glass jug (this is where your wine is going next). Dampen a section of muslin or cheesecloth and drape it into the funnel. Carefully dump the wine from your primary fermenter into the funnel. It won’t all fit at once of course so let it strain and add some more.

IMG_3639 copy

Once one jar it full you will want to transfer the funnel carefully to the other jar. When almost all the liquid is drained through, you can squeeze more out of the fruit if you want. Since I use a cloth that lets very little solids through, I give it a really good squeeze at this point. The cloth I use isn’t linked to here since it’s from a craft store and I was having a difficult time finding exactly what I wanted to show on amazon. Anyway, if you are using a coarser (bigger holes) mesh you probably won’t need or want to squeeze it a ton or you’ll have solids coming through. Now, if you don’t have a funnel set up, you can probably get away with straining it with your kitchen strainer and a layer of cheesecloth, again if you are doing a small batch. A jelly bag would work well too.

IMG_3644 copy

Now you have your wine strained. It’s time to transfer it into the gallon jug where you will finish the fermentation and age the wine. Make sure the jug is cleaned and sanitized. What I do at this point is actually just pour it carefully into the jug using a smaller funnel. This is not necessarily the best way to do it, but I’ll explain why I do it this way. If you just strained the fruit through a much coarser funnel or press, you will have larger particles that need to settle out. These are called the “gross lees.” If you use a coarse strainer, strain all the wine into one container, and allow the gross lees to settle out. I don’t really have any issue with this because I strain it through super fine cloth. However, if you have gross lees, or chunky bits, in your wine, let them settle, then rack the wine into the gallon jug instead of pouring it. You also mix in less oxygen this way, but I figure we’ve already mixed it in when straining it so it’s probably no biggie. Also, in this next waiting stage, any sediment is going to settle out, so if you get a bit it’s OK. Once your wine is in the gallon jug, top it off with a bit of water if you don’t have quite enough. You shouldn’t need to though if you had 1.25 gallons or squeezed the fruit well. Add another campden tablet to the wine. Place the airlock into the jug. You want only a tiny bit of space between the airlock cork and the wine to avoid oxidation of your wine. I would at this point recommend vodka or something in your airlock since at least with my iodine sanitizer, once the iodine evaporates you can get mould growth in your airlock. Mould = BAD. Awesome, now you are done for  a while! Place your jug somewhere cool, out of the sun, where it won’t be disturbed.

IMG_4461 copy

Day 5ish until ???

After the transfer day, wine making is just a waiting game. You will continue to have some fermentation for a while, but eventually the bubbling will slow and cease altogether. Admire your wine and patiently wait. Good wine does not happen over night. At this point, it’s up to you when you want to bottle the wine. At the very minimum, you want to wait until the wine is clear and all the sediment has settled to the bottom. You also don’t want any more fermentation occurring, so if there is any activity in the wine, do not bottle it. You will have to wait at least a couple of months. Joel’s instructions suggest between one and nine months. Yes, that’s a huge range. One is probably not going to be enough in many cases for it to be crystal clear, and in nine it’s probably drinkable (aged enough to be tasty and ready). I think 3 or 4 is probably plenty. Remember, as long as it’s clear, and done fermenting you can bottle it because it will still age and mature in the bottle. But wine that is bottled without good clarity isn’t going to clear anymore in the bottle.

From left to right, peach, blueberry, and raspberry wine during the aging process.

IMG_4673

Day 100 ish

Wow, has it really been 95 days? Time flew by! It is time to bottle our wine. We haven’t seen a bubble in 2 months and the wine is crystal clear! Today what you will need is 5 regular sized wine bottles (750 ml). I don’t buy these because I think that would be insane when I already drink wine. Just save your bottles and rinse them out. You will also need 5 corks (number 8 or 9), a corker (they make two main kinds of basic ones – this round compression one, these double level ones and these floor ones), a racking cane with tubing or mini auto siphon and preferably a bottle filler.

Sanitize all your equipment and your bottles and let them air dry. Very gently rack your wine into each bottle. Don’t disturb any of the sediment on the bottom of the jug. Fill your bottle up enough that you will only have a very small amount of space between the wine and the cork. I like to actually hold a cork up to the side of the bottle and see where it will sit so I can adjust the level of the wine. Once you fill all five bottles, cork them up and you are done! Store the wine in a cool dark place and enjoy your wine whenever you desire.

IMG_4470

If you are going to gift them, it’s super fun to make adorable labels for them (shipping labels actually work great – you can design any decorative label you want using the template in word) and add the fancy shrink wrap to the tops

IMG_2510

Unfortunately, a gallon of wine just barely fills five bottles, so you don’t have much left over, but be sure to sample the wee bit that remains, even if it is the sediment filled stuff at the bottom of the jug. Happy brewing!

IMG_4475 copy

*this post contains affiliate links, please see the “About the Blogger” page for more information

Inferno Wine Jelly

The other pepper jelly we tried out from Ball the same night as the habanero jelly was this inferno wine jelly. I think with the combo of jalapeno peppers and red bell peppers in it, it will make a perfect jelly to have a a Christmas wine and cheese party. So pretty.

IMG_4641b

Ingredients:
1/2 cup finely chopped seeded red bell pepper
2 tbsp finely chopped jalapeno pepper
2 dried chopped hot chili peppers
1.5 cups sweet white wine (ball suggests Sauternes but anything will work)
3 tbsp lemon juice
3.5 cups granulated sugar
1 pouch of liquid pectin

And here’s how we made it:

Prepare the canner, jars and lids. This recipe yields about 7 4oz. jars.

Combine the peppers, wine and lemon juice. Feel free to use milder peppers if you don’t want an “inferno.” You can also decide whether to seeded the dried chilies, or omit them altogether. Make sure you use a deep pot for this. This pot barely cuts it because the jelly boils very vigorously and can easily boil over if your pot is too shallow.

IMG_4553 copy

Stir in the sugar. So lovely! Bring the jelly to a boil over high heat, stirring constantly. If you have a fan, have it on. If you have an assistant, have them ready to fan. Boy does this go crazy. Once at the rolling boil stir in the pectin. Boil hard for another 2 minutes, then remove from the heat.

IMG_4558 copy

Quickly skim off any foam and fill your hot jars, leaving a quarter inch head space. Wipe the rims, apply the lids and tighten the bands finger tip tight. Process the jars for 10 minutes in a boiling water bath canner, covered by at least an inch of water. After the 10 minutes, turn off the heat, remove the canner lid, wait 5 minutes and remove the jars to a hot pad or towel.

IMG_4562

As with the habanero jelly, you can gently twist or tilt the jars after they are sealed to get a nice particle suspension. Just no shaking or inverting the jars, that can affect your seal, so just be very gentle. I didn’t do as nice of a job here, but oh well, still a lovely jelly. Cool the jars 12-24 hours, remove the bands, check the seals, wipe, label and store.

IMG_4641


*this post contains affiliate links, please see the “About the Blogger” page for more information


My mini primary fermenter

We have recently ventured into the realm of homemade fruit wines and are love love loving it. However, I have learned at least one lesson the hard way, which of course I will share with you so you don’t make the same mistake. I hope you can learn from my dumbiness, and perhaps get excited by the prospect of making your own wines. I think it’s easier than you might expect. I’ve now posted the full instructions on how to make it, which can be found here.

IMG_3836 copy

Our first fruit wine was strawberry, pictured below. To make a gallon batch (of which we made two), we used about 4 pounds of berries, and placed them with the other ingredients into a gallon glass container. It seemed from the instructions that we were following from our local brew store like this was what they had in mind, but I think we were mistaken.

IMG_3279

Now, I’m a scientist, and not an idiot (at least I thought not), so I’m not sure why I thought this would be just fine, but I did. The problem with making wine like this is that fermentation produces a lot of carbon dioxide bubbles. Especially in the first few days after pitching the yeast, and especially when there is a lot of added sugar, as with these. With a fruit wine, these bubbles get stuck below that mat of fruit floating at the top (called the cap)… pressure builds up… and… yaaaaa I think the photo below says it all (sorry it’s rather blurry). Narrow neck plus mat of fruit plus carbon dioxide equals kaboom! Strawberries on the ceiling. I noticed pressure was building up a bit, so I put them in the kitchen sink thinking that the pressure might cause the top to pop out, but I never expected it to happen with such force. Yes, that’s a whole strawberry on the ceiling. I wish I could say we were home for the incident, but we had to go to school, so sadly I am not sure how loud this was, or when it happened, but both of the corks were violently launched off the bottles and fruit chunks hit the ceiling. We did just top it off with water and still saved the wine (it actually still tastes surprisingly good), but it was time for plan B before attempting raspberry or blueberry, which were about to come into season.

wine explosion copy

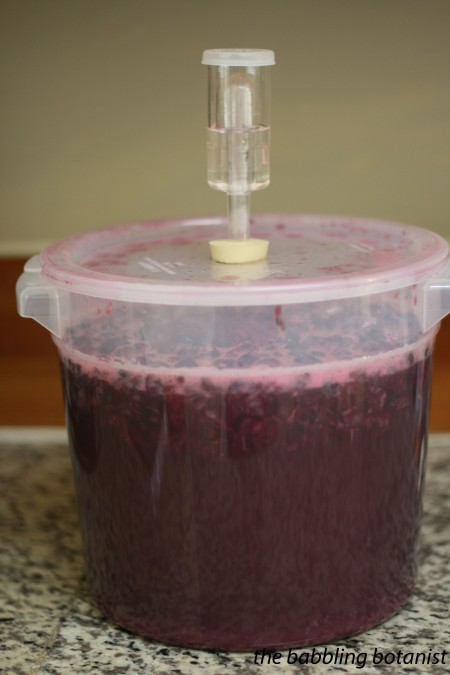
Enter the homemade primary fermenter. I bought these containers on amazon actually originally for making dough for bread. This is a whole other story, but I just bought these two books, Artisan Bread in 5 Minutes a Day and Healthy Breads in 5 Minutes a Day, and needed a 6 quart container for that. The one I saw came in a 2 pack, so I was inspired to use the second one to make a mini fermenter. It’s 1.5 gallons, so it’s perfect for filling it to the gallon mark, and leaving a 2 quart head space. If you just want to get them for brewing, this 8 quart version might be even better. All we did was drill a hole in the lid the size of the stopper we have. But as you can see we didn’t have the correct sized bit and kind of burned the edges of the hole to try and fix it and now have an oval, so it’s a bit sketchy, but with a little glue around the edges it’s now perfectly air tight! Really any food grade plastic tub with an air tight lid would work, get a 2 or 3 gallon one! Another thing I love about this one though is that it’s translucent so I can see the brewing in action.

IMG_3854 copy

Ta-da. Now brewing is a breeze! After about a week in the primary fermenter, we strain off the big chunks of fruit and age it in the gallon glass jugs, so you really would just need one or two little ones and multiple glass jugs if you wanted to have a number of things brewing at once. I think this is also great to have for trying out a small batch of a new beer, wine, whatever, of which you aren’t sure you want a full 5 gallons. I love these little batches, a gallon is about 5 regular bottles of wine, then we can decide to make more if we love what we’ve made. Not sure how other people do it, but this has been working great for us! Just don’t fill it too full or you will still get fruit sneaking into the stopper and airlock. Have you ever made fruit wine? What do you use?

IMG_3950 copy

*this post contains affiliate links, please see the “About the Blogger” page for more information

Making a mini primary fermenter on Punk Domestics

Makin’ my Merlot

Wine. Wine. What can I say about wine? The nectar of the gods. Wine is a delicious fermented beverage that people have been making and drinking for thousands of years. While the art of making phenomenal wine may be a skill that takes time to perfect, it’s actually not very hard to make pretty darn good wine at home. And for the cost comparison it can be well worth your while!

If you read my last post you know that we already invested in a beer starter kit, so we bought a few additional things, but mostly the kit will work for both.  Typically the wine kits (the ingredient kits as opposed to the equipment kits), which are a great place to start, make 6 gallons , so you need a 6 gallon carboy rather than 5 with the beer. This starter kit would be enough to get you started. Personally, I’d go for a glass carboy just because I feel like they are easier to clean and I’d prefer my wine to be sitting in glass than plastic for extended periods of time (although the primary buckets are plastic). But some “fancier” wines sit a lot longer. Anyways, start with a wine kit to try your hand at wine, everything you need is included right there in the box! Pictured below is my primary fermenter with everything that came in my first kit! yay!

wine1 copy

The first step for homemade wine is about as easy as it gets. You stir bentonite into warm water. Then add in that big sack o’ grape juice concentrate once it is dissolved. We could not figure out how the heck to pull off the cap without exploding it everywhere so I recommend one person holding it over the fermenter while the other cuts a hole in the corner.

wine2 copy

For this merlot there were also dried grape skins, which you put in a sack and add to the bucket. Then, you top it off to 6 gallons with water. Next, throw in some wood chips. Aging wine in fancy wood barrels, psshhh we just throw the wood in the wine instead of putting the wine in the wood.

wine3 copy

Take a hydrometer reading so you know your starting sugar content and can calculate percent alcohol at the end. Stir it all up, add in the yeast. Presto!

wine4

And then we wait. Put on the lid and watch it bubble away.

wine5

After about 6-8 days this wine was transferred to the secondary fermenter. This is because of the wood and peels in there. We’ve done a second one (Pinot Noir) where it stayed in the primary 14 days, until fermentation was complete, so it varies by wine.

wine6
The next stage for most kit wine occurs after about two weeks when fermentation is complete. At this stage we racked it back into the primary bucket where we added some chemicals for clarifying and stabilizing the wine. Sulphite and potassium sorbate are added as preservatives and kieselsol and chitosan are added as fining/clarifying agents.

wine7
This stage is also about degassing the wine, so after the addition of the different preservatives and clarifying agents you use a sweet drill attachment to stir the wine really vigorously. You could also just stir it really fast, but why not use a drill on your wine if you get the chance!? The chemicals have to go in a certain order to properly clarify the wine, so follow the instructions in your package and stir for the appropriate amount of time in between.

wine8

Once finished we racked the wine back into the cleaned and sterilized secondary fermenter to stabilize for a few more weeks.

Then when the wine is clear, it’s bottling day! For this we transferred it into the primary bucket, then bottled from there, but I’ve since decided that is totally unnecessary. Just bottle from your secondary fermenter. I let it clear at a height though so I didn’t have to disturb it at all bottling day.

wine9

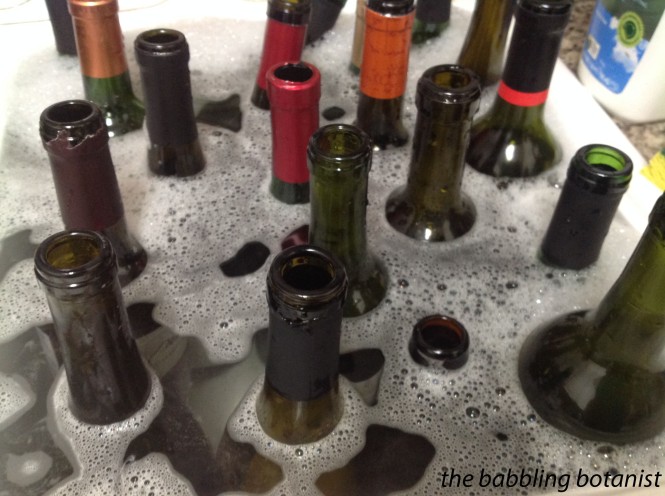
In advance of bottling day you will have cleaned some old bottles and accepted bottle donations from your friends. If you are going to get into wine making, it’s time to stockpile bottles! Don’t buy them, that’s ridiculous. Buy full bottles and drink them and then clean them up 🙂

wine 10 copy

Bottling is easy as pie. Fill each sanitized bottle to right about where the neck of the bottle begins.

wine 11

Then comes the final challenge. Corking. Here is our first attempt at that. We decided it just gives the bottles personality. We did get better after this one though. Corking it kind of a 5 handed job, so if you are two people, well… ya.

wine 12 copy

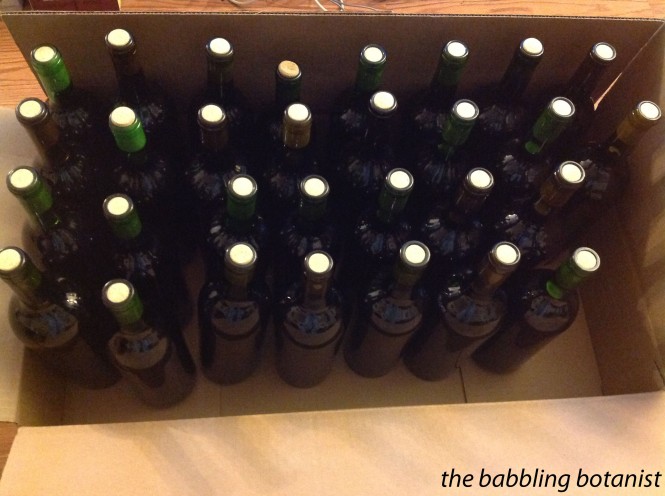
Ta da! 30 bottles of wine. Leave it upright for a day or so, then store it on its side to keep the cork moist. Kit wine usually recommends aging the wine 2-4 months, so in a few months I’ll let you know how it tastes. The glass we had left over tasted pretty good, and it’s only supposed to get better from here. Total cost – about $2 a bottle!

wine 13 copy

*This post contains affiliate links. Check out the “About the Blogger” page for more information.