Blackberry Cabernet Jam

Last weekend after picking a ton of blackberries I was thinking about what delicious blackberry creation I could come up with, and was reminded of the strawberry Pinot Noir jam that I made two summers ago. Blackberries and wine? Yes please! That sounds like a great idea. Blackberries are bold though, I thought to myself, they need a bolder wine, thus was born the blackberry Cabernet jam. This jam is a real time commitment, as it is pectin free, and has an entire bottle of wine in it. However, if you’re feeling slightly more impatient the Ball Complete Book of Home Preserving does have a berry wine jelly using liquid pectin that you could whip up faster. Alternatively, make a half batch and drink the other half of the wine.

Ingredients:
15 cups blackberries
2.5 cups sugar
One bottle of your favourite Cabernet Sauvignon or other bold wine
1 tbsp of lemon juice

IMG_5507 copy

Here’s what I did:

Prepare the canner, jars, and lids (and by prepare I really mean start pondering it, because you actually won’t need to prepare for like 4 more hours). Depending on how long you cook this jam, it will yield about 6-8 pints. Mash the berries to your preferred level of mashiness in a large pot, and add the sugar, wine, and lemon juice. Leave a small amount of wine in the bottom of the bottle to sip on while you bring the jam to a boil.

IMG_5509 copy

Bring to a boil over medium/high heat. Reduce and maintain a gentle boil for a good many hours, stirring occasionally. I think I ended up cooking this for nearly 5 hours. Be patient, or play with adding some liquid pectin of you want a firmer set. Near the end of the cook time, pay close attention to avoid any burning on the bottom of the pot.

IMG_5520 copy

Fill hot jars leaving 1/4 inch head space. Wipe rims, apply lids, and tighten bands finger tip tight. Process in a boiling water bath canner for 10 minutes.

IMG_5528 copy

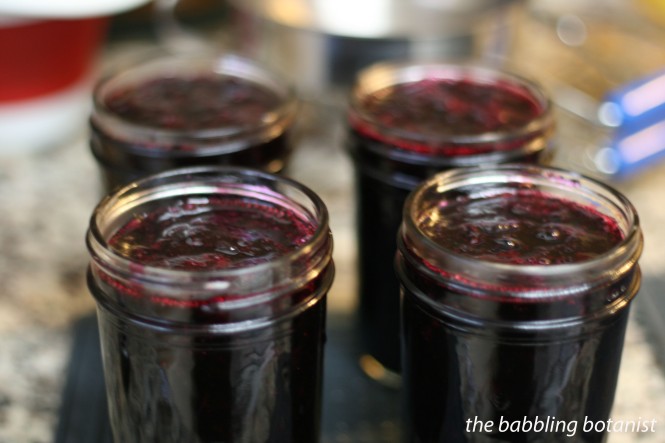
Deeeeelicious. And oh so pretty. Now who wants to host a cocktail party or wine night so that I can bring some of this jam? 😉

IMG_5556 copy

A “berry” good weekend – things to do with strawberries

Believe it or not, strawberry season is wrapping up here next week! So sad! However, I did do a pretty good job taking advantage of the berries this year. We bought a chest freezer, so I’ve frozen a bunch, and I did some dehydrating, canning, and wine making with the rest last weekend. A berry good weekend indeed. For many of you, berry season is probably just beginning, but whether this is your last week, or first, here is some inspiration for things to do with your berries.

Strawberry Rhubarb Pie Filling – my first blog post ever, and still one of my favourite recipes. The universe is telling us to put these two awesome items together by having them mature at the same time – you should really listen.

20130822-212438.jpg


Strawberry Fruit Leather – Since this post, I’ve learned adding some apple sauce or other more fibrous fruit helps with the cracking and crispiness issue. But I also still love it with just strawberries.

20131025-225202.jpg


Strawberry jam – a classic favourite of course. Or on the wilder side, add some wine to your jam and try this strawberry pinot noir jam.

IMG_2031 copy

Strawberry wine – heck yes! It’s really not as hard as it seems by the length of the post. You should really really try it. Shorter, point form directions coming soon to entice you more, since not all of you have the attention span for this novel of a post.

IMG_4461 copy

Or a non-alcoholic beverage  (or alcohol optional I should say) – strawberry lemonade concentrate!

IMG_3736 copy

Got a couple handfuls left over still? Flavour some vinegar (or vodka? Post coming soon on that, but it’s basically the same as vinegar)

IMG_4704

Now go, quickly, before they are gone!! Pick some berries! Eat some berries! Can some berries! Dry some berries! Love the berries! And don’t forget to eat some fresh – sometimes it’s easy to get caught up in preservation.  And lay off the caffeine! (Oh wait, that one’s for me.)

Can it forward day. A giveaway!

Happy international can it forward day! I hope that you all canned something today and/or ate something that you had canned to celebrate. To me, can it forward day is basically everyday, as I love to get others on to the canning train. I didn’t actually can today, because I just got home from a conference late last night, but zucchini relish and tomato sauce are on the roster for tomorrow. But anyways that brings me to the reason for this post. A can it forward day giveaway!! Pictured below are my giveaway items. I’ve decide to include 4 canned goodies, the zesty zucchini relish and tomato sauce are the two pint size jars, and you will get the fresh stuff I make tomorrow. The half pints are strawberry jam and Victorian barbecue sauce. Yum yum yum. The other exciting thing is that I will be giving away a copy of So Easy to Preserve, which is written by the University of Georgia extension service. This book is an amazing resource with many scientifically tested and trusted recipes. The one caveat, however, is that they are coming out with a new edition at the end of the month so I don’t yet have this book in my possession. What that means is I will likely ship (or give to in person depending who wins) the winner the other prizes first, followed by the book when it comes out. But what this does mean is you’ll be getting the most up to date awesome recipes!

IMG_2312.JPG

OK here is how to enter. There are going to actually be multiple ways that you can enter this contest. First you will receive one entry for commenting on this page and telling us who first introduced you to canning. Was it a parent or grandparent, a friend, or something you just started doing on your own? I love to hear how people got started, so that will earn you an entry. You can also earn an entry by liking the babbling botanist Facebook page and inviting others to do so. In the spirit of canning it forward I’d like to be able to reach more people and Facebook is a great way to do so. This is going to get complicated for me to tally up, but this is my plan. Anyone you invite gets an entry, but it also earns you an entry if they post the name of the person that invited them like my page on my Facebook wall. I hope this doesn’t get too confusing for everyone involved, but I’m going to give it a shot! The contest will close on the one year anniversary of me starting this blog, August 22 2014 at 9pm Pacific time.

Happy canning! And sorry, but I can ship to Canada and USA only.

Thanks y’all, this giveaway is now CLOSED.

Blueberry Lime Jam

I do love blueberries on their own, but sometimes you just need a little something extra to really bring out the flavour of a berry. If you are looking for a jam that really kicks it up a notch, you’ve come to the right place. Adding the juice and zest of a lime or two really enhances the flavour of the blueberries and makes a delicious jam. This recipe is from the Ball Complete Book of Home Preserving. The only change that I make is to use a lower sugar pectin and less sugar, and two limes rather than one, but here it’s written as in Ball.

IMG_3775 copy

Ingredients:
4.5 cups crushed blueberries
5 cups sugar
Zest and juice of 1-2 large limes
1 package of regular pectin (or use low sugar pectin and adjust sugar accordingly)

Here’s what we did:

Prepare the canner, jars and lids. This yields around 6 half pints unless you reduce the sugar.

In a stainless steel pot, combine the crushed berries, lime juice, lime zest, and pectin. Mix well to combine all the ingredients.

IMG_3778 copy

Bring the jam to a full rolling boil over high heat, stirring constantly.

Add the sugar all at once when the boil is reached, and return to a boil. Boil hard for 1 minute, then remove from heat and skim off any foam.

Fill the hot jars leaving a 1/4 inch head space. Wipe rims, apply lids, and tighten the bands finger tip tight.

IMG_3788 copy

Process the jars in a boiling water bath canner, covered by at least 1-2 inches of water for 10 minutes, starting the time when the water reaches a full rolling boil. After the 10 minutes, turn off the heat, remove the canner lid, wait 5 minutes and remove the jars to a hot pad or towel. Cool the jars 12-24 hours, remove bands, check seals, wipe clean, label and store.

IMG_3826 copy

*this post contains affiliate links, please see the “About the Blogger” page for more information

Kiwi Daiquiri Jam

The other day they had local kiwis for sale at one of my favourite farm stands just outside of town. “Local Kiwis! Whaaat. Don’t mind if I do,” I thought to myself. So of course, despite having any idea what I might do with them, other then eat a few, I bought a box. Luckily, I found this recipe for Kiwi Daiquiri Jam in my Ball Complete Book of Home Preserving.

IMG_3623 copy

Kiwis are so pretty! Doesn’t it look like eyes with really long lashes?

IMG_3632 copy

Ingredients:
2 cups crushed, peeled kiwifruit
2/3 cups unsweetened pineapple juice
1/3 cup lime juice
1 package regular powdered pectin
3 cups granulated sugar
1/4 cup rum (plus a shot for yourself)

Here’s how we made it:
Prepare the canner, jars and lids. This yields about 4-5 half pint jars.

Peel and crush the kiwi. Combine in a stainless steal pot with the pineapple juice, lime juice and pectin. Premeasure the sugar into another bowl for later, the rum into a measuring cup, and a shot for yourself into a shot glass (and one for your helper if you have one).

IMG_3633 copy

Heat the jam to a boil over high heat, while stirring frequently. Once you reach a boil that can’t be stirred down, add the sugar all at once. Return to a boil, and boil for one minute, starting the time once a full boil is reached. After the one minute, pour the 1/4 cup of rum into the jam, and take your shot. Stir it in, and remove from heat.

IMG_3647 copy

Fill the jars, leaving a quarter inch head space. Wipe rims, apply lids, and tighten bands finger tip tight. Process in a boiling water bath canner for 10 minutes covered by at least 1-2 inches of water, starting the time when a full rolling boil is reached.

IMG_3656 copy

After 10 minutes, turn off the heat, remove canner lid, wait 5 minutes and remove the jars to a hot pad or towel. Cool 12-24 hours, check seals, remove bands, and wipe clean. Label and store.

Gosh dang that’s a pretty jam. This one would make a really pretty gift. And the combo of pineapple, lime and kiwifruit makes for a lovely, tropical flavour.

IMG_3733 copy


Kiwi Daiquiri Jam on Punk Domestics

*this post contains affiliate links, please see the “About the Blogger” page for more information

Strawberry Freezer Jam

IMG_3289 copy

Freezer jam is a super quick and easy alternative to making canned jam. I love canning, and think everyone should learn how (do it, do it now!!) but there are also a few advantages to freezer jam. First, you don’t have to cook the berries at all. This means you can keep a little more of the natural consistency and taste of the uncooked berries. It’s also faster, and you don’t need a canner, jar lifter or anything like that. I think it’s a great gateway into canned jams, although I did about a million jars of canned jam before ever trying it. But, if you have a little bit of extra freezer space, all you need is the jars, pectin and the berries to make quick an easy freezer jam.

IMG_3286 copy

Ingredients:
4 cups crushed fruit
1.5 cups sugar
1 packet freezer jam pectin

For this endeavor I used Mrs. Wages freezer jam pectin, but Ball and many other brands also make freezer jam pectin.

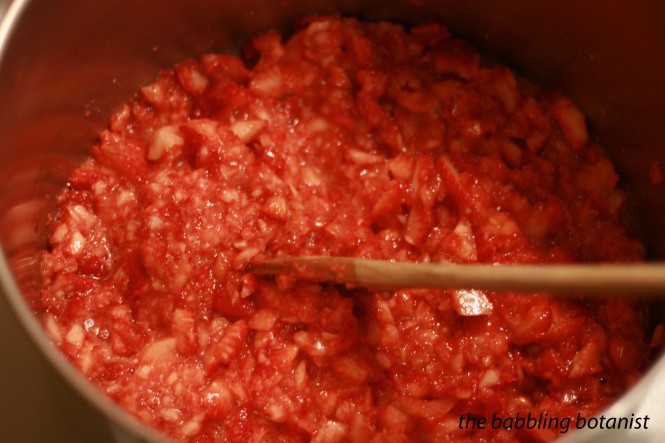
First, wash, hull and crush the berries.

IMG_3292 copy

Separately, combine the sugar and pectin together and stir to evenly mix them.

IMG_3293 copy

Stir in the crushed berries and then continue to stir the jam for 3 minutes.

IMG_3298 copy

Now all you do is pour it in jars. Leave a half inch or so of head space for the jam to expand when it freezes. Put on the lids and bands. Let it set up at room temperature for a half hour or so prior to freezing it.  You can leave it longer if you want, just not longer than 24 hours. After that just pop it into the fridge or freezer. It will keep around 3 weeks in the refrigerator or a year in the freezer.

IMG_3301

Easy peasy lemon squeezy. Now you really have no excuse to buy store bought jam anymore. This takes under a half hour and yields about 5 jars.

IMG_3304 copy

Strawberry Jam with Liquid Pectin

Yes, I did already post a strawberry jam recipe a few weeks ago, you didn’t hallucinate it, but we made strawberry jam again and had liquid pectin on hand, so I thought this would be the perfect opportunity to highlight the difference between using powdered and liquid pectin. Also if I’m going to make every recipe in Ball I need to make the liquid pectin ones too of course 😉

Ingredients:
4 cups crushed strawberries
7 cups sugar
4 tbsp lemon juice
1 pouch liquid pectin

How to make it:
Crush the berries and put them in a deep, stainless steel pot.

IMG_2463 copy

Mix in the sugar and the lemon juice. This recipe has an absurd amount of sugar in my opinion and is too sweet, but liquid pectin doesn’t come in a low sugar version as far as I know. Yes, I’m posting a recipe I wouldn’t necessarily make again, I think it’s informative though. The sugar added here is the major difference when using liquid pectin. The sugar goes in at the beginning, then you bring the jam to a boil, then add the liquid pectin. With powdered pectin, the pectin goes in at the beginning and the sugar is added once you reach a boil. They are not always directly interchangeable, but you can often find a recipe for either, especially for berry jams. For example there is a lot more sugar in this recipe than the powdered pectin one I posted earlier, so you can’t just use the same recipe with a different pectin always.

IMG_2469 copy

Bring to a full rolling boil that cannot be stirred down, and squeeze in the pectin.

IMG_2476 copy

Boil hard for 1 minute, remove from heat, and skim the foam. Personally, I think that liquid pectin has it’s place, but this may not be it. The liquid pectin is great for jellies I think though, like the pepper jelly I posted recently. Adding the sugar at the beginning seems to cause this jam to get really foamy. Plus I like to reduce the sugar and use low sugar pectin with strawberries since they are so sweet already. But the full sugar makes a nice gift and could be good for later season, less sweet berries.

IMG_2485 copy

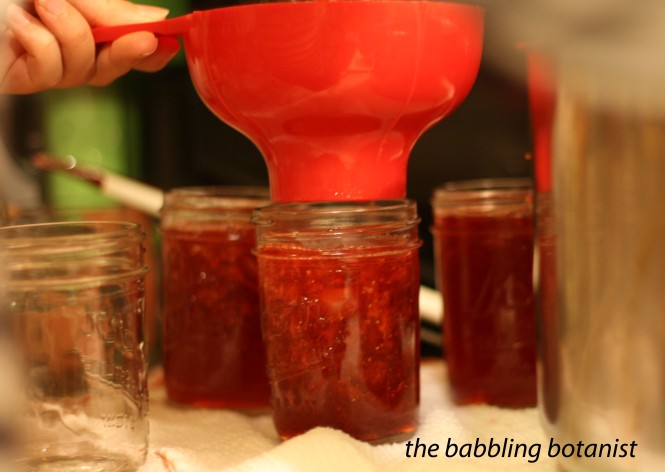
Fill the hot jars, leaving a 1/4 inch head space. Wipe rims, apply lids, and tighten bands finger tip tight. Place the jars in the canner, covered by at least 1-2 inches of water. Bring to a full rolling boil and process for 10 minutes.

IMG_2490

After 10 minutes, turn off the heat, remove the canner lid, wait 5 minutes and remove the jars to a hot pad or towel. Cool 12-24 hours, remove bands, wipe clean, label and store.

photo 32

Master Food Preserver Class – Week 2

I promised to post about master food preserver class each week, so here is what we learned in last Thursday’s class! I took 116 photos in class during week 2, and it didn’t feel like enough, so you know it must have been a good class! And of course it means this post will basically be a picture show. 😉 This week we covered freezing, fruit pie fillings and soft spreads. So I would like to start off with some fun facts that I learned in class that you may or may not already know.

Freezing
– The best way to freeze if you are going to do a bunch of stuff, is to turn your freezer extra cold (down to -10F) the day before so that things freeze quickly. Frozen goods should be kept at 0F or below, so once frozen return the temperature to 0.
– Vegetables should always be blanched before freezing to stop enzymes that would otherwise cause changes in colour, texture, flavour and nutritional value. Recommended blanching times vary by vegetable and range from 1-10 minutes

One thing we covered for freezing was freezing convenience foods. So we did just that, and will eat these food later in the class! YUM.

One convenience food we froze was a “meal in a bag”:
-1 chicken breast cooked and diced
– 2 cups blanched veggies (or frozen ones)
– 1 cup pasta cooked until almost done
– seasoning packet in a separate baggie (such as 2t chicken bouillon, 1/2t garlic powder, 1/2t onion powder, 1/2t paprika, 1t parsley, 2T parmesan cheese)

Freeze it all up in a baggie. When you want to eat it, dump it all in a wok, stir fry it up and … presto!

Chicken for the meal in a bag.

IMG_2326 copy

Blanched veggies for the meal in a bag.

IMG_2350 copy

Combine it all and freeze. A great idea if you have a free weekend day and freezer space!

IMG_2367 copy

Another convenience food we froze was twice baked potatoes. nom nom nom.

Bake potatoes, halve, and remove innards to a large bowl.

IMG_2335 copy

Mash and mix in milk, sour cream, garlic, salt, pepper and cheese.

IMG_2346 copy

Refill, top with more cheese if desired, then freeze on a baking sheet. Once frozen, transfer to freezer containers. When you want to eat it, bake at 375F for 25-30 minutes.

IMG_2348 copy

The last convenience food we did was cookies. Works with most cookie recipes.

Mix up the recipe.

IMG_2344 copy

Mold into balls (and in this case dip in sugar – yum!)

IMG_2359 copy

Freeze on a cookie sheet and then transfer to a freezer container. When you want to eat them bake without thawing at 400F for 10-15 minutes.

IMG_2361 copy

Fruit pie filling (and juice hiding in back)

Most fruit pie filling recipes for canning call for clear jel. What is clear jel anyways? It’s a starch used for thickening, and is basically a modified corn starch. You shouldn’t used regular corn starch or other thickening agents in canning, because they are not specifically designed for canning like clear jel. Clear jel has been modified to make it more heat stable, so it can take the heat of the canning process. It is also stable in low pH, like the pH of fruits. It makes products more shelf stable, and doesn’t separate over time like other starches can. It can be reduced in recipes too if you don’t want quite as much. If you don’t like the starchy pie fillings though, don’t try and can a pie filling recipe without it. Either follow a recipe for canning fruit in syrup, and then drain the syrup to use it in pies, or freeze the fruit instead!

IMG_2402 copy

Soft spreads

Fun fact. Do you know the difference between a jelly, jam, conserve, preserve and a marmalade?
Jam – made from crushed or chopped fruit
Jelly – made from fruit juice
Conserve – made with two or more fruits and nuts or raisins
Preserves – made with whole fruits, or large pieces, in a clear, slightly gelled syrup
Marmalade – made with soft fruit and citrus peel in a clear jel

In class we made the following soft spreads. Click the names to link to the full recipe posts.

Blueberry lime jam

IMG_2393 copy

and all canned up.

IMG_2428 copy

Jalapeno pepper jelly.

IMG_2417 copy

Strawberry lemon marmalade.

IMG_2418 copy

And strawberry rhubarb jam.

IMG_2422 copy

So many delicious treats! And the day’s excellent haul.

IMG_2425 copy

Happy Earth Day! Planting golden paintbrush, convincing you to can, and a jam giveaway!

Happy 2014 Earth Day! I hope you are all doing some earth friendly things today! For me, my field work that was planned for today was postponed until tomorrow, so I’m being green by “working from home.” HA! Anyways, it’s true, well, that I’m home, but all joking aside I wanted to share a couple things that I did do for the occasion, and a few that you can do too.

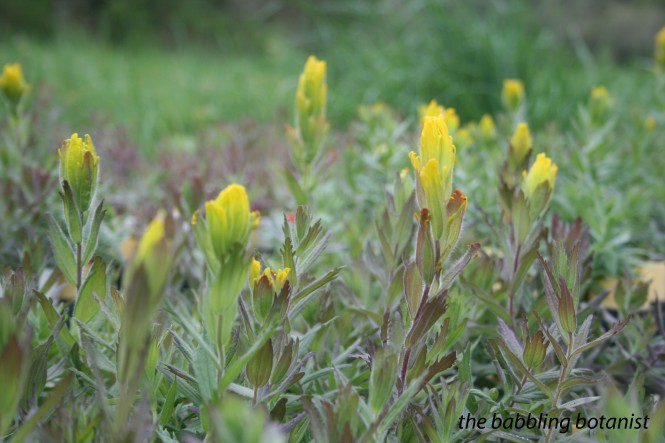
The first way I celebrated Earth Day was with the Institute for Applied Ecology. Every year we recruit volunteers and plant endangered plants. This year we planted 800 golden paintbrush (so far!) at William L. Finley National Wildlife Refuge. This is my study species as many of you might know! We are proud to say it is well on its way to recovery. Here are a few pictures from the event.

Paintbrush in “cone-tainers” ready to go in the ground.

IMG_2057 copy

A lovely flowering paintbrush

IMG_2062 copy

And his comrades.

IMG_2065 copy

Volunteers working hard to get plants in the ground.

IMG_2078 copy

A paintbrush in his new home on our grid.

IMG_2079 copy

Awesome! Aren’t they gorgeous?! Great way to spend the Saturday before Earth Day!

OK, now to totally switch gears to another Earth Day topic – canning! And other food preservation. I love to can (if you haven’t realized this yet, I’m not sure what blog you’ve been reading), but it’s not just fun and delicious. It can be good for the planet too, and for you! Yes, I’ve been posting a lot of sugary jam recipes lately, but really how much jam do I actually eat? And I do often go for much less sugar. But anyways, let me get to the point – here are my top reasons that you should start preserving this Earth Day . Some of them are earth friendly and some health friendly reasons.

1. It allows you to eat local even in the dead of winter.
This should really count are more than one reason since eating local has so many benefits:
– less emissions from your food travelling
– fresher food
– knowledge of where your food came from – talk to your farmer!
So many foods are available for only a short period, but preserve very well. Berries and fruits are
great canned and some freeze well also. Many vegetables can be pressure canned or are great
pickled, and freeze well. Herbs can be dried, or frozen in oil.

2. You produce less waste
Canning jars are reusable over and over again. Every time you eat a store bought canned good,
you either produce waste throwing it away, or even if you recycle it, it takes energy to do that.
Can your own and that jar is good until it get chipped or cracked!

3. You can customize your recipes (to a safe extent)
Certain things can’t be adjusted in canning because it makes recipes unsafe, such as the
amount of vinegar or lemon juice you add, but there are countless ways that you can customize
recipes to suit your needs
– Use less sugar and a low sugar pectin
– Try sweetening things with honey or stevia
– Adjust saltiness and spiciness to your preference
– Sweeten pickled goods that are too strong with a small amount of sweetener
– Choose the size of jar you preserve in to be appropriate for how much your family eats,
reducing wasted food

4. It can save you money
– Preserve things you grow yourself
– Buy in bulk at the peak of the season, split it with a friend to possibly save even more
– Go to pick your own places to get the same produce cheaper than at the market
Canning can end up being more expensive than store bought, such as when you buy a ton of
tomatoes to make sauce, so plan accordingly by planting the most expensive produce and
things you use the most.

5. People love it when you give canned goods away!

Which leads me to why you forced yourself to read this whole post – the jam giveaway! In celebration of Earth Day, and to spread the love of canning I am giving away one jar of my rhubarb orange jam (click for the recipe). Please enter by commenting below and telling me what you are doing to celebrate Earth Day. One entry per person, and it has to be a comment on the blog not the facebook page so it’s easier for me to just draw from one pool of comments. Good luck! Contest will close one week from today – April 29th at 9pm Pacific time. And for now, just open to US and Canada please. Thanks!

IMG_1639 copy

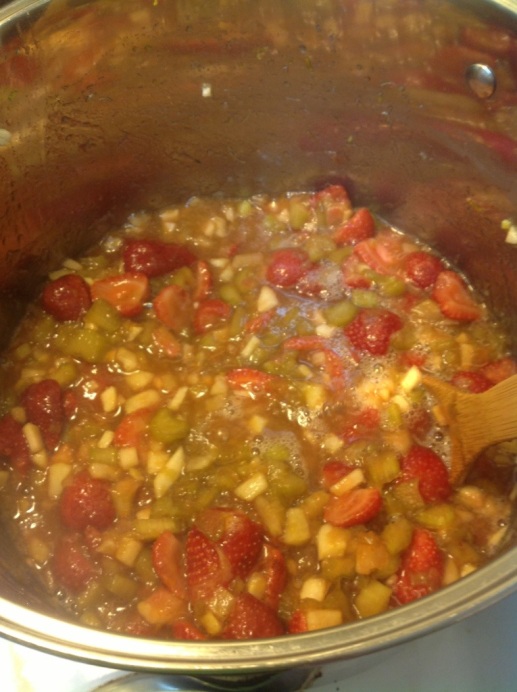
Strawberry Rhubarb Jam

Strawberries and rhubarb are perfect for each other – a delicious match of sweet and tart! This recipe calls for a 1:1 ratio of strawberries to rhubarb, but you are welcome to do a little less rhubarb if you want. I love the tartness of it though, and would actually recommend doing this with a reduced sugar pectin and less sugar to really let the rhubarb shine. Here are the ingredients as written in the  Ball Complete Book of Home Preserving, but the low sugar sure jell does 6 cups of berries to 4 cups sugar, so I think I’d go for that level of sweetness next time.

Ingredients:
2 cups crushed strawberries
2 cups chopped rhubarb
4 tbsp lemon juice
1 package powdered fruit pectin
5.5 cups granulated sugar

IMG_1932 copy

Step one for this jam is preparing the canner, jars and lids. It’s another pectin recipe so is a quick one. This will yield about 6-7 half pints.

Mix together the crushed strawberries, rhubarb, pectin, and lemon juice in a deep stainless steel saucepan. Measure out the sugar and set it aside so it can be added all at once.

IMG_1937 copy

Bring the jam to a boil over high heat. Stir, stir, stir! Once boiling, dump in the sugar and return to a boil. Once at a full boil, maintain for one minute, remove from heat, skim foam and fill jars.

IMG_1948 copy

Fill the jars, leaving a quarter inch head space. Wipe rims, apply lids, and tighten bands finger tip tight. Place filled jars in the canner, covered by at least 1-2 inches of water. Bring to a full rolling boil, and process for 10 minutes. After 10 minutes, remove canner lid, wait 5 minutes and remove the jars to a hot pad or towel. Cool 12-24 hours, remove bands, wipe clean, label and store.

IMG_1959 copy

Such a beautiful and delicious jam!

IMG_2031 copy