Chicken broth – two ways to make it and two ways to preserve it

The winter months definitely have less opportunities for food preservation than summer, but if you are itching for some canning, now can be a good time to stock up on bone broths. Yes, horrible, horrible pun intended. Making chicken broth is a great way to prevent any part of the chicken from going to waste, it’s good for you, and it’s way better than store-bought. Cook up a chicken or two, and hang onto the bones and scraps.

IMG_1283

Ingredients:
1 chicken
2 stalks celery
2 medium onions, quartered
10 peppercorns
2 bay leaves
1 tbsp salt

How it’s made:
Combine the bones and any leftover scraps of meat in a large stock pot with the rest of the ingredients and cover with water. These ingredients are as written in Ball, but you can be a bit flexible in making broth – you could also use a carrot if you want, throw in some parsley or garlic, or if you prefer, just make straight bone broth with no added vegetables. Bring to a boil, then reduce to a simmer. Now, just wait. Occasionally taste the broth; leave it simmering until it reaches the desired strength of flavour. Typically, I let it simmer for the better part of a day.

IMG_1289 (1) copy

A second way to make chicken broth is in the crock pot, and I can’t believe I didn’t think of it myself. I recently purchased 100 Days of Real Food, which is a great book by the way, and in it Lisa has a recipe for overnight chick stock in the crock pot. Dang, why did I never think of that?! Typically, I make a chicken for dinner, chuck the bones and leftovers in the refrigerator, and make the broth the next day because I don’t want to leave my burner on while I sleep (especially on my current stove – don’t get me started). This method is just brilliant because you can leave it over night and deal with it the next morning.

IMG_5222 copy

The next morning it looks and tastes so delicious!

IMG_5230 copy

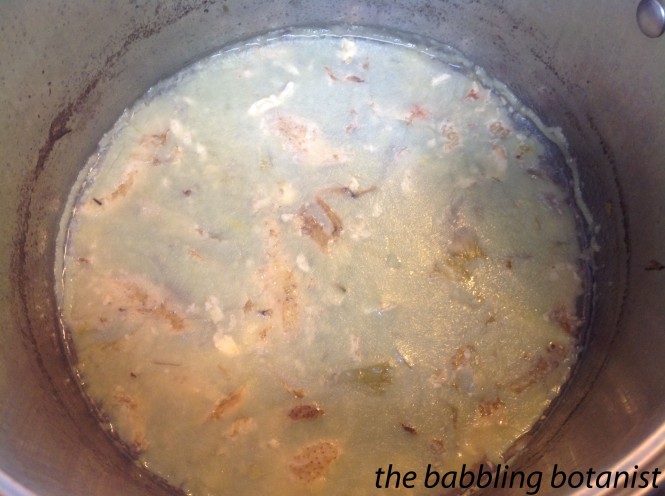
To remove some of the fat more easily, cool the broth in the refrigerator, and then skim off the fat.
IMG_1299 copy

Strain off the bones and vegetables.

IMG_5232 copy

Broth can be preserved either through canning or freezing. If freezing, simply place the broth in a freezer safe container, leave some head space for expansion when it freezes, and place it in the freezer.

If canning it, prepare your pressure canner, jars and lids, and reheat the broth to boiling. Fill the jars, leaving an inch head space. Wipe the rims, apply the lids, and tighten the bands finger tip tight. Place the jars in the canner containing three quarts of hot water.

IMG_1310 copy

As an aside, broth can vary in colour by what you have in it, how well you strain it, and how long you cook it, but it’s really just a matter or personal preference. I generally don’t strain it until it’s super clear (like though cheese cloth, just through a fine strainer), but if you want it nice and clear go for it.

IMG_5235 copy

With all the jars in the canner, lock the lid in place and bring the water to a boil. Once a steady stream of steam is coming out of the canner, time 10 minutes of vent time, and then place the weight on the vent pipe. Bring the pressure to 11 psi (sea level with a dial gauge canner). Process pints for 20 minutes and quarts for 25 minutes. At the end of the processing time, turn off the heat and wait for the pressure to drop completely. Remove the weight, wait 10 more minutes, remove the canner lid, and remove the jars to a hot pad or towel. Cool 12-24 hours, remove bands, check seals, wipe clean, label and store.

IMG_1311

Ta-da! Way better than store bought!

*this post contains affiliate links, please see the “About the Blogger” page for more information


Spicy Tomato Vegetable Soup

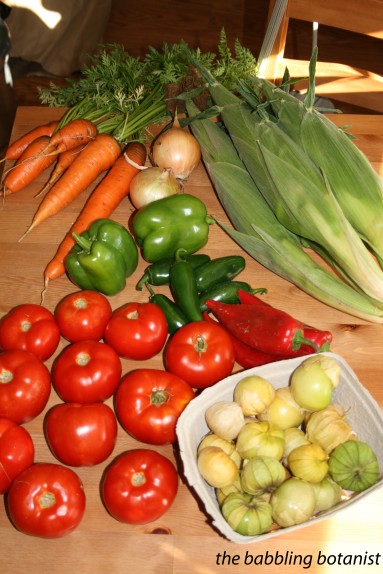
I first made this soup back in the pressure canning week of my Master Food Preserver class, and I could not wait until tomato season rolled around so I could stock up on this deliciousness. This soup is so good, and I just love that every ingredient is in season right now, which means every ingredient I either grew or picked within 10 miles of my house. That’s the best! This recipe is from So Easy to Preserve, which by the way is now out with its newest edition if you’re looking to get your hands on that. I just ordered a couple copies for myself and others. 🙂

IMG_4342 copy

Ingredients:
6 cups chopped tomatoes
2 cups chopped tomatillos
1 cup chopped onion
1 cup chopped carrots
1 cup chopped red bell pepper
1 cup chopped green pepper
1/2 cup chopped and seeded hot pepper
6 cups whole kernel corn, uncooked
2 tsp chili powder
1 tsp cayenne pepper
1 tsp black pepper
1 tsp salt
1 tbsp hot pepper sauce
5 cups tomato juice
2 cups water

Here’s how we made it:

Chop, chop, chop, and chop some more. But really, that’s basically all there is to it. When I made this recipe at home by myself I got a hand cramp from too much chopping, so invite a friend over for goodness sake. For the tomatoes, core, blanch and peel them before chopping. For the tomatillos, remove them from the husk, wash and chop them without peeling. For the onions and carrots just peel and wash them and chop them into soup sized pieces. Wash and seed the peppers and use gloves to cut up the hot ones. For the corn, either cut it off the cob and measure 6 cups, or use frozen corn.

IMG_2576 copy

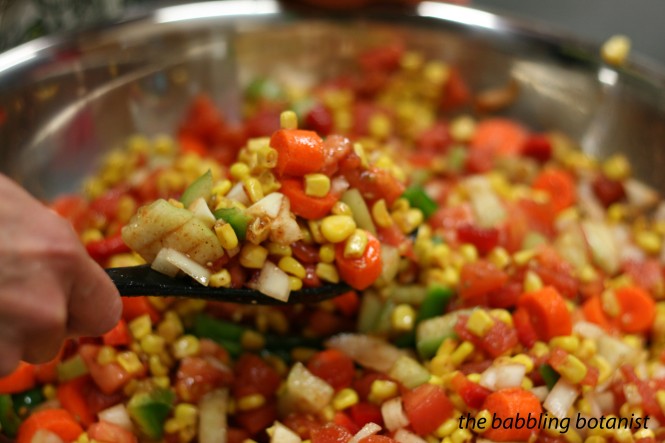
Combine all the veggies in a large stockpot. Add in the tomato juice, water, and all the seasonings. For the tomato juice, you can either make juice by pressing some tomatoes through a food strainer, or use store bought. I bet you can guess which one I prefer. I think that the ratio of solids to liquids in this soup is a bit off, so it could probably use more like 6 or 7 cups of tomato juice. And just to justify this, the reason I think it’s OK to adjust the recipe in this way is because these are the National Center’s soup recommendations. The processing is the same with whatever combo of foods you have, unless you add seafood, and they just say to cover with liquid. Plus, tomato juice is the most liquidy and most acidic ingredient in this recipe. Anyways, bring the soup to a boil, then reduce the heat and simmer for 15 minutes. While the soup is simmering, prepare your canner, jars and lids. This yields about 9 -10 pints of soup.

IMG_4346 copy

When it comes time to fill the hot jars, it’s important to follow these instructions for filling them to ensure safe processing. Using a slotted spoon, fill the jars about half full with solids. The head space for the soup is going to need to be a full inch, so when filling halfway, keep in mind that you should be filling it halfway to that point. After the jars are half full with solids, fill them with liquid, leaving an inch head space.

IMG_2621 copy

Such pretty jars.

IMG_2624 copy

Remove air bubbles, adjust head space, wipe rims, and apply the lids and bands, tightening to finger tip tight.  Place the jars in your pressure canner with 3 quarts of water and begin heating the canner. Once all the jars are in the canner, close and lock the lid and get the canner heated up. Once your canner starts to vent a steady stream of steam, continue to vent for 10 minutes. After the 10 minutes, apply the weight. Bring the canner up to 11 pounds of pressure (10 for weighted gauge; sea level). The processing time for this recipe is 60 minutes for pints or 75 minutes for quarts. Begin the timer once at or above the correct pressure, and maintain that pressure throughout the canning time. After the processing time is complete, turn off the burner and carefully remove the canner from the heat. Wait until the pressure is completely returned to zero and the safety nubbin thing drops. Remove the weight, wait 10 more minutes, and then remove the lid of the canner and remove your jars to a hot pad or towel.

IMG_2626 copy

While the jars can, eat any leftovers that you had.

IMG_2631 copy

Ta-da! Gorgeous soup. And so damn delicious. After 12-24 hours, remove the bands, check the seals, wipe clean, label and store. Then repeat a week later because this soup is super good.

IMG_2646 copy


*this post contains affiliate links, please see the “About the Blogger” page for more information
Master Food Preserver Class – Week 7

Week 7 of the Master Food Preserver class was a big old meat fest. We made jerky, smoked fish, pickled fish, and cooked up some summer sausage. This post will be the last in the Master Food Preserver series (I know, so sad), as week 8 was just our presentations and planning for the epic events of this summer. But don’t worry, there is still much more knowledge in that massive notebook of mine that I will continue to share with you all.

The first thing we did in class was make beef jerky. Beef jerky can be made safely at home, but there are just a couple of precautions that you need to take to ensure it is safe. The PNW 632  publication (click it for the link) is full of excellent information for making jerky, but I’ll give you the summary version here.

IMG_3664 copy

Bacterial contamination is a concern when making jerky, which is why it needs to be sufficiently heated to ensure any pathogens are destroyed. Three methods can be used to do this: post-drying heating, precooking the meat, and a vinegar soak. The post drying heating is perhaps the easiest, all you do is cook the jerky in the oven at 275F for 10 minutes after it is done. This is the method I tend to use. Preheating is done either by cooking the jerky strips in hot brine for about 1.5-2 minutes, which obviously doesn’t really work for ground meat jerky, or by cooking in the oven at 325F until an internal temperature of 160F (165F for poultry) is reached. You need a nice thin tipped thermometer for this. Lastly, soaking the meat in vinegar has been shown to be effective as well, but of course gives the jerky a very vinegary flavour. It’s also not been tested for game meats. And that’s basically all there is to it for safety. Jerky can be dried at the highest setting in a dehydrator (145-155F) or in an oven. But for the oven you really need to test if it can maintain those temperatures first.

Other notes about jerky:
– Yes, you can use other meats like poultry, fish and game meats.
– Just recently the recommendations have changed and it is okay to use ground meat, so long as you post dry heat it. Get the leanest meat possible, 93% lean or greater. The concern with ground meat is that the bacteria that could have been on the surface is distributed throughout by grinding, so use extra caution when making ground meat jerky.
A jerky gun can be useful for shaping ground meat into strips.
– To easily cut jerky from steaks, partially freeze it so you can cut even strips; aim for about  1/8-1/4 inch thick.
– To test for doneness, cool the jerky slightly and try bending it. If it bends and cracks it is done. You don’t want it to snap right in half or it’s over done but if it is bendy but still doesn’t really break it’s not done. Ya, it sounds a bit wishy washy, but you get the feel for it pretty quickly.
– When the jerky is done, condition it in a jar or other container, loosely packed. Conditioning basically just means they sit there for a couple says and equalize in moisture content. Shake it occasionally. If you see moisture collect in your container, they are not dry enough.
– Store jerky in a cool dark place. I like to just store it in a quart jar. It will keep for 2 weeks at room temperature, 3-6 months in the refrigerator, and up to a year in the freezer.
– Nom nom nom

IMG_3570 copy

The next thing we did for meat week was to learn about smoking fish. As with jerky, this can be done safely at home, but there are precautions you should follow to ensure a safe product. Additionally, products need to be refrigerated or frozen when made at home as a precaution, even though you can find commercial products that are safely stored at room temperature. This is due to us not being 100% certain of the salt and moisture content when making it at home. Canning your smoked fish is also an option.

If you want more information beyond what I provide here, the publication for this one is PNW 238 (again click for the link).

In summary:
– Smoked fish must reach an internal temperature of 150F (preferably 160F) and hold at that temperature for 30 minutes. This is important to kill bacteria such as Clostridium botulinum.
– Fish must be salted or brined, and since at home it is difficult to measure salt content, this is why as an added precaution the product must be refrigerated.
– Salt fish in a solution of 1 part table salt to 7 parts water, by volume. Brine for about an hour, although fatty or larger pieces of fish need 2 hours. Less fat = less brine time. Experiment with your fish – it should taste salty, but not unpleasantly so.
– After brining, fish is air dried until a pellicle (shiny, tacky skin) forms. This is usually at least 1 hour. After it forms it is ready to be smoked.
– Fish should be smoked then cooked. Smoke at 90F for up to 2 hours, then increase the temperature until the internal temperature of 150F is reached and maintained. This means the smoker temperature needs to be around 220-225F. If this cannot be achieved in your smoker, heat the fish in the oven after it’s smoked.
– Use hardwood for smoking, soft woods make unpleasant fish.
– If canning your smoked fish, just smoke the fish lightly, for up to 2 hours, then can immediately. Pints will need to be canned for 110 minutes. For full instructions follow the PNW 450 publication.
– Don’t store longer than 2 weeks in the fridge, freeze or can if you want to store it longer.

IMG_3572 copy

I wish this were full and I got to take it alllllllll home with me.

IMG_3573 copy

Mmmm smoked salmon. Makes me want to take a fishing trip to Alaska so badly!

IMG_3582 copy

Honestly, I didn’t even taste the pickled fish because it seemed gross, but I promise I will, so for now I’m just going to provide you that publication, PNW 183, because I can’t really claim any insight here.

The last and meatiest product we made was summer sausage. In contrast with jerky, for summer sausage you want fatty fatty fattiness. It tastes pretty good, but I have to admit that I was a little bit grossed out making it. Honestly I don’t think it’s something I will really try making at home, but it was interesting to learn about. The extension service publication that you can refer to is SP 50-735. My only real original thought on the subject, since this was the one and only time I’ve experienced homemade sausage, is that I preferred the texture when we cooked it in the oven, as opposed to a pressure cooker. Both tasted very similar, but it was the texture that I found I preferred. So, that’s all I really have to say on that…check out those sausages.

IMG_3577 copy

So! If you’re a meat lover, get out there and make some meaty meaty products!


*this post contains affiliate links, please see the “About the Blogger” page for more information
Master Food Preserver Class – Week 3

Week three of Master Food Preserver Class was all about preserving low acid foods. Which means pressure canning! A lot of people are scared of pressure canning, and there are a few things that I think you should have a healthy fear of  – like botulism, but done correctly there is no reason to be afraid of pressure canning. Your pressure canner is not going to explode or anything like that. Even if you accidentally over pressurized it, there is a little safety value that pops off. So ya, you could have a mess on your ceiling, but that’s also only if you really aren’t paying attention. So, I am here to give you some facts about canning, and hopefully dispel some of the pressure canning jitters.

A pressure canner is mandatory if you want to can anything with a pH of 4.6 or above. These low acid foods include any vegetables, meats and combo foods like soups. To toss in some pictures, here is my very first canning project – green beans!

https://thebabblingbotanist.files.wordpress.com/2014/05/b9e96-5fc91546f2a411e2816722000a1f93c3_7.jpg

When picking a pressure canner, there are a couple things to consider. For one, to safely heat the food, a pressure canner must be large enough to hold 4 quart jars minimum. Most are designed for 7 quarts, and the taller ones can fit two layers of pints. The one below is mine, a 23-quart presto. There are two types of pressure canners: weighted gauge and dial guage (dial pictured below). Dial gauges need to be tested every year for accuracy, and the dial replaced if it is off by more than two psi. Usually they stay accurate a long time unless they are bumped, or dropped or something, but you definitely want to check it every year. Your local extension office should be able to do it for you! Dial gauge canners never need to be tested, but only do 5, 10 and 15 psi, so if you need to adjust for altitude, you have to use the 15psi weight. I prefer the dial gauge just because I am a very visual person and like to be able to see that I am at the correct pressure. Some weighted gauge ones also have a dial though. With the weighted gauge you just listen for it venting every 15-20 seconds.

OK, so why do we need pressure canners anyways? Why can’t we just hot water bath can everything? The answer to this is basically one bacteria – Clostridium botulinum, which is the bacteria that produces the botulism toxin, causing severe neurological illness. C. botulinum thrives at pH 4.6-7.0, which is why anything with a pH above 4.6 must be pressure canned (for extra safety most recipes are desgined with 4.2 as the goal). Ideal growing conditions for C. botulinum are anaerobic conditions (without air), moist conditions, around room temperature, with the pH 4.6-7. These are the exact conditions created in a canning jar. However, there is a way to kill C. botulinum, and that is by bringing it to a temperature of 240 F and holding it there for a set amount of time. This cannot be achieved in a boiling water bath – water boils at 212 F.

Other facts about pressure canning:
– When pressure canning (actually any canning) follow safe, approved recipes, like from Ball, So Easy to Preserve, or the National Center for Home Food Preservation website
– Canning times differ for different products due to their texture, density and pH
– Canning at sea level is at 11 psi. Always adjust for your altitude.
– If your canner ever drops below 11 psi while canning, return to pressure and start the time over
– Don’t skip the 10 minute vent time. This vents cold air from the canner to ensure proper processing.
– Pack the jars as listed in the recipe. For example, use appropriate head space. Also, for soups you need to fill half with solids (no more) and top off with liquid.
– Never try to force a canner to cool, just let it cool naturally at room temperature until the safety plug drops. At that point, remove the weight, wait 10 more minutes, then it can be emptied.

OK, and on too the fun pictures. We did beans in class (two types) and a spicy tomato veggie soup. So delish. I’ll update this post with links to the recipes once I post them.

White beans ready to be heated.

IMG_2565 copy

Spooning the rehydrated beans into jars.

IMG_2601 copy

Small red beans.

IMG_2564 copy

With bacon!!

IMG_2587 copy

Most pressure canned items need 1 or 1.5 inch head space. This is below the bottom of the threading by a good centimetre.

IMG_2608 copy

Beans in syrup with bacon!

IMG_2613 copy

My group worked on the spicy tomato soup. SO GOOD! I need to make a giant batch of this when tomato season hits!

IMG_2576 copy

Half full of solids first, then you top off with liquid.

IMG_2624 copy

Eating the leftovers.

IMG_2631 copy

Sorry to taunt you with these pictures and not the full details, but the recipes are coming soon!

*this post contains affiliate links, please see the “About the Blogger” page for more information

Countin’ your cans… for bragging rights, and a purpose

OK, so it may seem like I’m just doing this post to brag about the abundance of goodies in my overflowing pantry, but I swear there is also a purpose beyond making you jealous of me. Why keep a tally of how much you can each year? Well I’ll tell you why. My first year canning, I discovered in February that I only had three jars of salsa left! THE HORROR! I couldn’t make more until August! I never should have shared that red gold with anyone; it is too delicious. So last year, I canned 82 pints of it. HA! That’s not even hyperbole – but, when I do salsa I go big with the batches and split it with a friend, so 40 or so of those went into my pantry. Point is, are 40 pints of salsa going to get me through until I can make more? So far so good! I’ll let you know if it lasts. So, to get to my point at last. Do you have any idea how many jars of something you eat in a year? Are you always kicking yourself come late winter saying, “I wish I canned more ____!!”? This year keep a tally with me. I promise it’s not a contest, but if it were I think I’d place pretty well 😉 Here’s my canning closet in early November, when the bulk of the real canning season was over.

canning closet
Here she is, the 2013 canning list, just shy of 500 jars

Jams – 95
16 half pints strawberry jam
17 half pints strawberry rhubarb jam
6 half pints raspberry jam
9 half pints blueberry jam
8 half pints fig strawberry jam
8 half pints apricot jam
8 pints strawberry Pinot noir jam
6 pints blackberry cinnamon tequila jam
17 pints spiced cranberry jam

Who in their right mind needs 95 jars of jam!? No one, absolutely no one! Now having said that, these make excellent gifts. 5 went to my nana for her birthday, many went to family members for Christmas, a few went as wedding presents etc. You can have too much jam, but you’ll never have it go to waste.

Pie Filling
11 quarts strawberry rhubarb pie filling
17 quarts blueberry pie filling

Ya eating 28 pies is a lot, but when you are scrambling two hours before a potluck wondering what the heck to bring, man will you be glad for home canned pie fillings.

Pickles and Relishes
28 pints pickles
7 pints pickled asparagus
14 pints pickled carrots
6 quarts pickled beets
8 pints spicy dilly beans
8 pints zesty zucchini relish

You can never have too many pickled goods. They make a good snack, a nice treat to bring to ladies wine night, or a great topping. And this is coming from someone who a few years ago would pick the pickles off her burgers at a restaurant.

Fruits and Fruit Juices
15 quarts peaches in syrup
7 pints applesauce
5 quarts cranberry juice
10 pints of strawberry lemonade concentrate

I need to get more into fruit things, this area is actually kind of lacking for me. But dang I really like making the juices, SO GOOD.

Tomato Products
82 pints salsa
10 pints salsa verde
29 pints tomato sauce
8 quarts crushed tomatoes
5 pints country western ketchup

My favourite category for sure – always can have more tomatoes!

Pressure Canning
14 pints beans
64 half pints tuna
10pints chicken stock
6 quarts pressure canned beets
20 half pints corn

Always great to have these things on hand for a quick meal!

Overall, I think I need to add more savoury to my sweet this year, but I’m pretty proud of this list! What canned goods do you always run out of first? Keep track with me this year so you can better gauge how much you eat, and how much to make of your favourites.

Pressure Canned Beets

Holy guacamole, I haven’t blogged in a month and now canning season is basically over! Although there are still things that can be done over the winter and ways to keep that canning fire burning. And I have a backlog of a couple other recipes I want to let you in on. But anyways, today’s post is about beets and a slight trauma I had while canning which shall be my excuse for this slight hiatus I took.

So! Pressure canning beets is a teensy bit time consuming, but I love beets so I thought I would give it a whirl. Step 1 is to select your beets and wash them. Now everyone will tell you to select the small beets because large ones can be fibrous, and don’t select the ones over 3 inches in diameter. Well, the farm stand near me was having an end of season blowout sale so you take what you can get. And I don’t discriminate, I love beets off all sizes, so don’t be a “beetist.” But I digress again, let’s can some beets.

20131212-190515.jpg

Step 2 is to trim the beets then boil them for 15-20 minutes “until the skins slip off easily.” Personally, I think step 2 is a sham. Trying to handle hot beets and slip their skins off turned my kitchen into what looked like a murder scene. I wish I had taken a photo for you. I guess they were a bit easier to peel, but I feel as though next time I’d prefer to peel and chop and then heat them even though everyone does the boiling whole. But I digress again. The moral of the story is you want your beets heated, pealed, and chopped in pieces. If you would like to change the order I feel like you should be allowed to do so.

While they are boiling it’s a good time to prepare the canner, jars, and lids. Add 3 quarts of water to your pressure canner and start heating it. Canning in quarts would be my recommendation, not a lot fit in a pint. In fact, I had pints prepared, and at the last second realized how little fit in them and swapped them out, but anyways…

20131212-190624.jpg

Chopped beets! The idea is you want a hot pack. So whichever order you did you want those beets still hot. Boil some clean water (i.e. not the water you boiled the beets in) to use to pack them in.

20131212-190745.jpg

Pack them into the jars, and cover with the boiling water. Leave an inch head space and be sure to remove the air bubbles between the beets. Wipe the rims, apply the lids, and tighten finger tip tight. Place the jars in the canner. Secure the canner lid, vent the canner for 10 minutes, then place the weight on the vent. Bring to 11 pounds of pressure and process 30 minutes for pints or 35 for quarts.

20131212-190905.jpg

Now it was at this point for me that tragedy struck! About 15 minutes into my canning time THE POWER WENT OUT! I was so upset. I may be canning to prepare for the apocalypse but it’s not supposed to come WHILE I am canning. OK I jest, maybe, but still I was very upset. So I lit some candles and angrily listened to the canner depressurize. It’s usually a lovely sound “yay they’re done,” but when you know they are not done it is a maddening sound! OK rant complete. So assuming your power did not also go out (it returned at 3am by the way, too little too late) you will turn off the heat after 35 minutes, let the pressure drop on its own, and remove the weight once the pressure is all the way down and the do-dad drops. Wait 5 more minutes, remove the lid and remove your beets to a hot pad or towel. Listen to the ping ping ping. After 12-24 hours when they have cooled, check the seals, remove the bands, label and store.

As a side note, below are my successful jars, done with different beets a few days later. Tune in for the next post for what I did with the failed pressure canned beets. As an additional side note, yes I put some in pints, I wanted to see how cute they’d look in blue jars. Meh, not as cute as expected but OK.

20131212-191117.jpg

Corn!

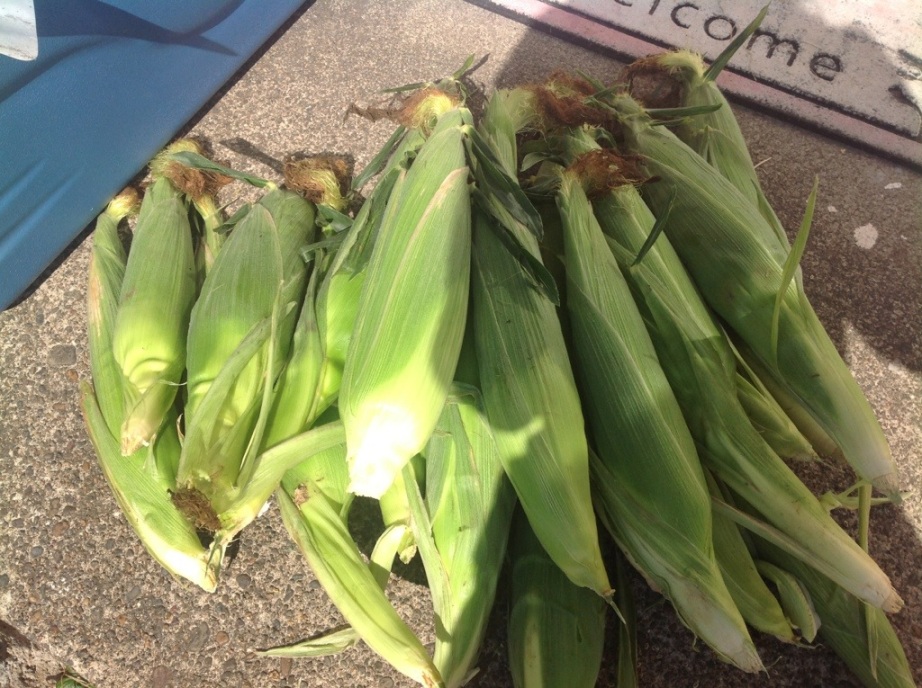
Some people have asked me, “Why would you bother canning corn, it’s 97 cents at the store?” To those people I say … Uh, shut up. But seriously, anything home canned is worth it. I know my canned corn was freshly picked, immediately canned and contains only corn and water. Plus corn was on sale at the farm stand for 20 cents so I got the 20 ears for $4. And I’m a canning addict. I also like that you can put it in any size jar you like (well within reason, not a half gallon). I just eat a bit at a time, so can in half pints, but if you eat a ton of corn it could be nice to open up a whole quart at a time.

20130915-154313.jpg

Canning corn is as easy as pie. Step one: husk the corn on the porch.

20130915-153205.jpg

Next wash the corn and cut the it off the cob – now I was going to use this nice little $2.99 tool pictured here, but it didn’t work that well and I also saw after buying it that it has that weird cancer warning on it that only California labels things with. Yaaaaaaa. So I just used a knife. Try to cut not quite to the cob, and remove any bad spots.

20130915-153232.jpg

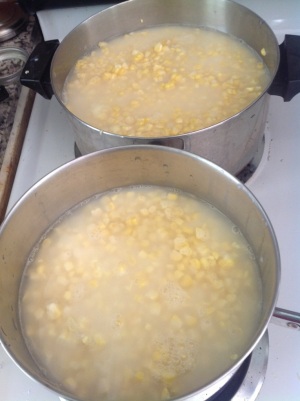
Blanch the corn for 3 minutes. Although when I reread my presto manual I think maybe I was supposed to blanch it on the cob? Meh, I dunno, makes no difference.

20130915-153345.jpg

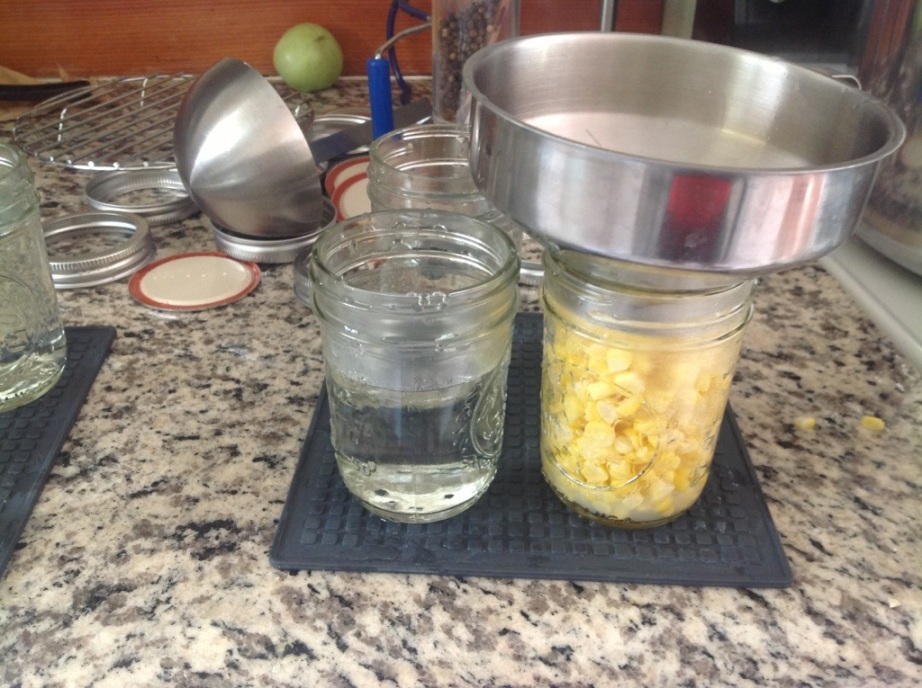
Meanwhile boil a pot of water to use to pour over the corn. Wash the jars and heat them (just leave them full of hot water after you wash them). Then fill the jars with corn (spoon it out with a slotted spoon). Add boiling water to cover the corn leaving an inch head space.

20130915-153428.jpg

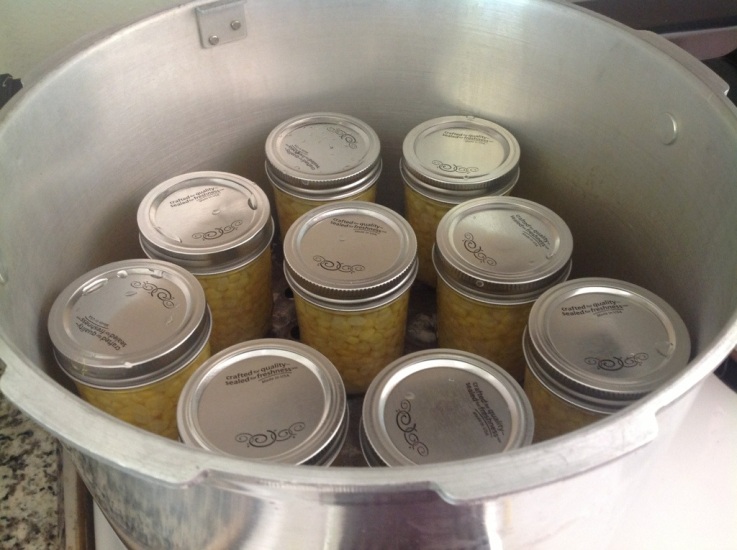
Debubble, wipe the rims, apply the warm lids and tighten the bands finger tip tight. Add 3 quarts of hot water to the canner and place the corn jars in the canner.

20130915-153457.jpg

Once all the jars are ready, close the lid and turn the heat on high. Vent the canner for 10 minutes before applying the weight. After the 10 minute vent period, place the weight on the vent. For a dial gauge canner like mine, bring to 11 pounds of pressure at sea level. Once at pressure process for 55 minutes for half pints or pints and 85 minutes for quarts. After the time is up, turn off the heat and allow the pressure to drop. After the pressure has dropped (and the safety do-hickey drops), remove the weight and wait 10 more minutes. Then remove the lid and the corns. ping ping ping ping!

20130915-153654.jpg

12-24 hours later check the seals, remove the bands and wipe down the jars. Label and store. Nom nom nom!

20130915-153956.jpg

Tuna Fest

Two weeks ago in canning class we canned Oregon Albacore Tuna. I got to take home one jar, as per usual. ONE JAR – that’s not going to get me through the winter! So it was time for a quest. Mama’s in town so I conned her into helping me process a bunch of tuna. We went to Newport and got three 20 pound fishies! 60 glorious pounds of Albacore Tuna. After filleting that worked out to about 34 pounds of meat.

20130912-210605.jpg

Here we go! Bringing home the tuna from the Chelsea Rose.

20130912-221817.jpg

The first thing we did was can as much as we could fit in my pressure canner – 24 half pints. Tuna needs to be pressure canned for 100 minutes, so you definitely want to do a full load. We filled the jars with raw tuna leaving about an inch head space. You can precook it first if you want, but that just seems silly when it cans for so long. Do you want your house to stink even more than it already will from the canning?

20130912-222145.jpg

It’s probably a good idea to wear gloves. Stinky stinky tuna. Stuffing the jars kinda made me want to vomit all over them, so I had to stop for a drink and make mama do a lot more while I worked on wiping rims and putting on the lids.

20130912-205016.jpg

When the jars are full you can add a little water if you want. We did in some of the jars but you don’t actually have to, just ensure you get as many of the air pockets out as possible.

20130912-201438.jpg

When the jars are full and debubbled to the best of your ability wipe the rims and apply the warm lids. This rim wiping is not just the regular wipe though, those rims are nasty! Use vinegar and many paper towels to get the oils off so that they will seal.

Add 3 quarts of water to the canner. Load it up, 2 layers of 12 (in a 23 quart canner). When stacking, either place a tray between the layers or stack the top layer jars so they are each resting on the rims of two jars.

20130912-201530.jpg

We did a second load in a 16 quart canner so used the wide mouth half pints so we could fit 16 – 8 per layer.

20130912-201600.jpg

Tuna needs to be canned for 100 minutes – that’s 1 hour and 40 minutes! HERE WE GO!

Close the lid. Turn the heat up to high and get the water boiling. Get a steady stream of steam venting and adjust the heat if necessary so it doesn’t get too vigourous. Vent for 10 minutes. After the 10 minutes of venting, place on the weight. Bring the canner to 11 pounds of pressure. Start the time when the pressure is reached. Watch carefully and maintain the pressure over 11 pounds for a full 100 minutes. REMEMBER if it drops below pressure for even a brief moment you MUST restart the time. So keep it over 11 – it sucks to have to start over. And test your pressure gauge every year! Yes I am yelling at you since this is my first pressure canning post and I want you to be safe.

20130912-201637.jpg

When the 100 minutes are up, turn off the heat and carefully remove the canner from the burner. Let the pressure drop completely on its own. After the little pressure button thing drops, remove the weight. Wait 10 more minutes, then remove the lid and the tuna jars. Listen to the PING PING PINGS!!!!

BAM 40 jars of tuna!

20130912-204615.jpg

After 12-24 hours when the jars are cool, remove the bands, check the seals and rinse the jars. There is going to be some nasty residue from the little bits on the outside of the jar so use soap and water to clean the jars. I ended up just chucking the bands since they were so nasty. In other nasty news, I have now washed the towels that we used for this endeavor 5 times and they still stink of tuna, so don’t use your favourite towels. If any one has good suggestions on getting out the stench please let me know.

Label, store and enjoy all winter! I am really excited to eat it, I swear, it’s just kind of a gross process so one needs a break before one starts eating the tuna.

20130912-204836.jpg

The tuna that was left after canning we froze in steaks. I think I will borrow my friends vacuum sealer to avoid freezer burn. Now we are set for winter! In terms of yield, it works out that you’ll need just over 10 pounds to fill 24 half pint jars. So we split this partially with a friend and froze just less than half of the tuna. Now go get some – once you do you’ll never go back to the 99 cent cans in the grocery store.

20130912-230628.jpg