We have recently ventured into the realm of homemade fruit wines and are love love loving it. However, I have learned at least one lesson the hard way, which of course I will share with you so you don’t make the same mistake. I hope you can learn from my dumbiness, and perhaps get excited by the prospect of making your own wines. I think it’s easier than you might expect. I’ve now posted the full instructions on how to make it, which can be found here.

Our first fruit wine was strawberry, pictured below. To make a gallon batch (of which we made two), we used about 4 pounds of berries, and placed them with the other ingredients into a gallon glass container. It seemed from the instructions that we were following from our local brew store like this was what they had in mind, but I think we were mistaken.

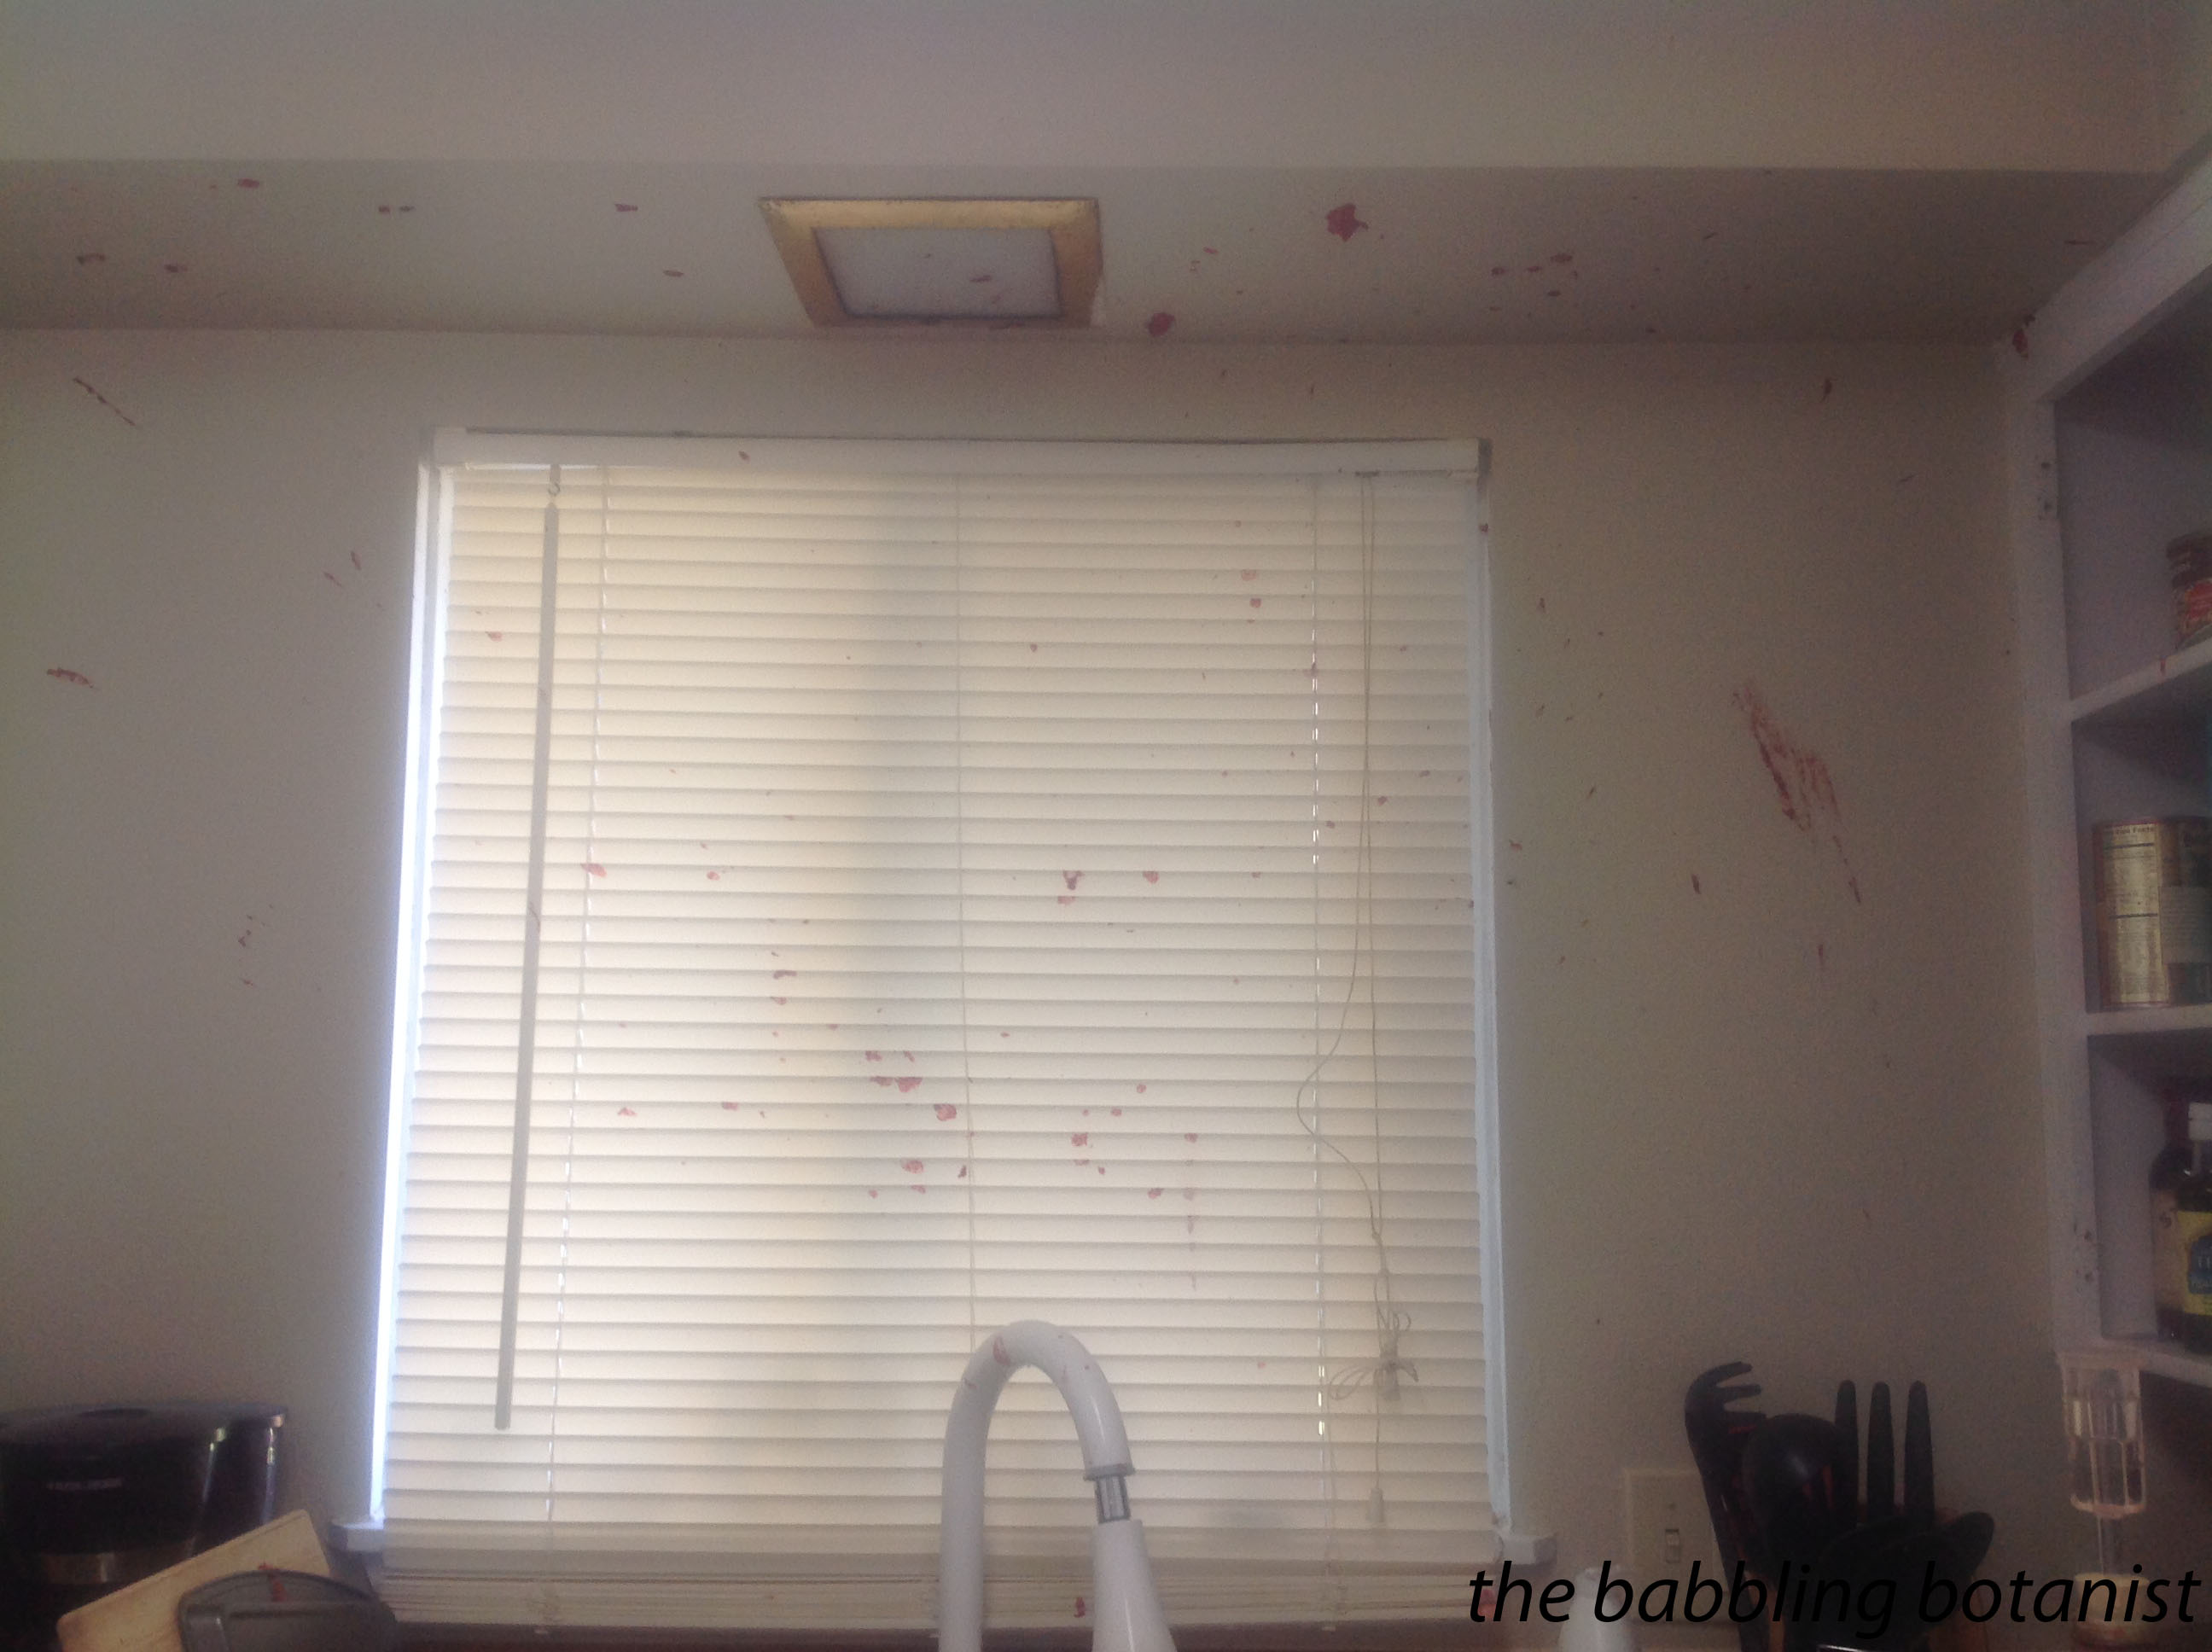
Now, I’m a scientist, and not an idiot (at least I thought not), so I’m not sure why I thought this would be just fine, but I did. The problem with making wine like this is that fermentation produces a lot of carbon dioxide bubbles. Especially in the first few days after pitching the yeast, and especially when there is a lot of added sugar, as with these. With a fruit wine, these bubbles get stuck below that mat of fruit floating at the top (called the cap)… pressure builds up… and… yaaaaa I think the photo below says it all (sorry it’s rather blurry). Narrow neck plus mat of fruit plus carbon dioxide equals kaboom! Strawberries on the ceiling. I noticed pressure was building up a bit, so I put them in the kitchen sink thinking that the pressure might cause the top to pop out, but I never expected it to happen with such force. Yes, that’s a whole strawberry on the ceiling. I wish I could say we were home for the incident, but we had to go to school, so sadly I am not sure how loud this was, or when it happened, but both of the corks were violently launched off the bottles and fruit chunks hit the ceiling. We did just top it off with water and still saved the wine (it actually still tastes surprisingly good), but it was time for plan B before attempting raspberry or blueberry, which were about to come into season.
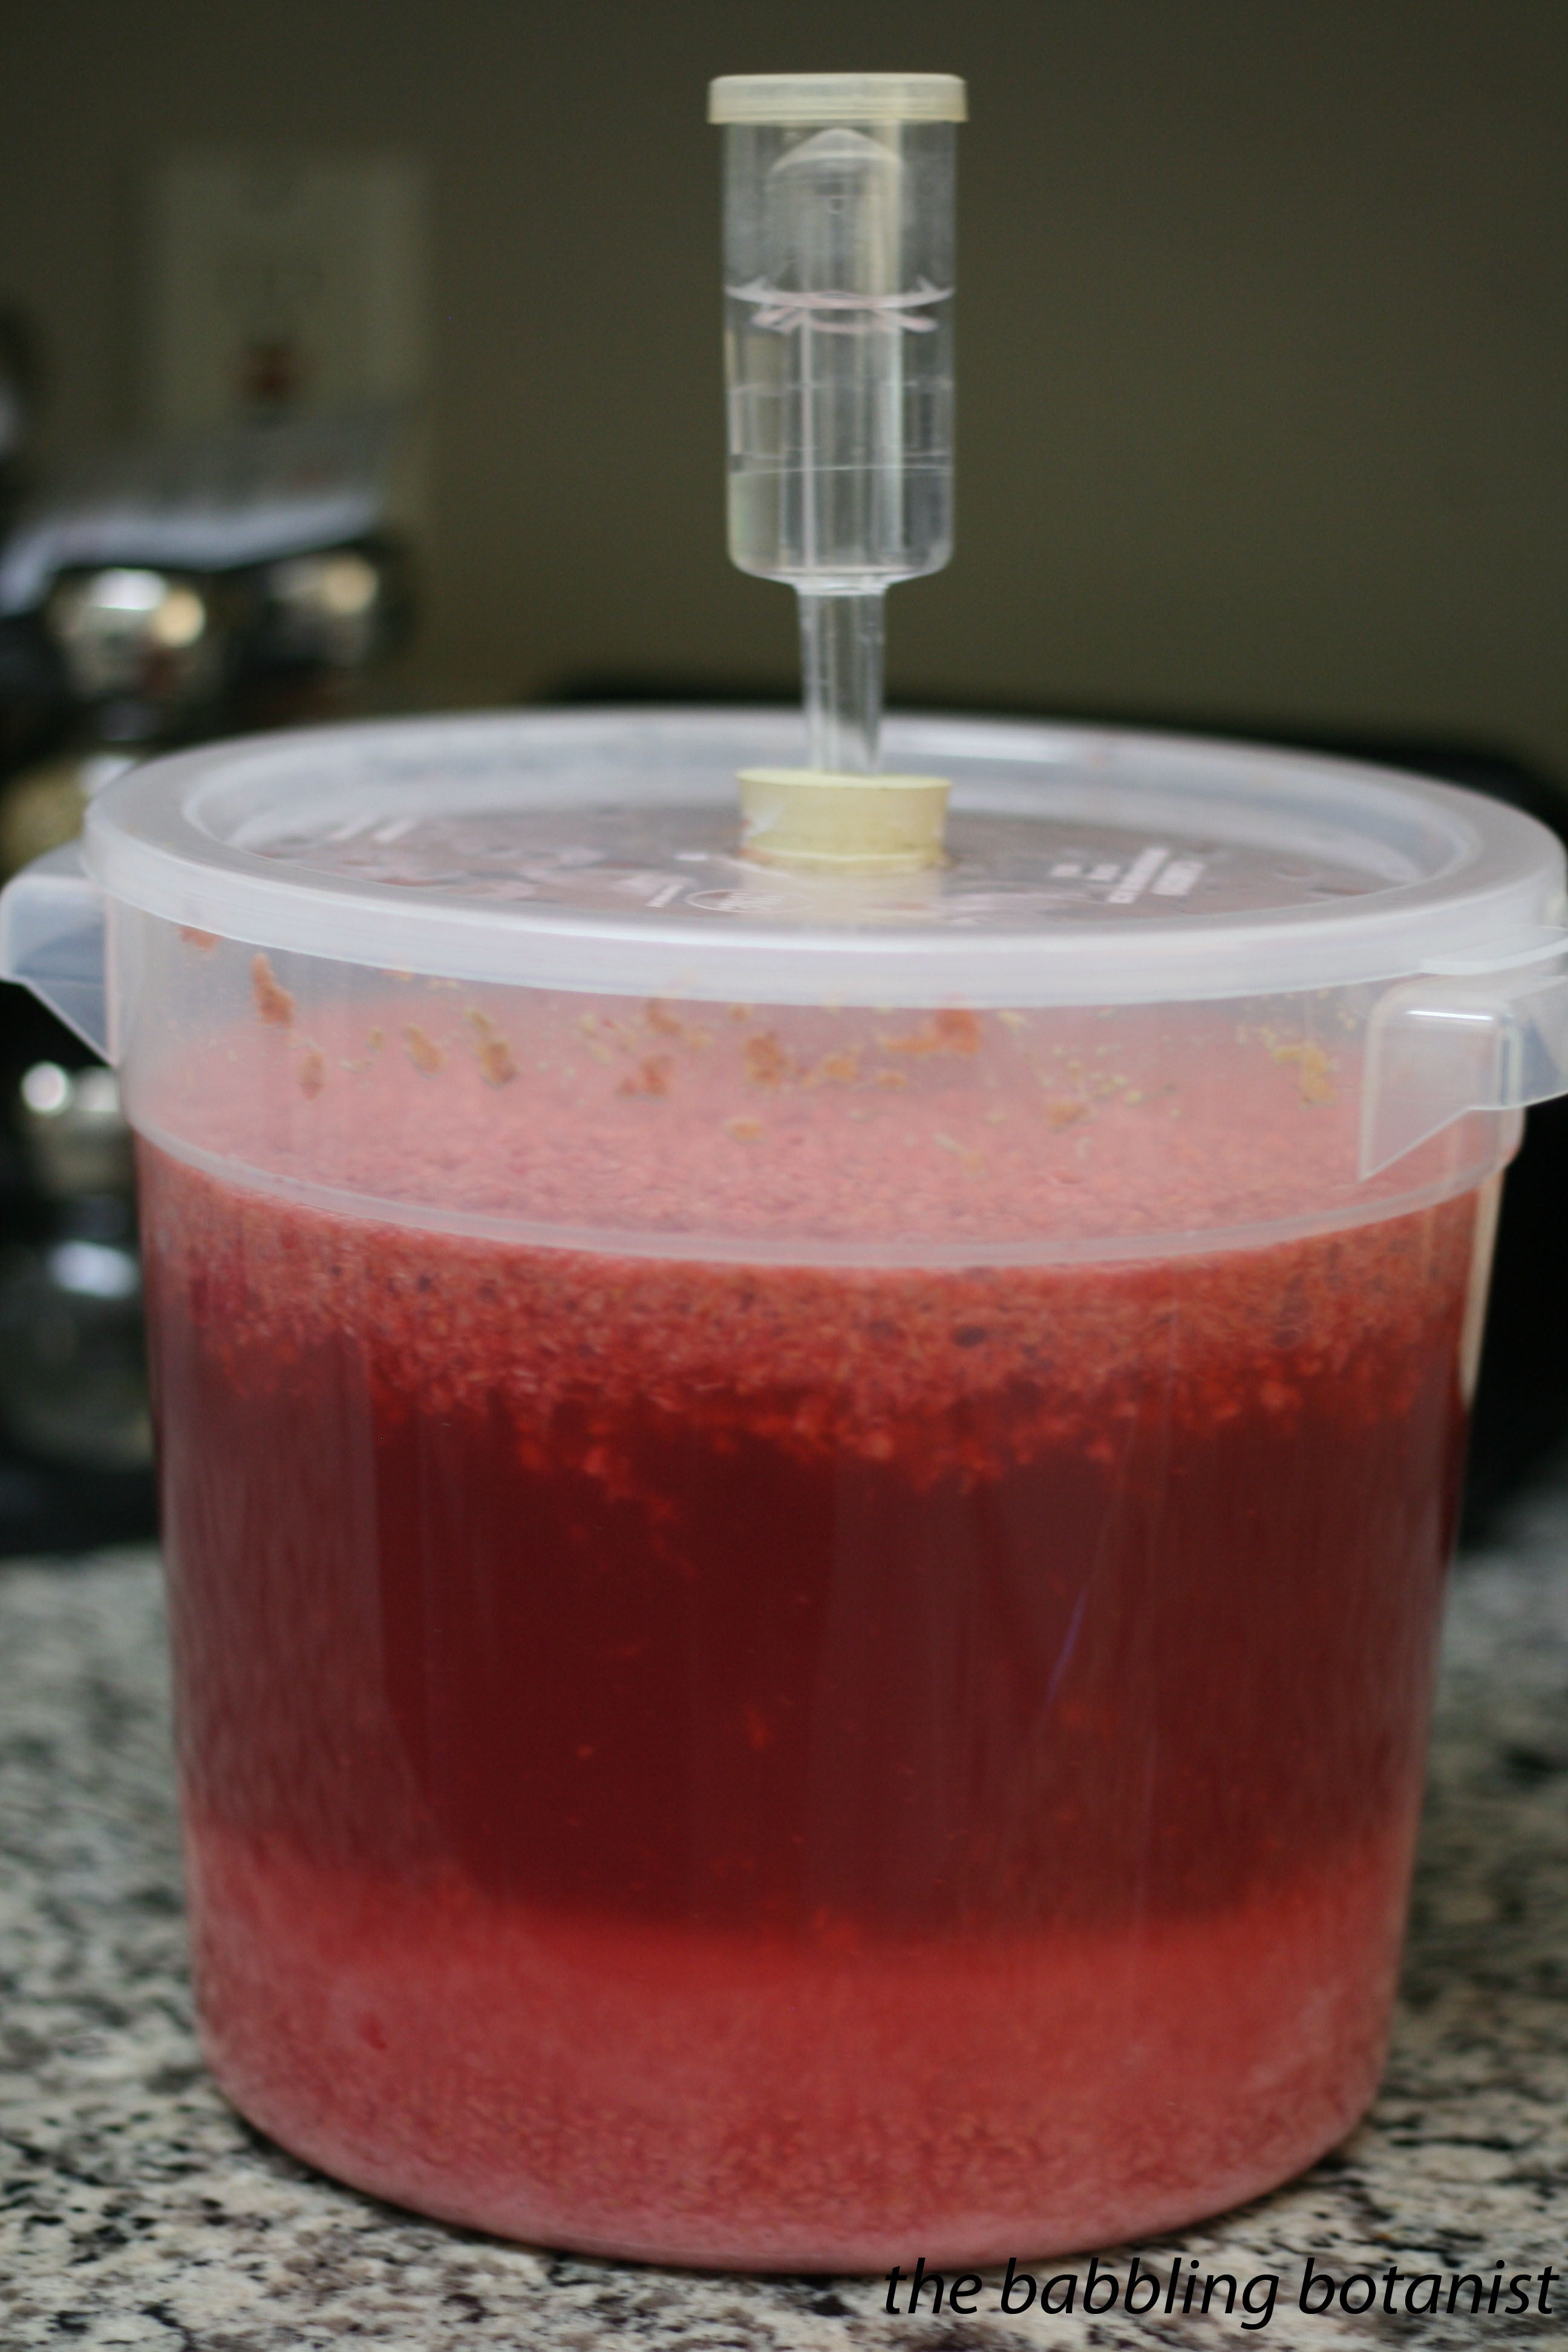
Enter the homemade primary fermenter. I bought these containers on amazon actually originally for making dough for bread. This is a whole other story, but I just bought these two books, Artisan Bread in 5 Minutes a Day and Healthy Breads in 5 Minutes a Day, and needed a 6 quart container for that. The one I saw came in a 2 pack, so I was inspired to use the second one to make a mini fermenter. It’s 1.5 gallons, so it’s perfect for filling it to the gallon mark, and leaving a 2 quart head space. If you just want to get them for brewing, this 8 quart version might be even better. All we did was drill a hole in the lid the size of the stopper we have. But as you can see we didn’t have the correct sized bit and kind of burned the edges of the hole to try and fix it and now have an oval, so it’s a bit sketchy, but with a little glue around the edges it’s now perfectly air tight! Really any food grade plastic tub with an air tight lid would work, get a 2 or 3 gallon one! Another thing I love about this one though is that it’s translucent so I can see the brewing in action.

Ta-da. Now brewing is a breeze! After about a week in the primary fermenter, we strain off the big chunks of fruit and age it in the gallon glass jugs, so you really would just need one or two little ones and multiple glass jugs if you wanted to have a number of things brewing at once. I think this is also great to have for trying out a small batch of a new beer, wine, whatever, of which you aren’t sure you want a full 5 gallons. I love these little batches, a gallon is about 5 regular bottles of wine, then we can decide to make more if we love what we’ve made. Not sure how other people do it, but this has been working great for us! Just don’t fill it too full or you will still get fruit sneaking into the stopper and airlock. Have you ever made fruit wine? What do you use?
*this post contains affiliate links, please see the “About the Blogger” page for more information


Awesome idea, cheers for the share 🙂
Sounds very yummy!!
[…] Want to make some homemade wine this summer? Check out this DIY fermenter set-up! […]
As a matter of fact: http://efrank5.wordpress.com/2014/01/02/homemade-wine/
Cheers, fellow wine-makers!
I’m surprised the brew store let you use the glass for the primary fermentation when using real fruit. When I learned to make wine we were taught to use a plastic bucket for the primary fermentation with headspace (kind of like you made) so if you were making 5 gallons, you used a 6 gallon bucket. After you racked it, then you put it in a glass carboy to finish off your secondary fermentation pre-bottling. The only time I ever used glass for primary fermentation was when we made wine from juice or juice concentrate so there were no particles which could jam up the neck/air lock.
That’s a fun experiment, you can buy juice concentrate like Welches then add sugar, yeast and water to make a quick gallon batch. It’s fun to try to non-traditional juice flavors.
You’re right Andi, the brew store would not have recommended it the way I did it, I was just a dummie and misunderstood, which is partially why I wanted to write this post, so others wouldn’t make the same error. Sorry that was quite the run on sentence. We do have a larger (8.5 gallon) primary fermenter that we use when we make are larger batches of wine or beer, then we rack it into 5 or 6 gallon glass secondary fermenters.
It sure is fun to try these new flavours, next up is blackberry and marionberry. Thanks for the comment!
Exact same thing happened to me. http://ithacork.wordpress.com/2009/08/20/strawblog-day-3-disaster-strikes/
Oh wow, I guess we both got to learn our lesson the hard way! 🙂
[…] a masher or spoon to stir with. For the dos and don’ts of what to use as a fermenter, head here. I made mine, and the reason for that was because I planned to do a bunch of small one gallon […]
When I’ve made fruit wines before, I’ve boiled all my fruit up to make a hot must. I then let it cool, sieved it and chucked it into glass demi-johns – never had any issues, and made some pretty good Elderberry port! I found it needed a good year to age appropriately in the secondary though, otherwise it was damn bitter.
[…] Want to make some homemade wine this summer? Check out this DIY fermenter set-up! […]