Sauerkraut

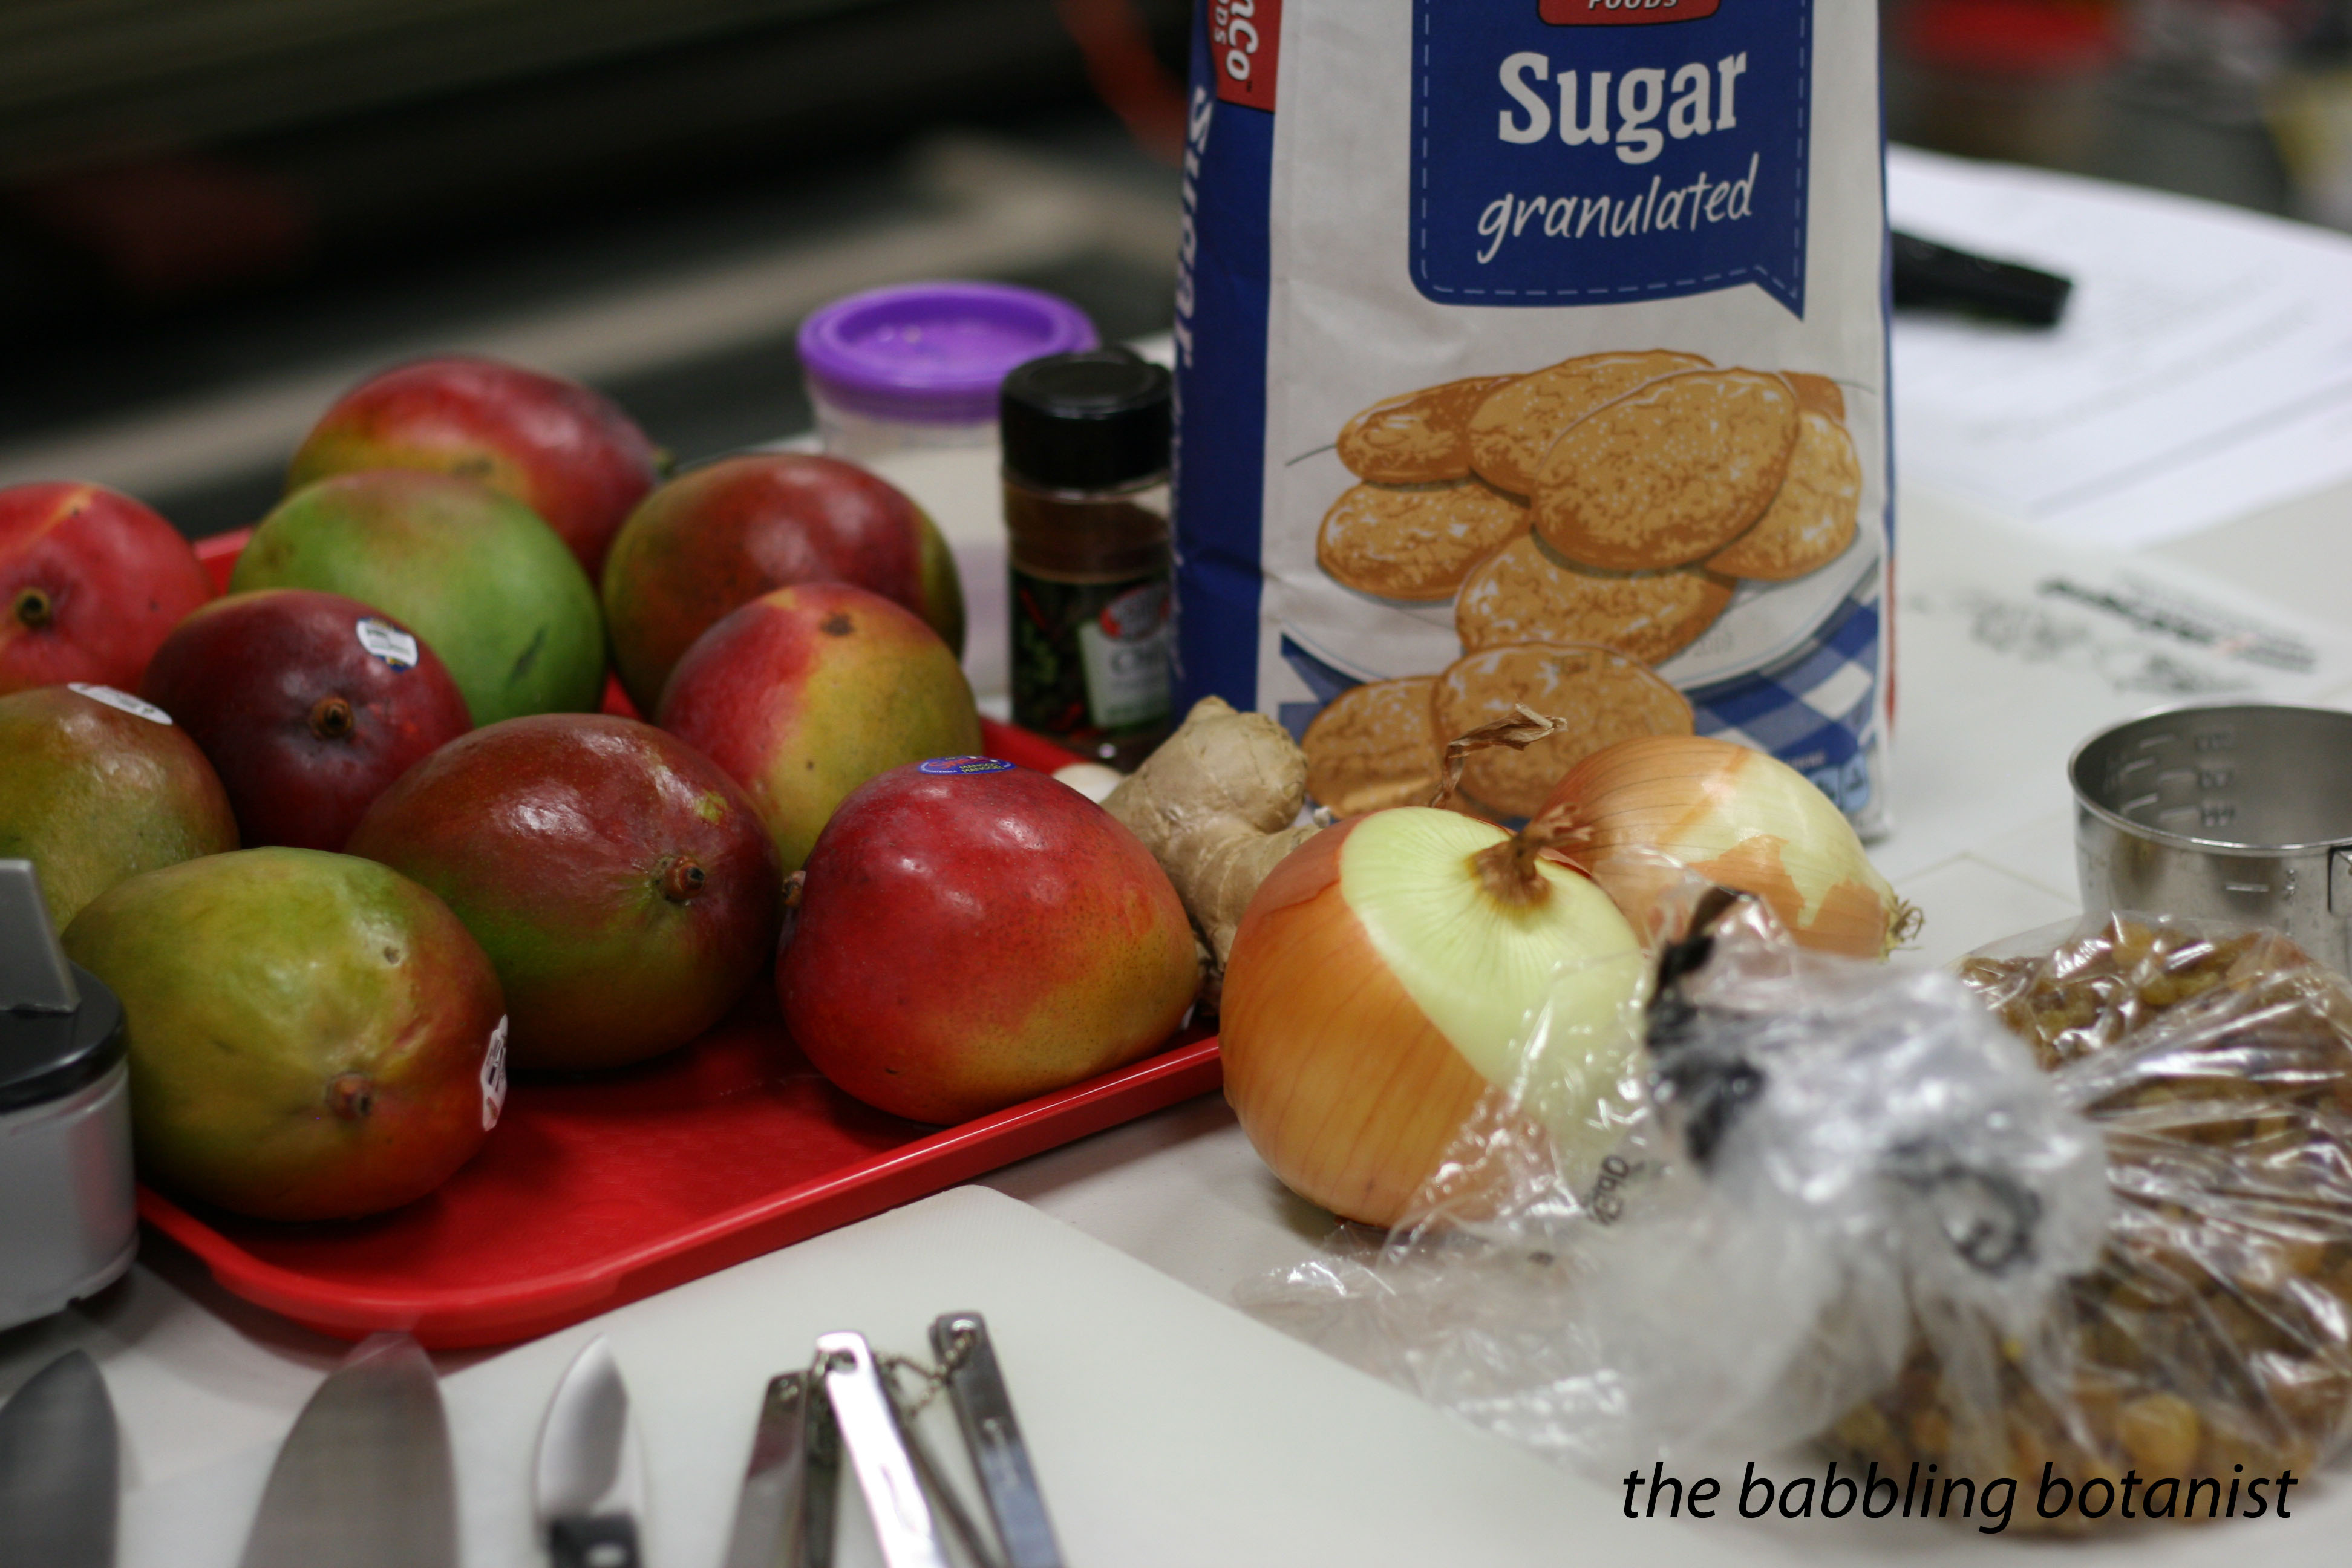
Sauerkraut is actually surprisingly easy to make, as it turns out. All you need is cabbage, pickling/canning salt, and a little bit of patience.

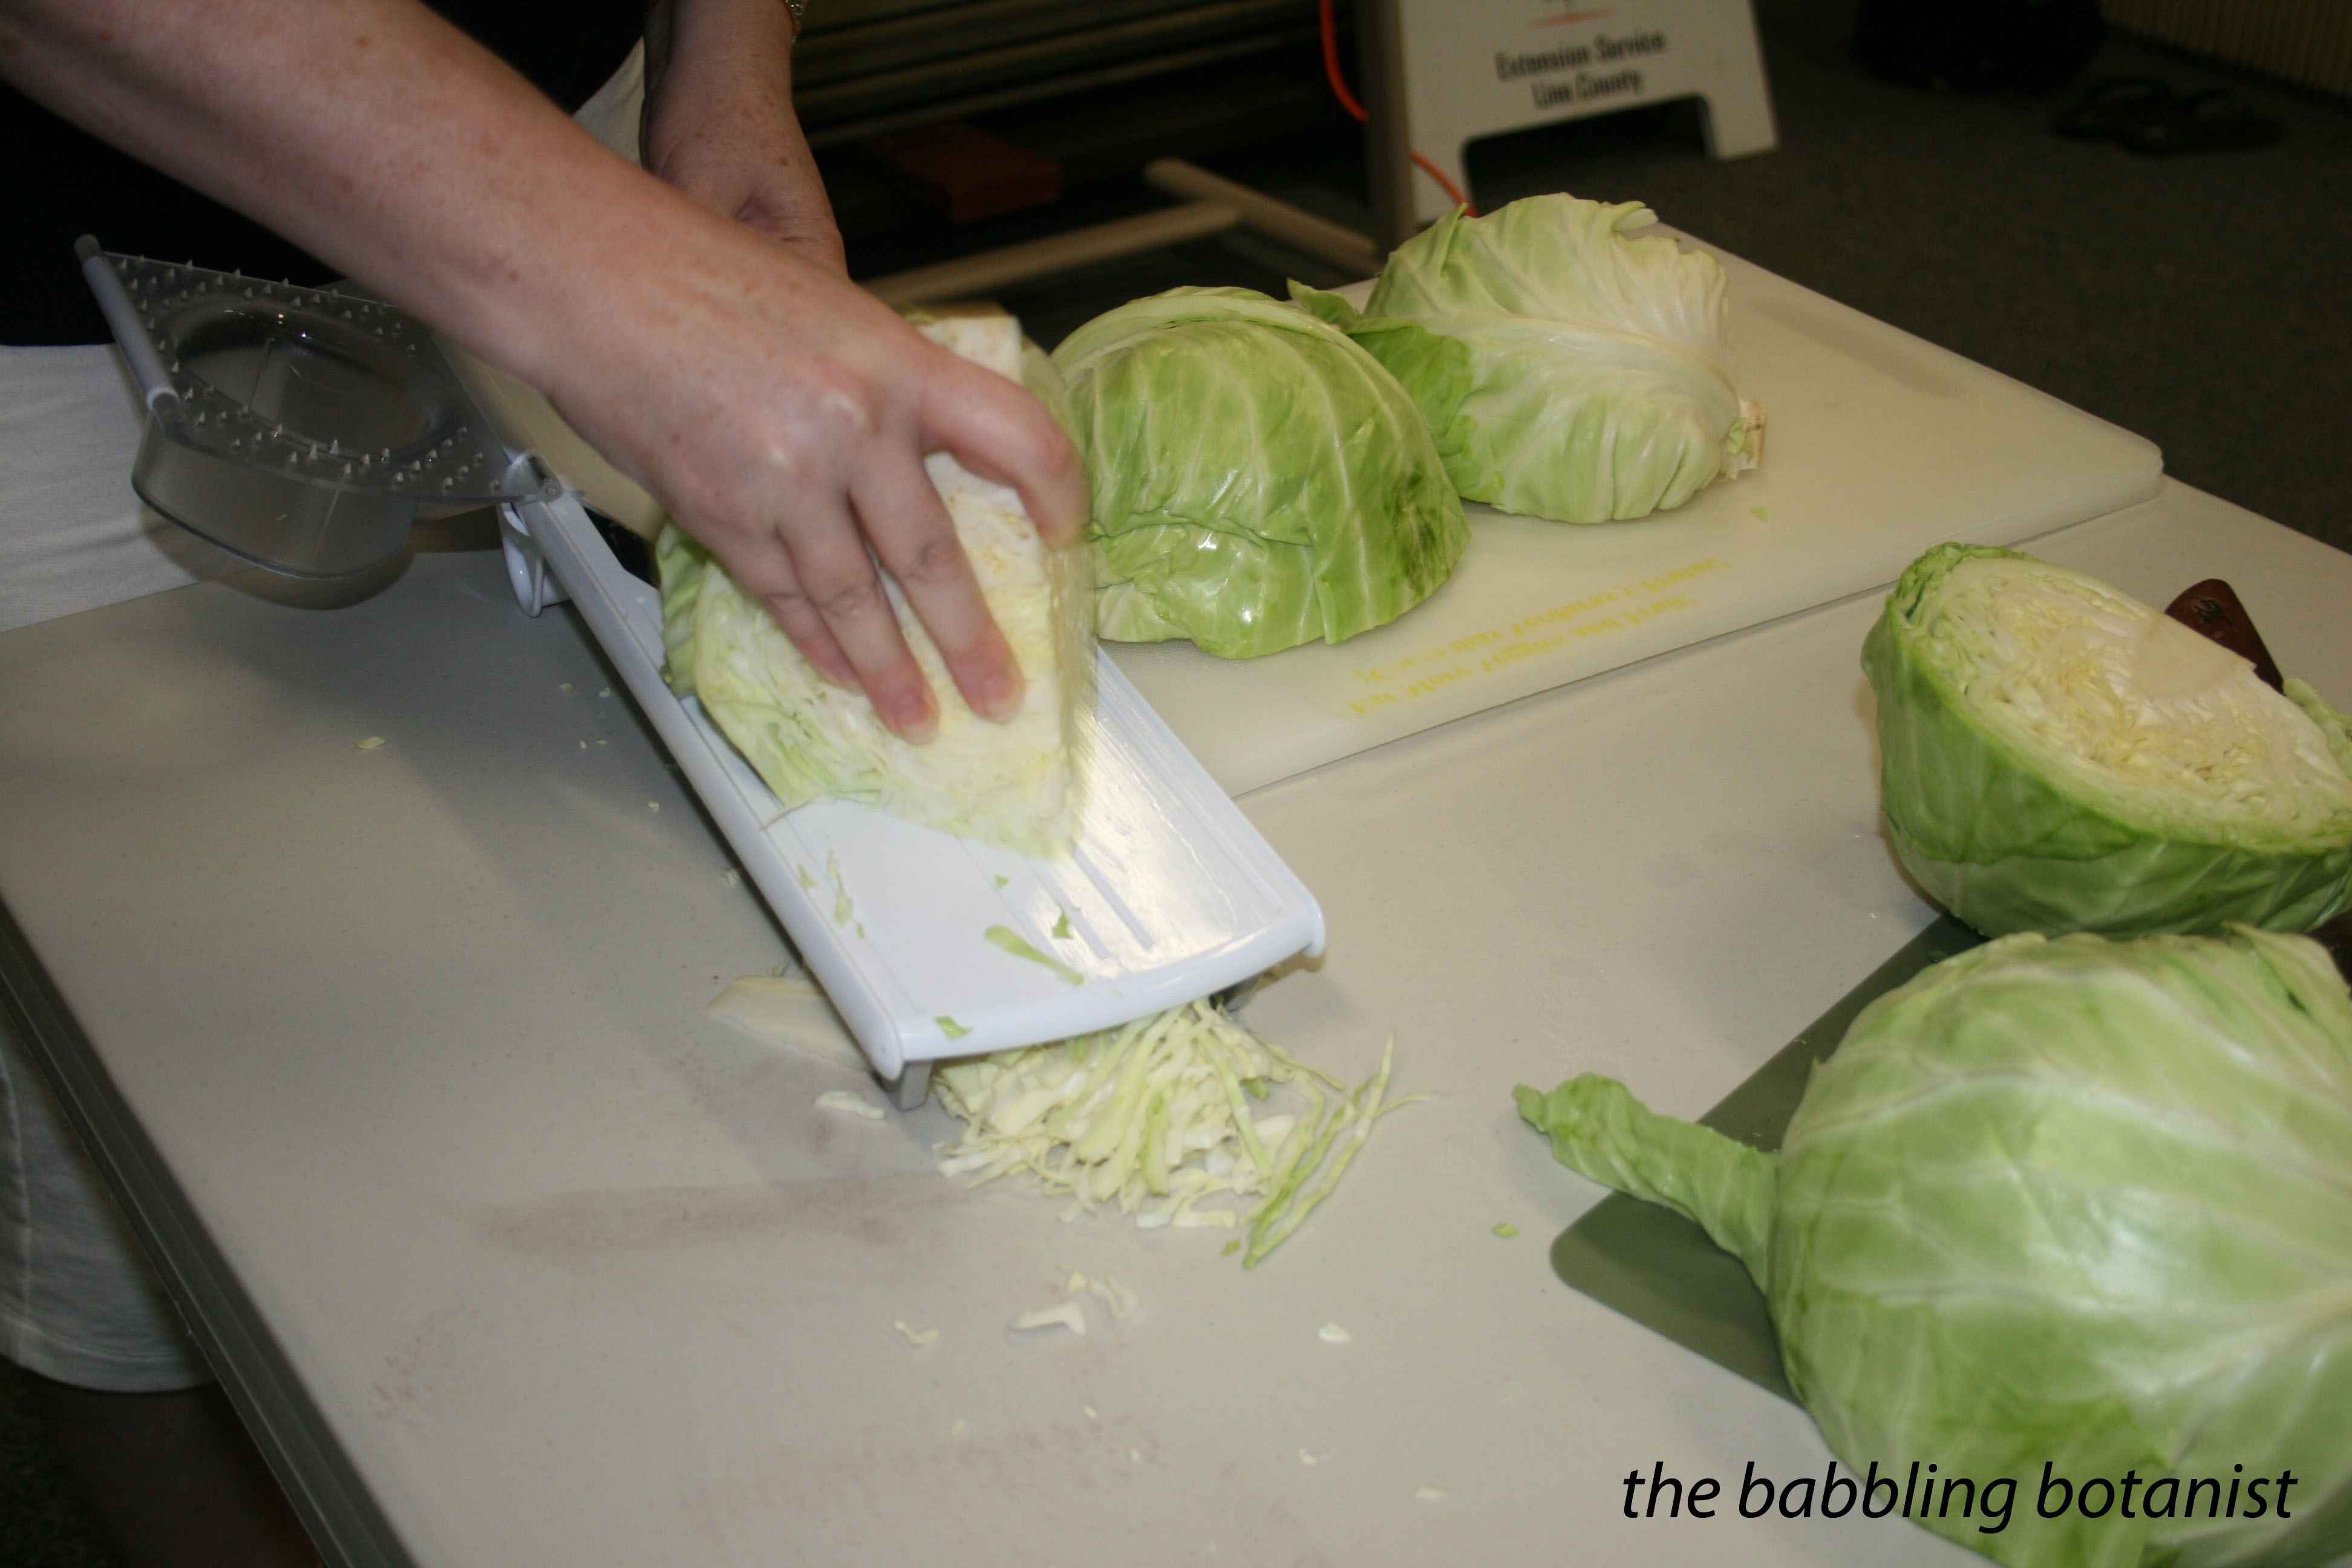
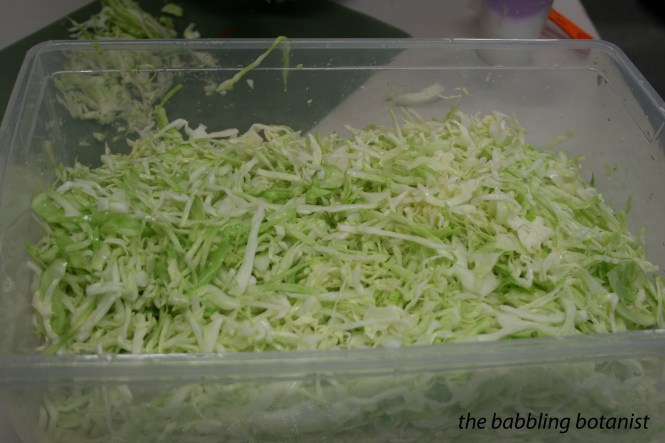
The first thing you need to do is prepare the cabbage. Wash it, remove the outer leaves, cut it in 4 and shred it. This can be done either by chopping it by hand, in a food processor, or with a mandolin.

IMG_2103 copy

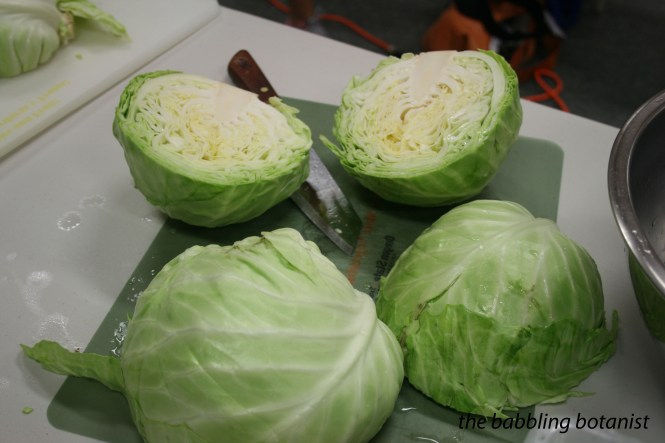
If you are doing it by hand it is a little harder to get nice even shreds, which is why I really liked using the mandolin for this purpose. Plus it gets to be a crazy cabbagey mess pretty fast.

IMG_2101 copy

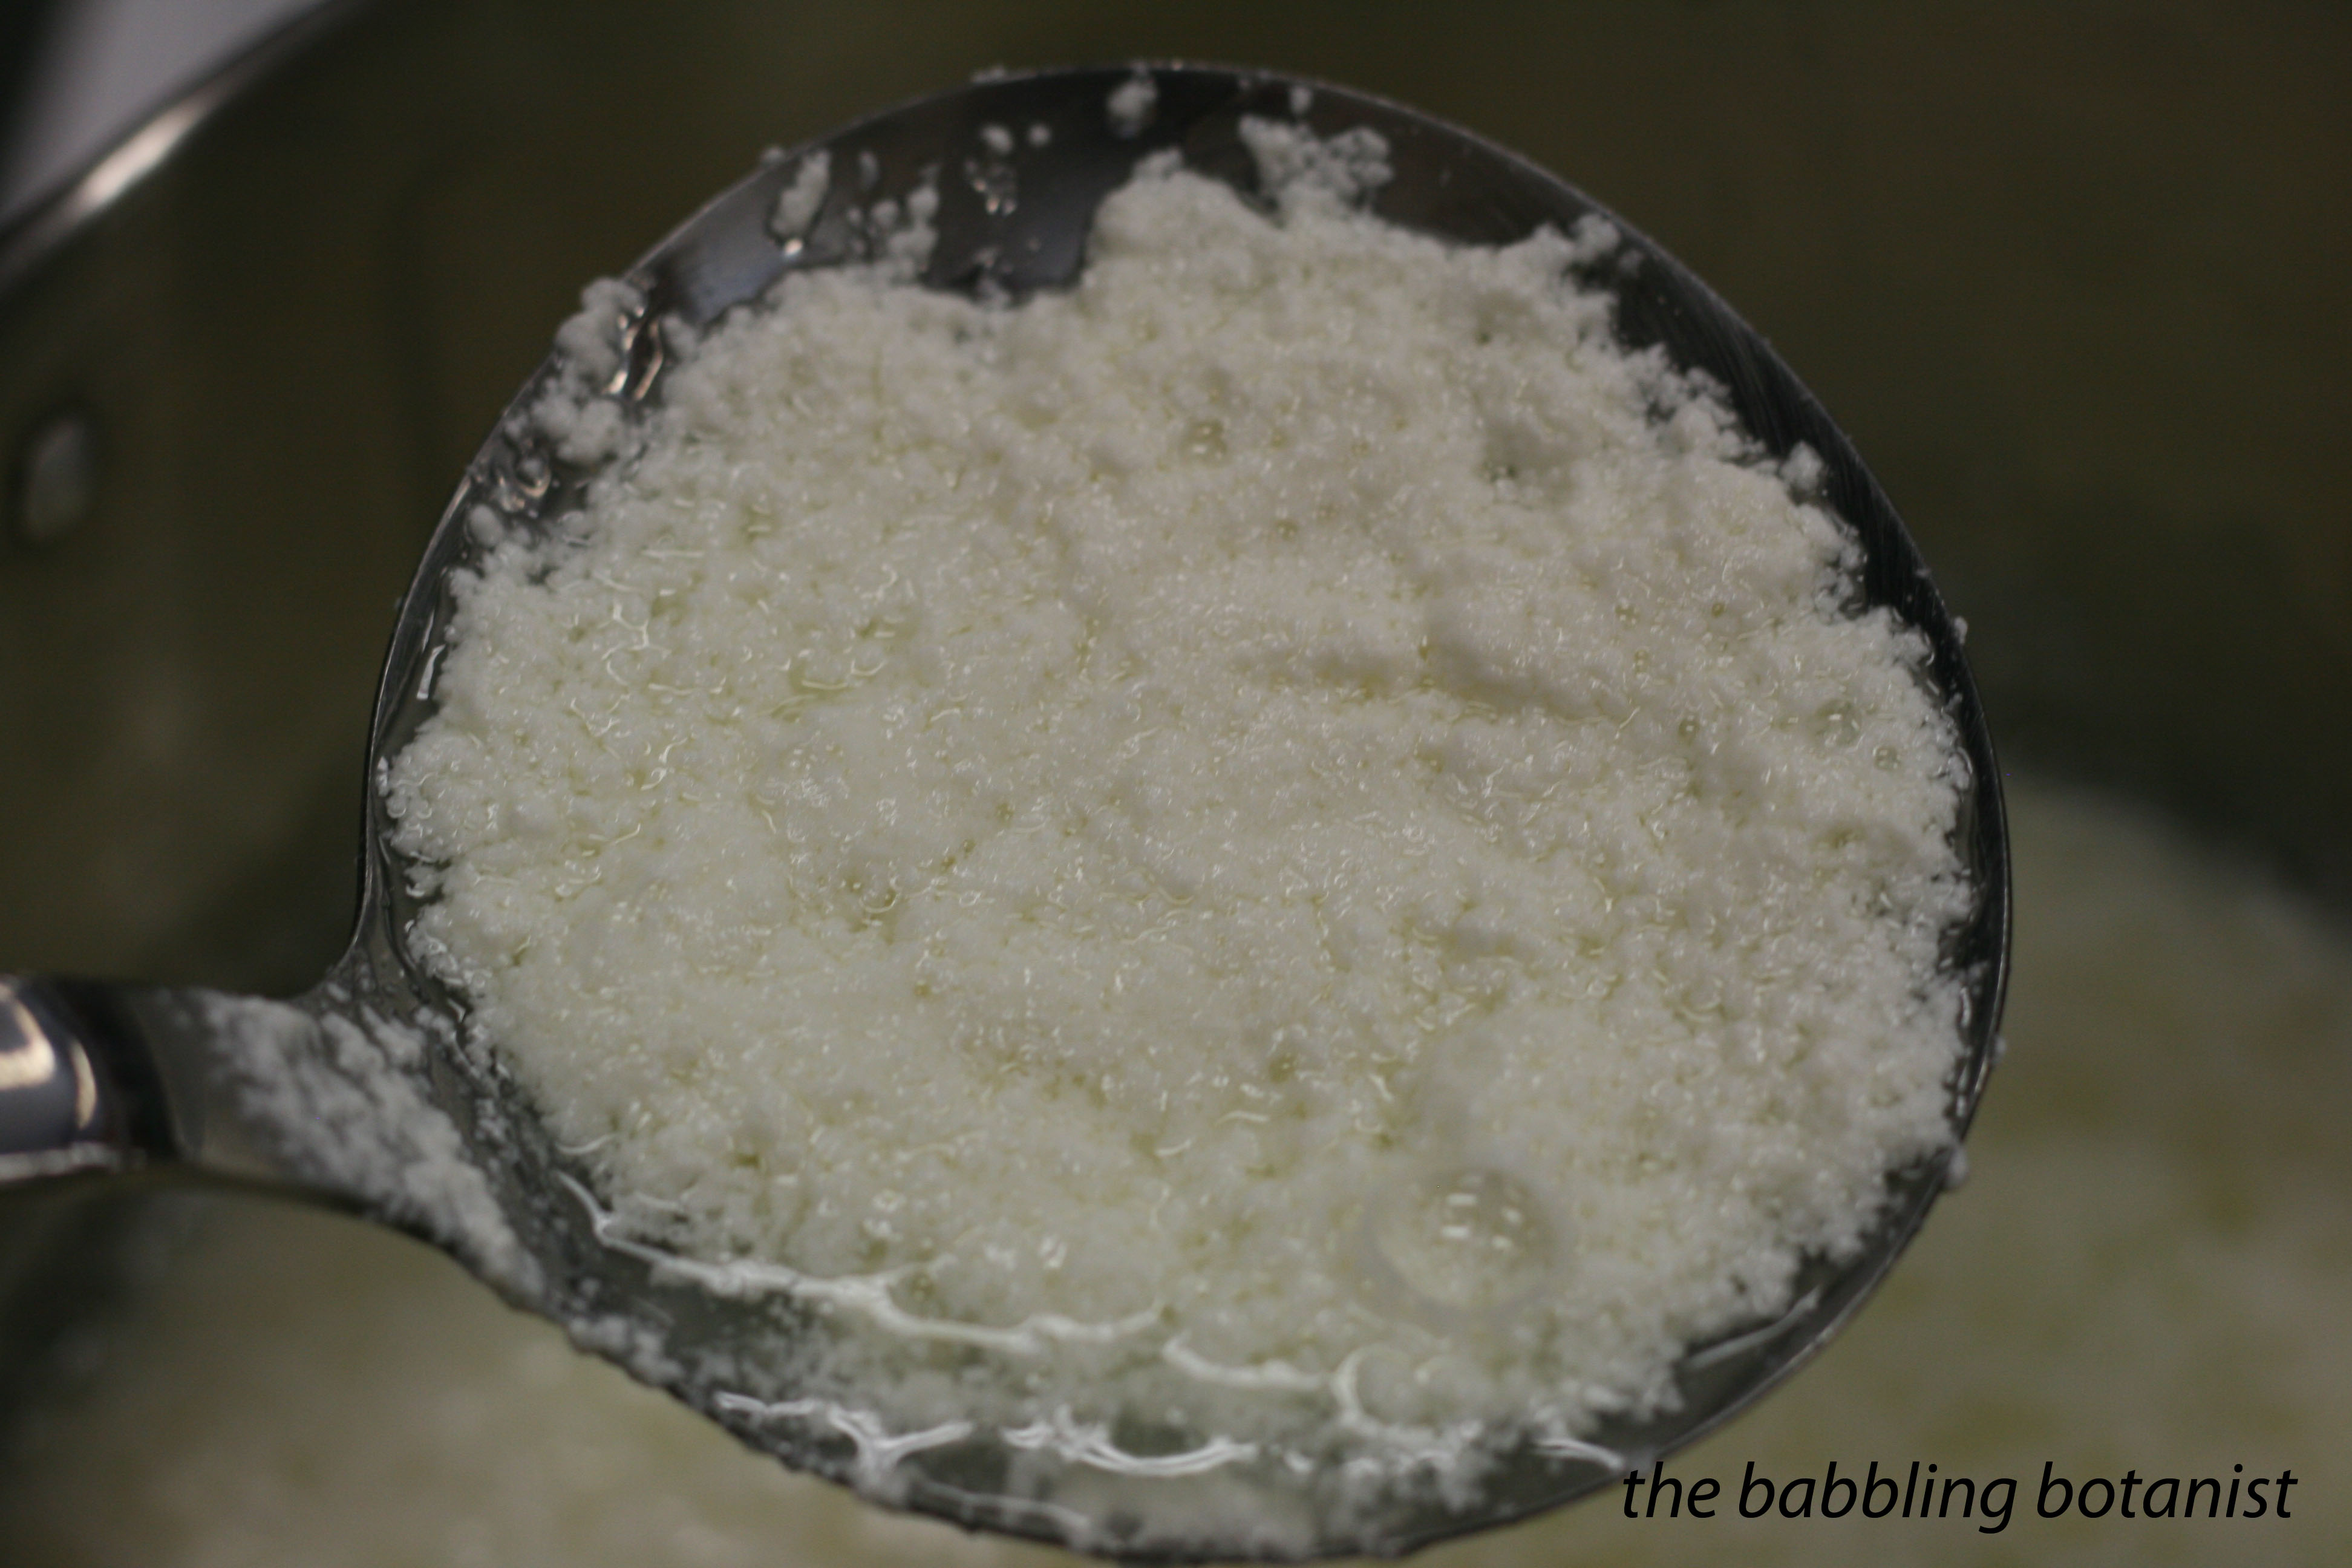
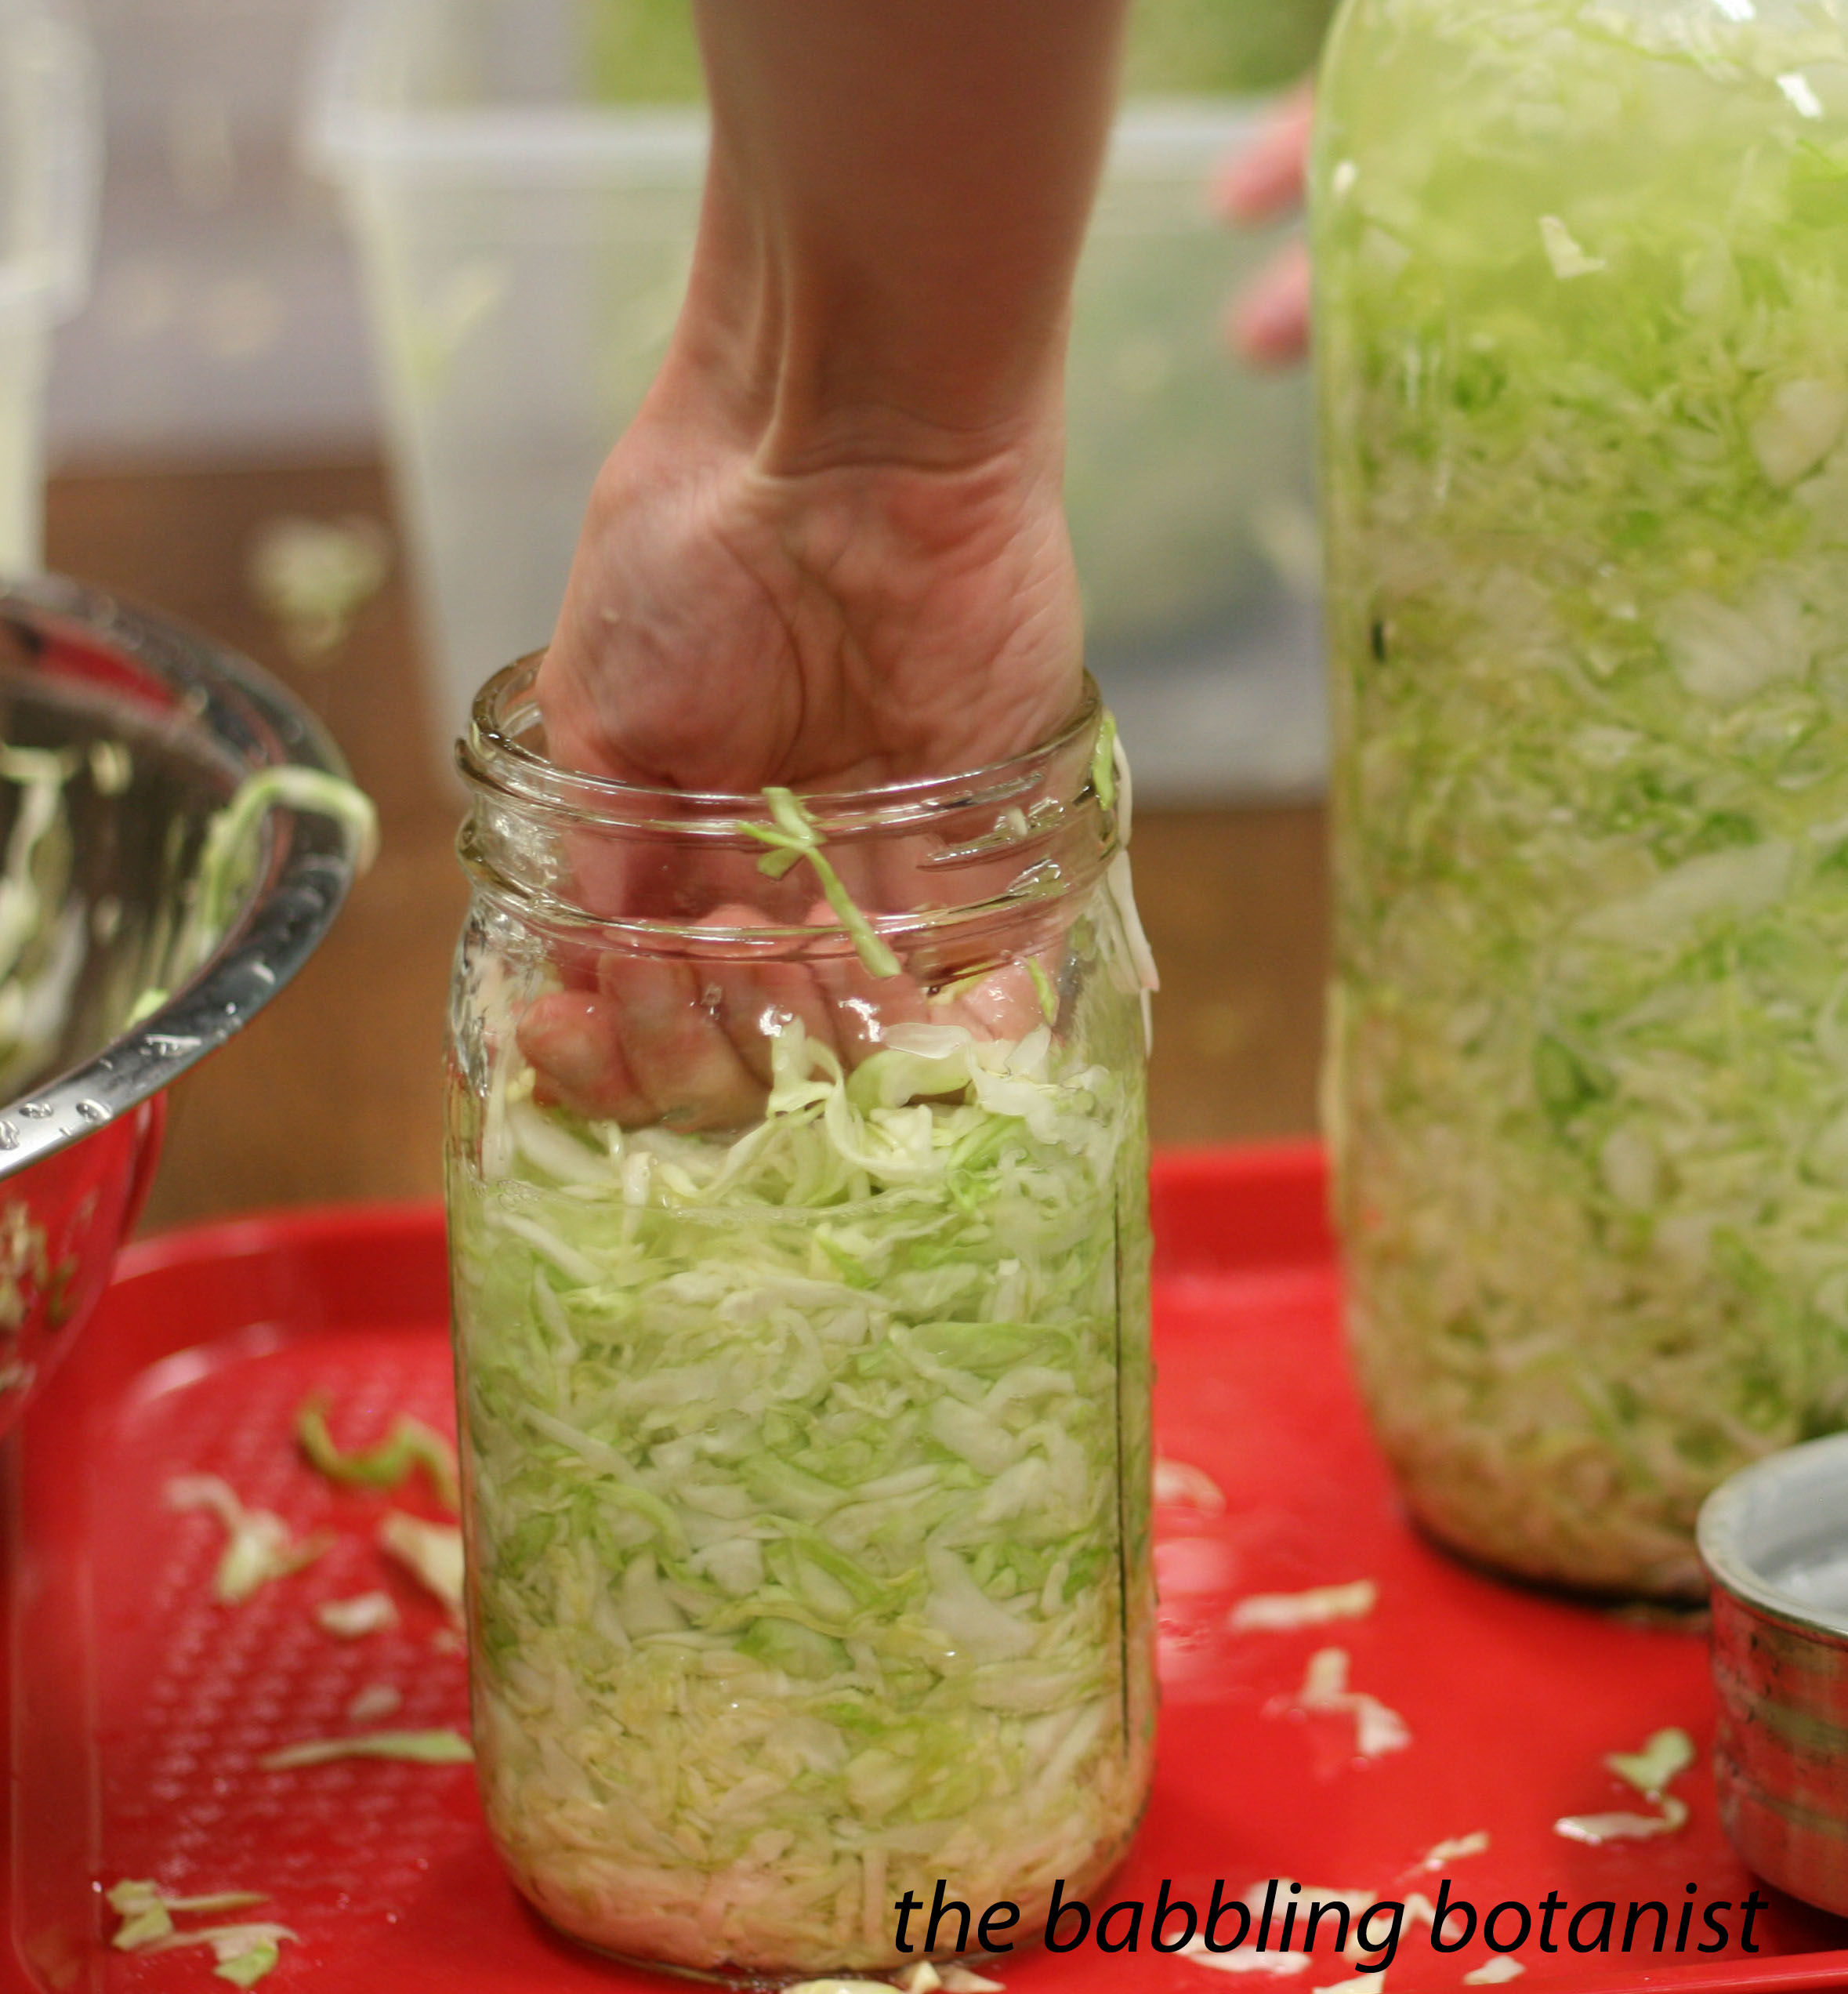
In clean and sterilized container, combine 5 pounds of cabbage with 3 tablespoons of salt. Sprinkle the salt evenly over the cabbage, and with clear hands mix it in well. Leave it until it starts to wilt, and release its juices. At the very least 15 minutes. Don’t reduce the salt in the recipe.

IMG_2104 copy

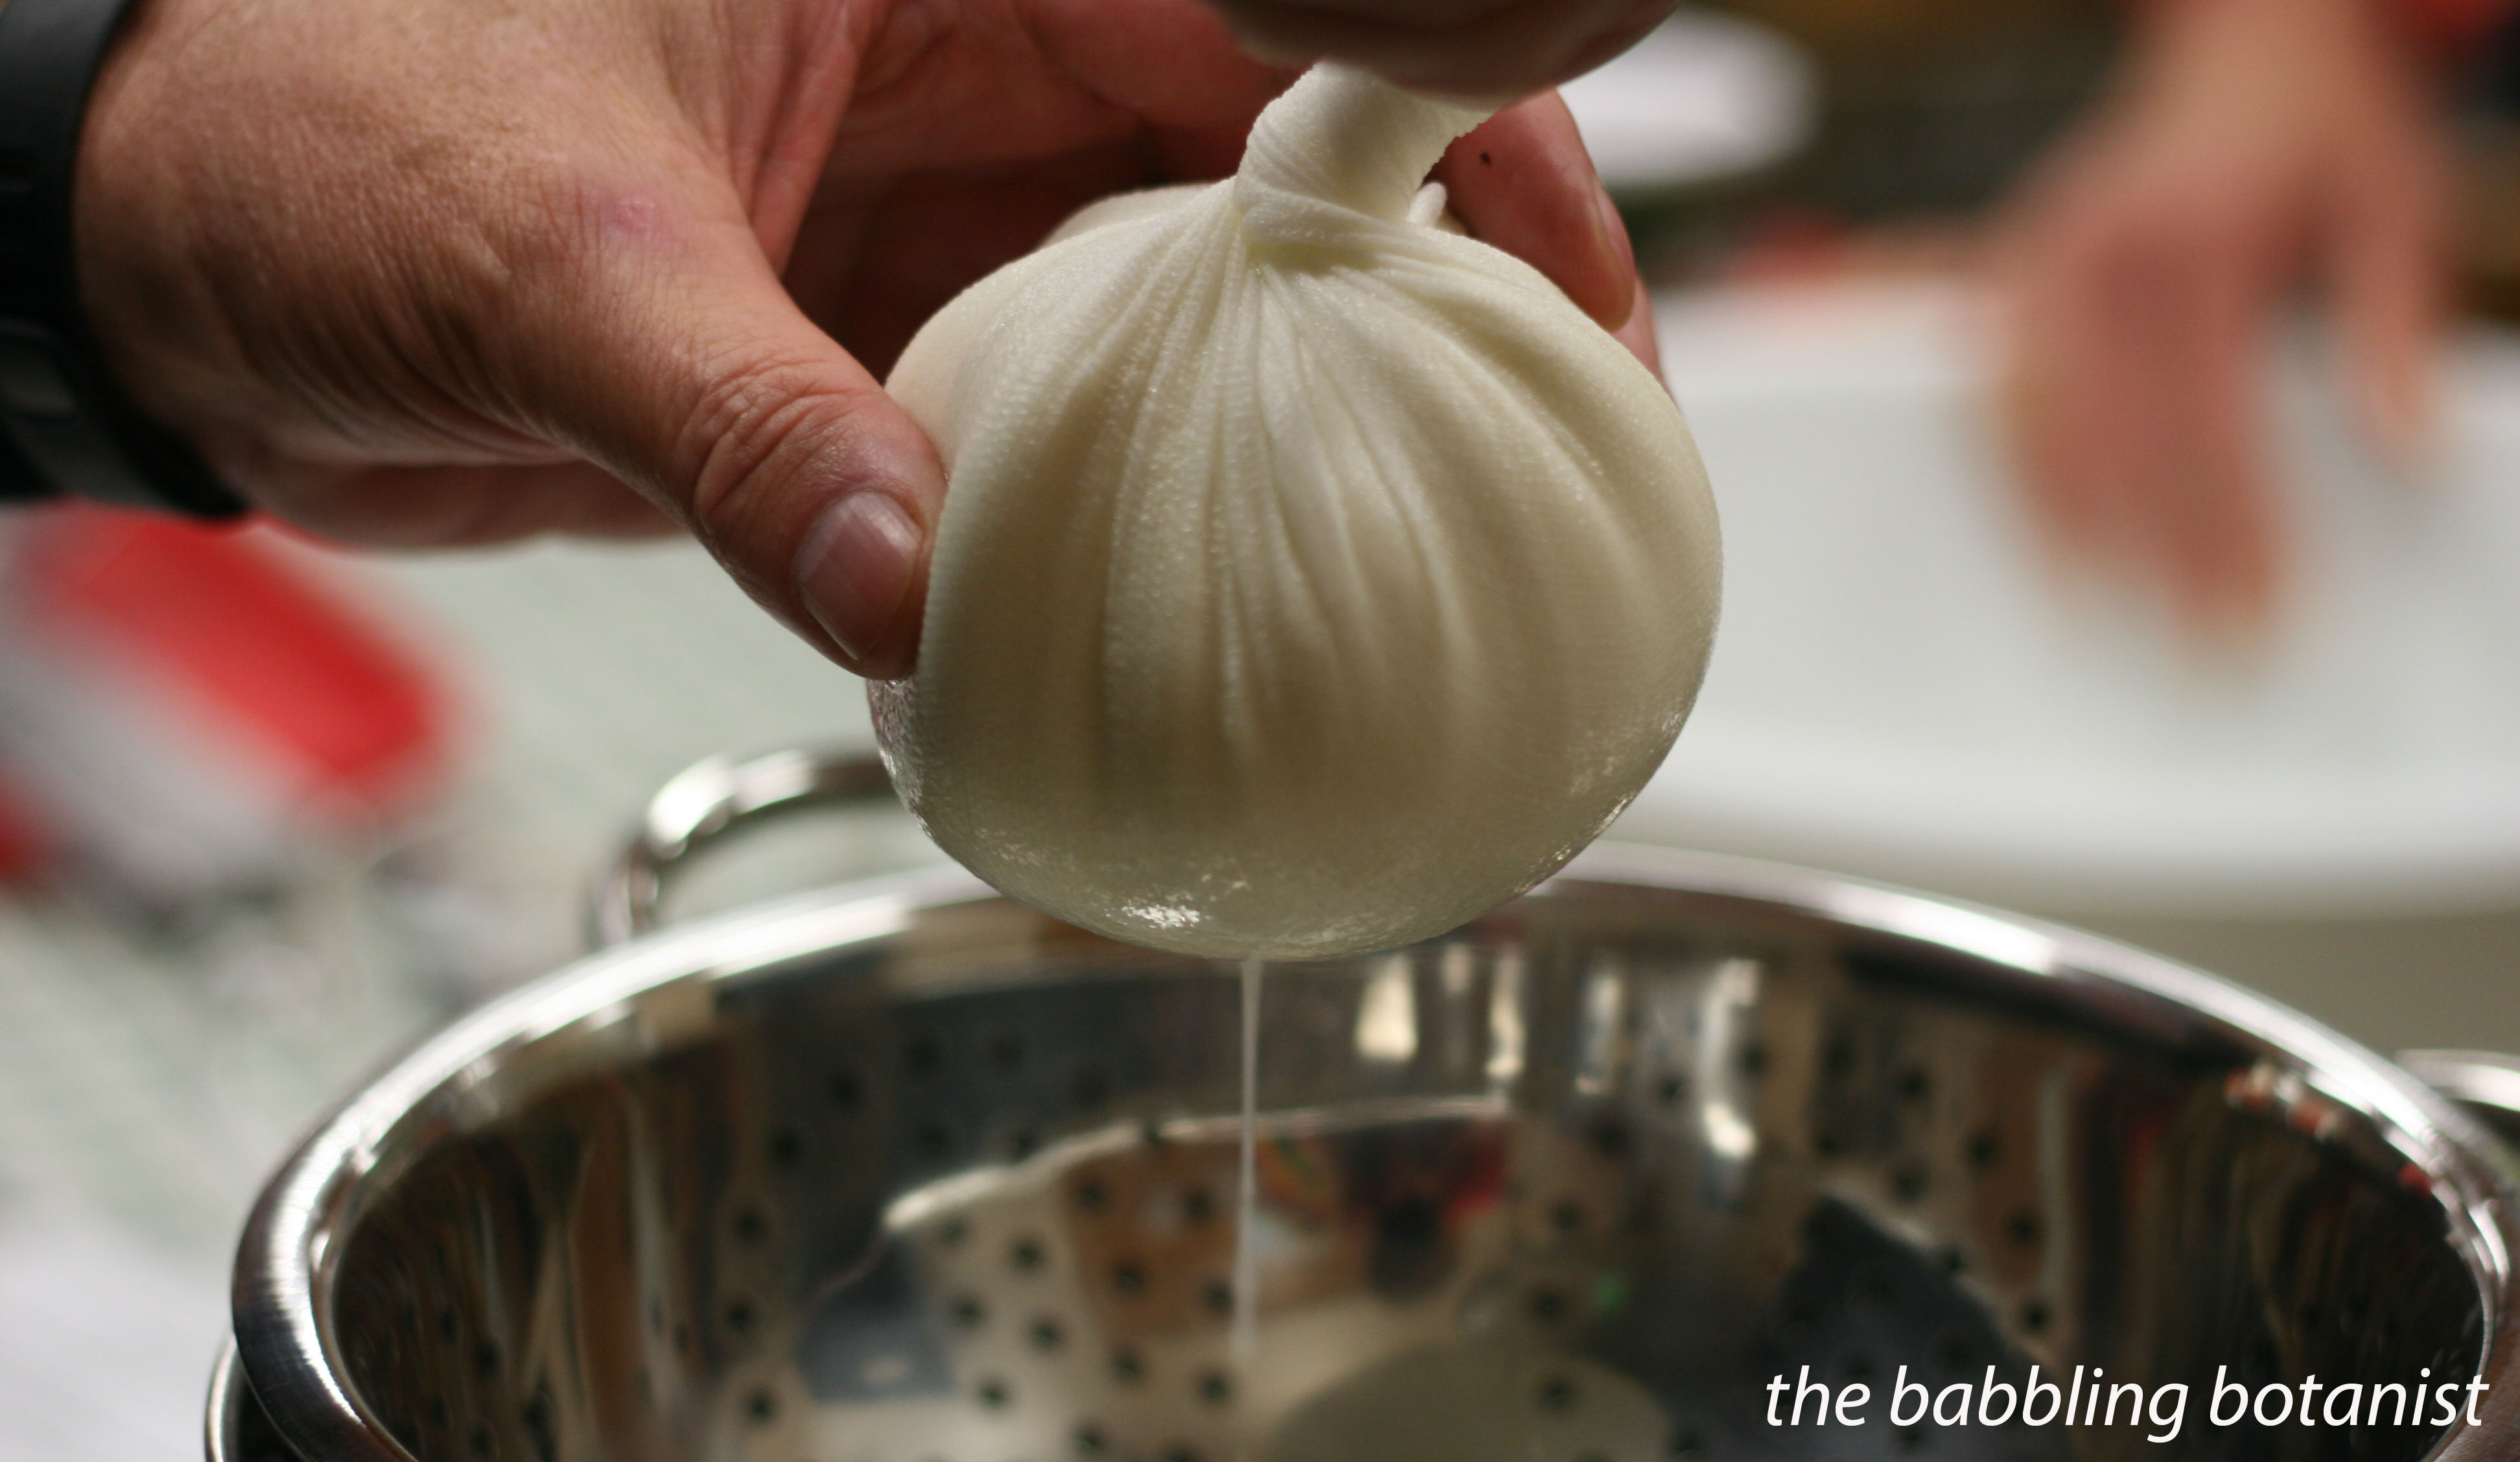
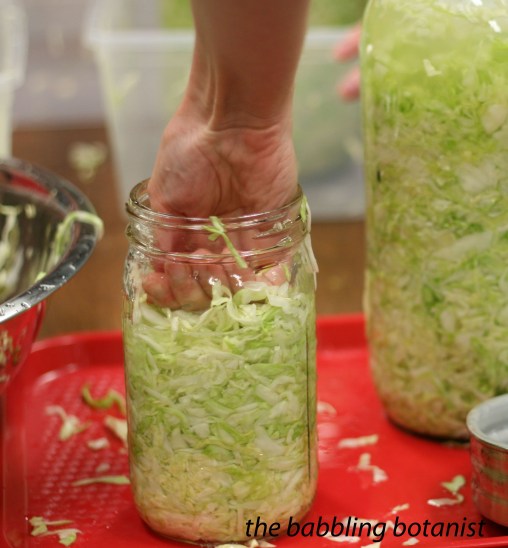
Next you want to transfer it into the container you plan to ferment it in. In class, and when I made it at home later, we just used large mason jars. I think this is easier than a pickling crock, but it’s up to you. The crock is of course nice for a gigantic batch. Push the cabbage tightly into the jar or crock, getting it to release more liquids. It should release enough that you don’t need added brine, but if you do, top it off with a brine that is 4.5 teaspoons of salt for every 4 cups of water. Leave at least 4-5 inches of headspace in your pickling vessel.

IMG_2152 copy

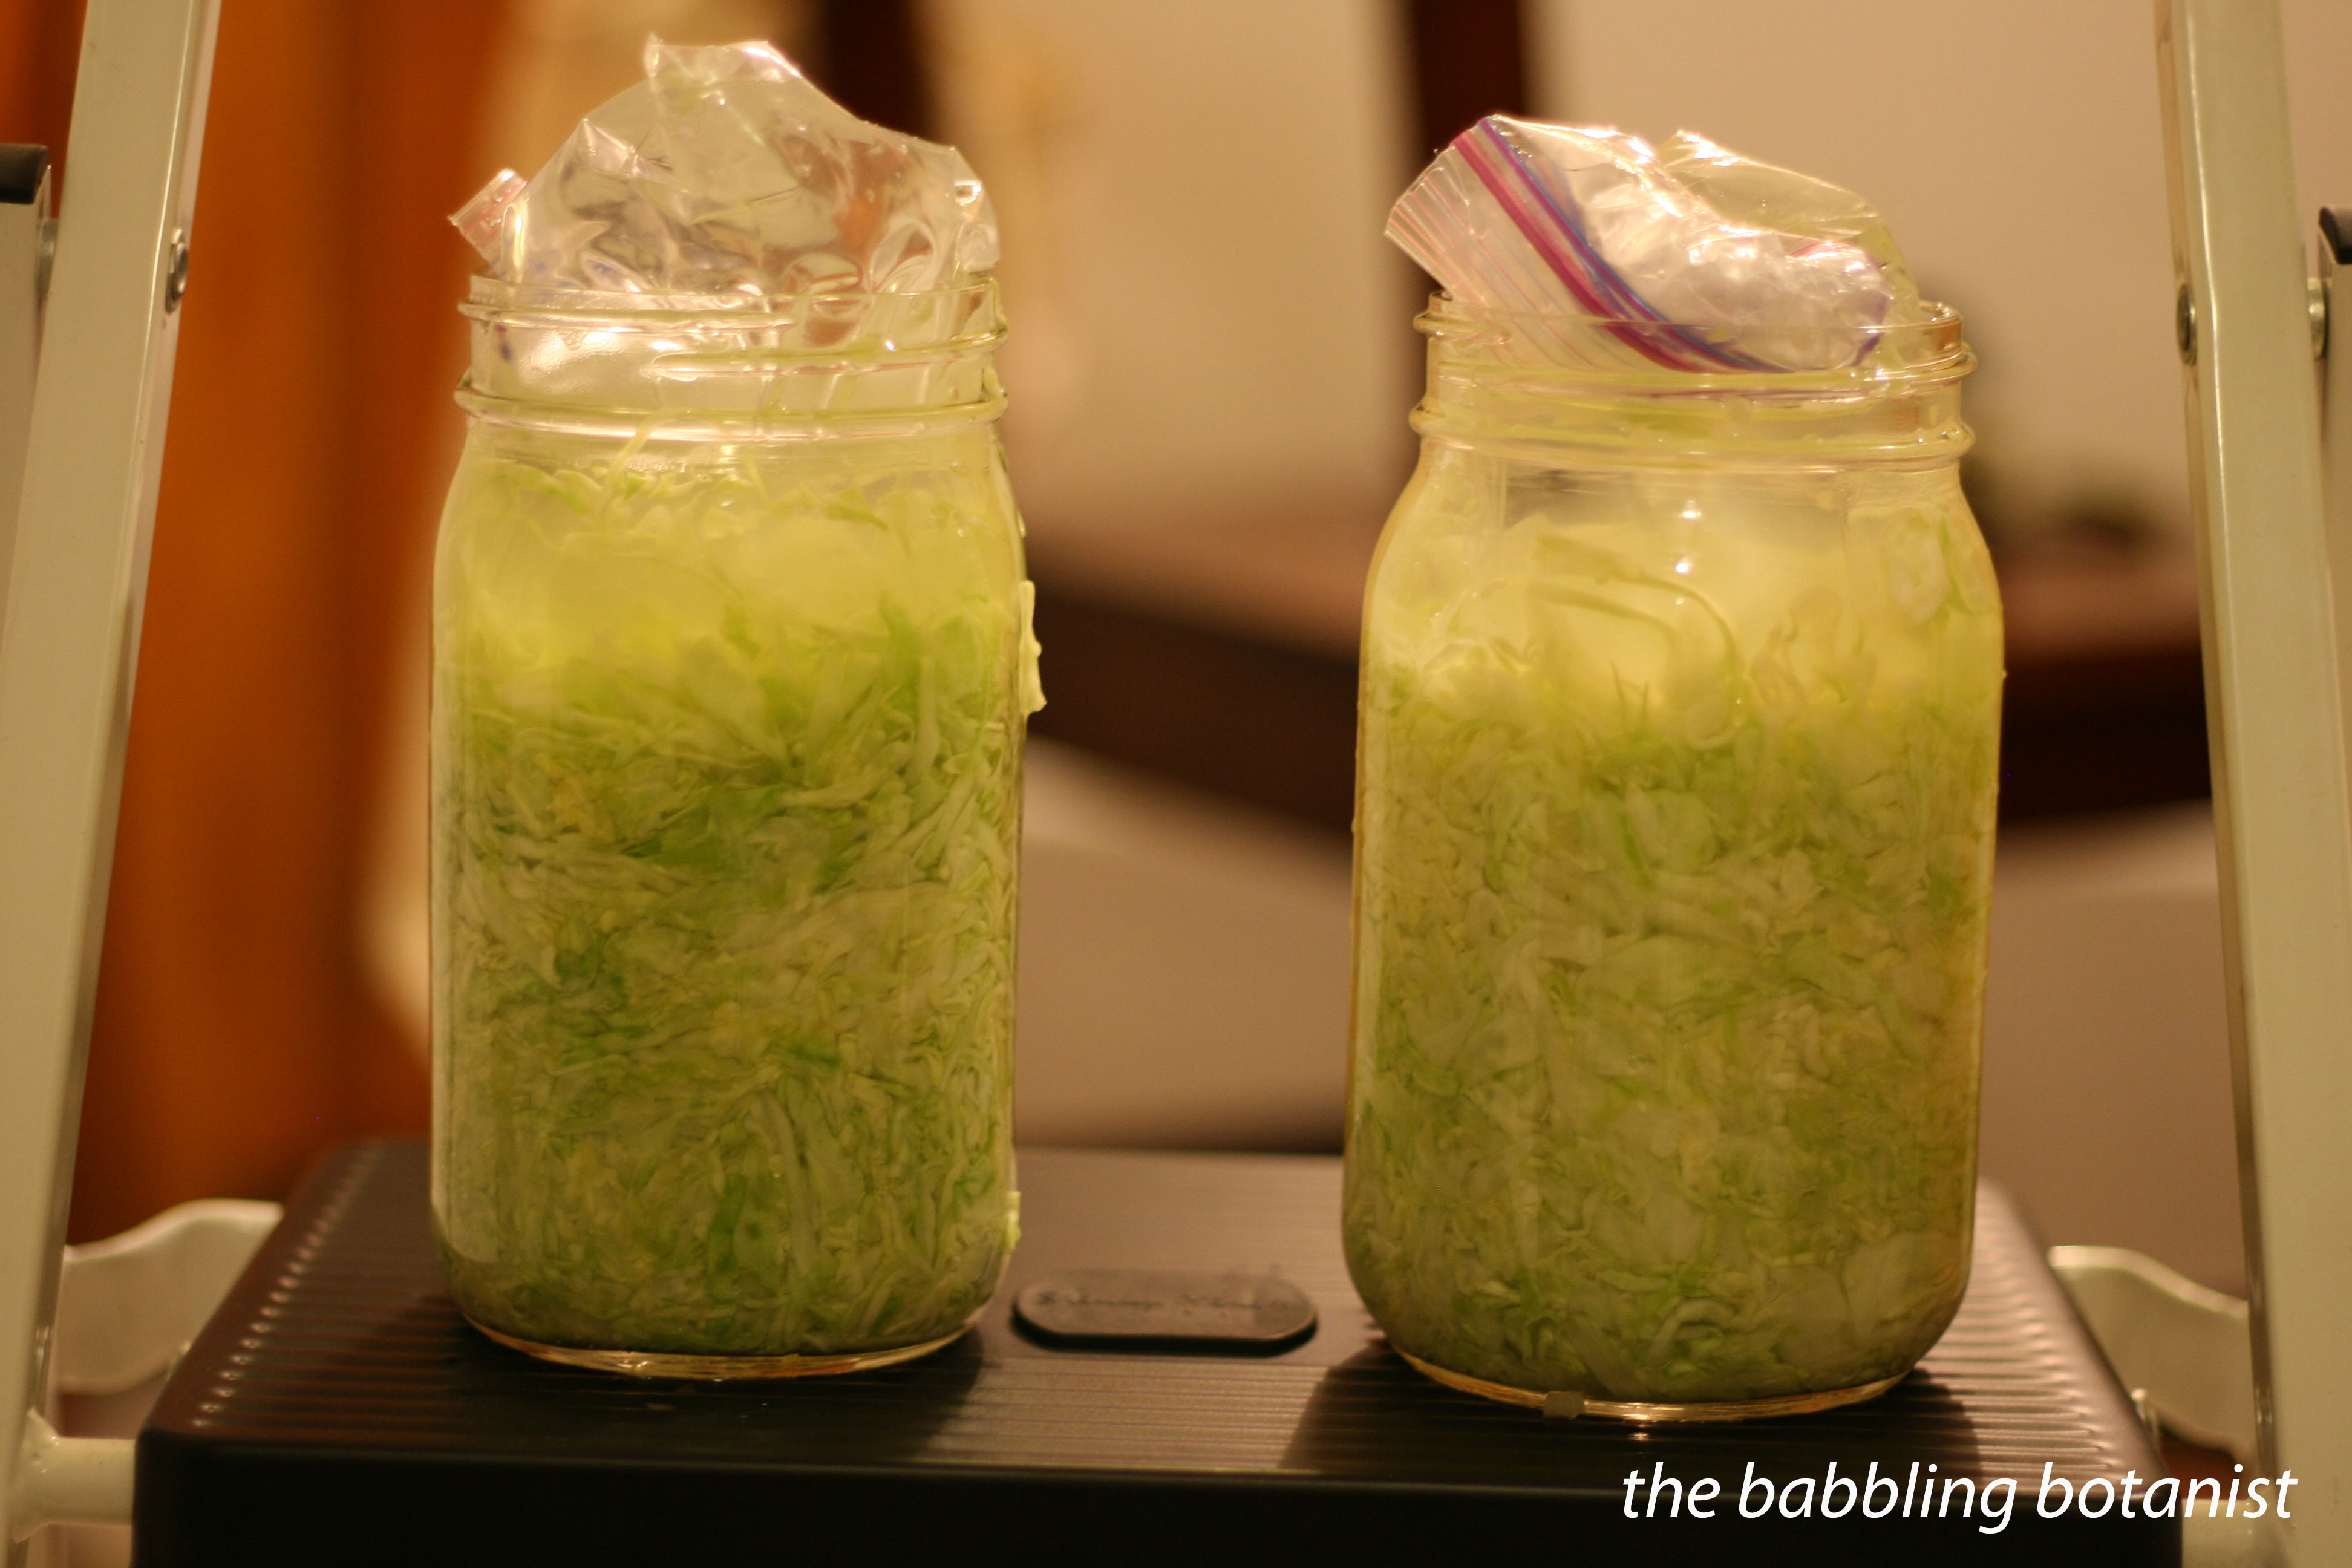
The thing that I liked about doing it in the jars was what we did next. We filled a plastic bag with the brine, and placed that in the top of the jar to hold the cabbage down. With the crock you need to weight it down with a plate or something, and it just seemed a little more difficult. The bag trick totally rocks. If you start to get a bit of scum, just remove the bag, wash it, clean out the scum, and put it back in. It seemed to me like you got a lot less though too with this bag method. Ball says you’ll have to skim it daily, and like this that is definitely not the case.

IMG_2453

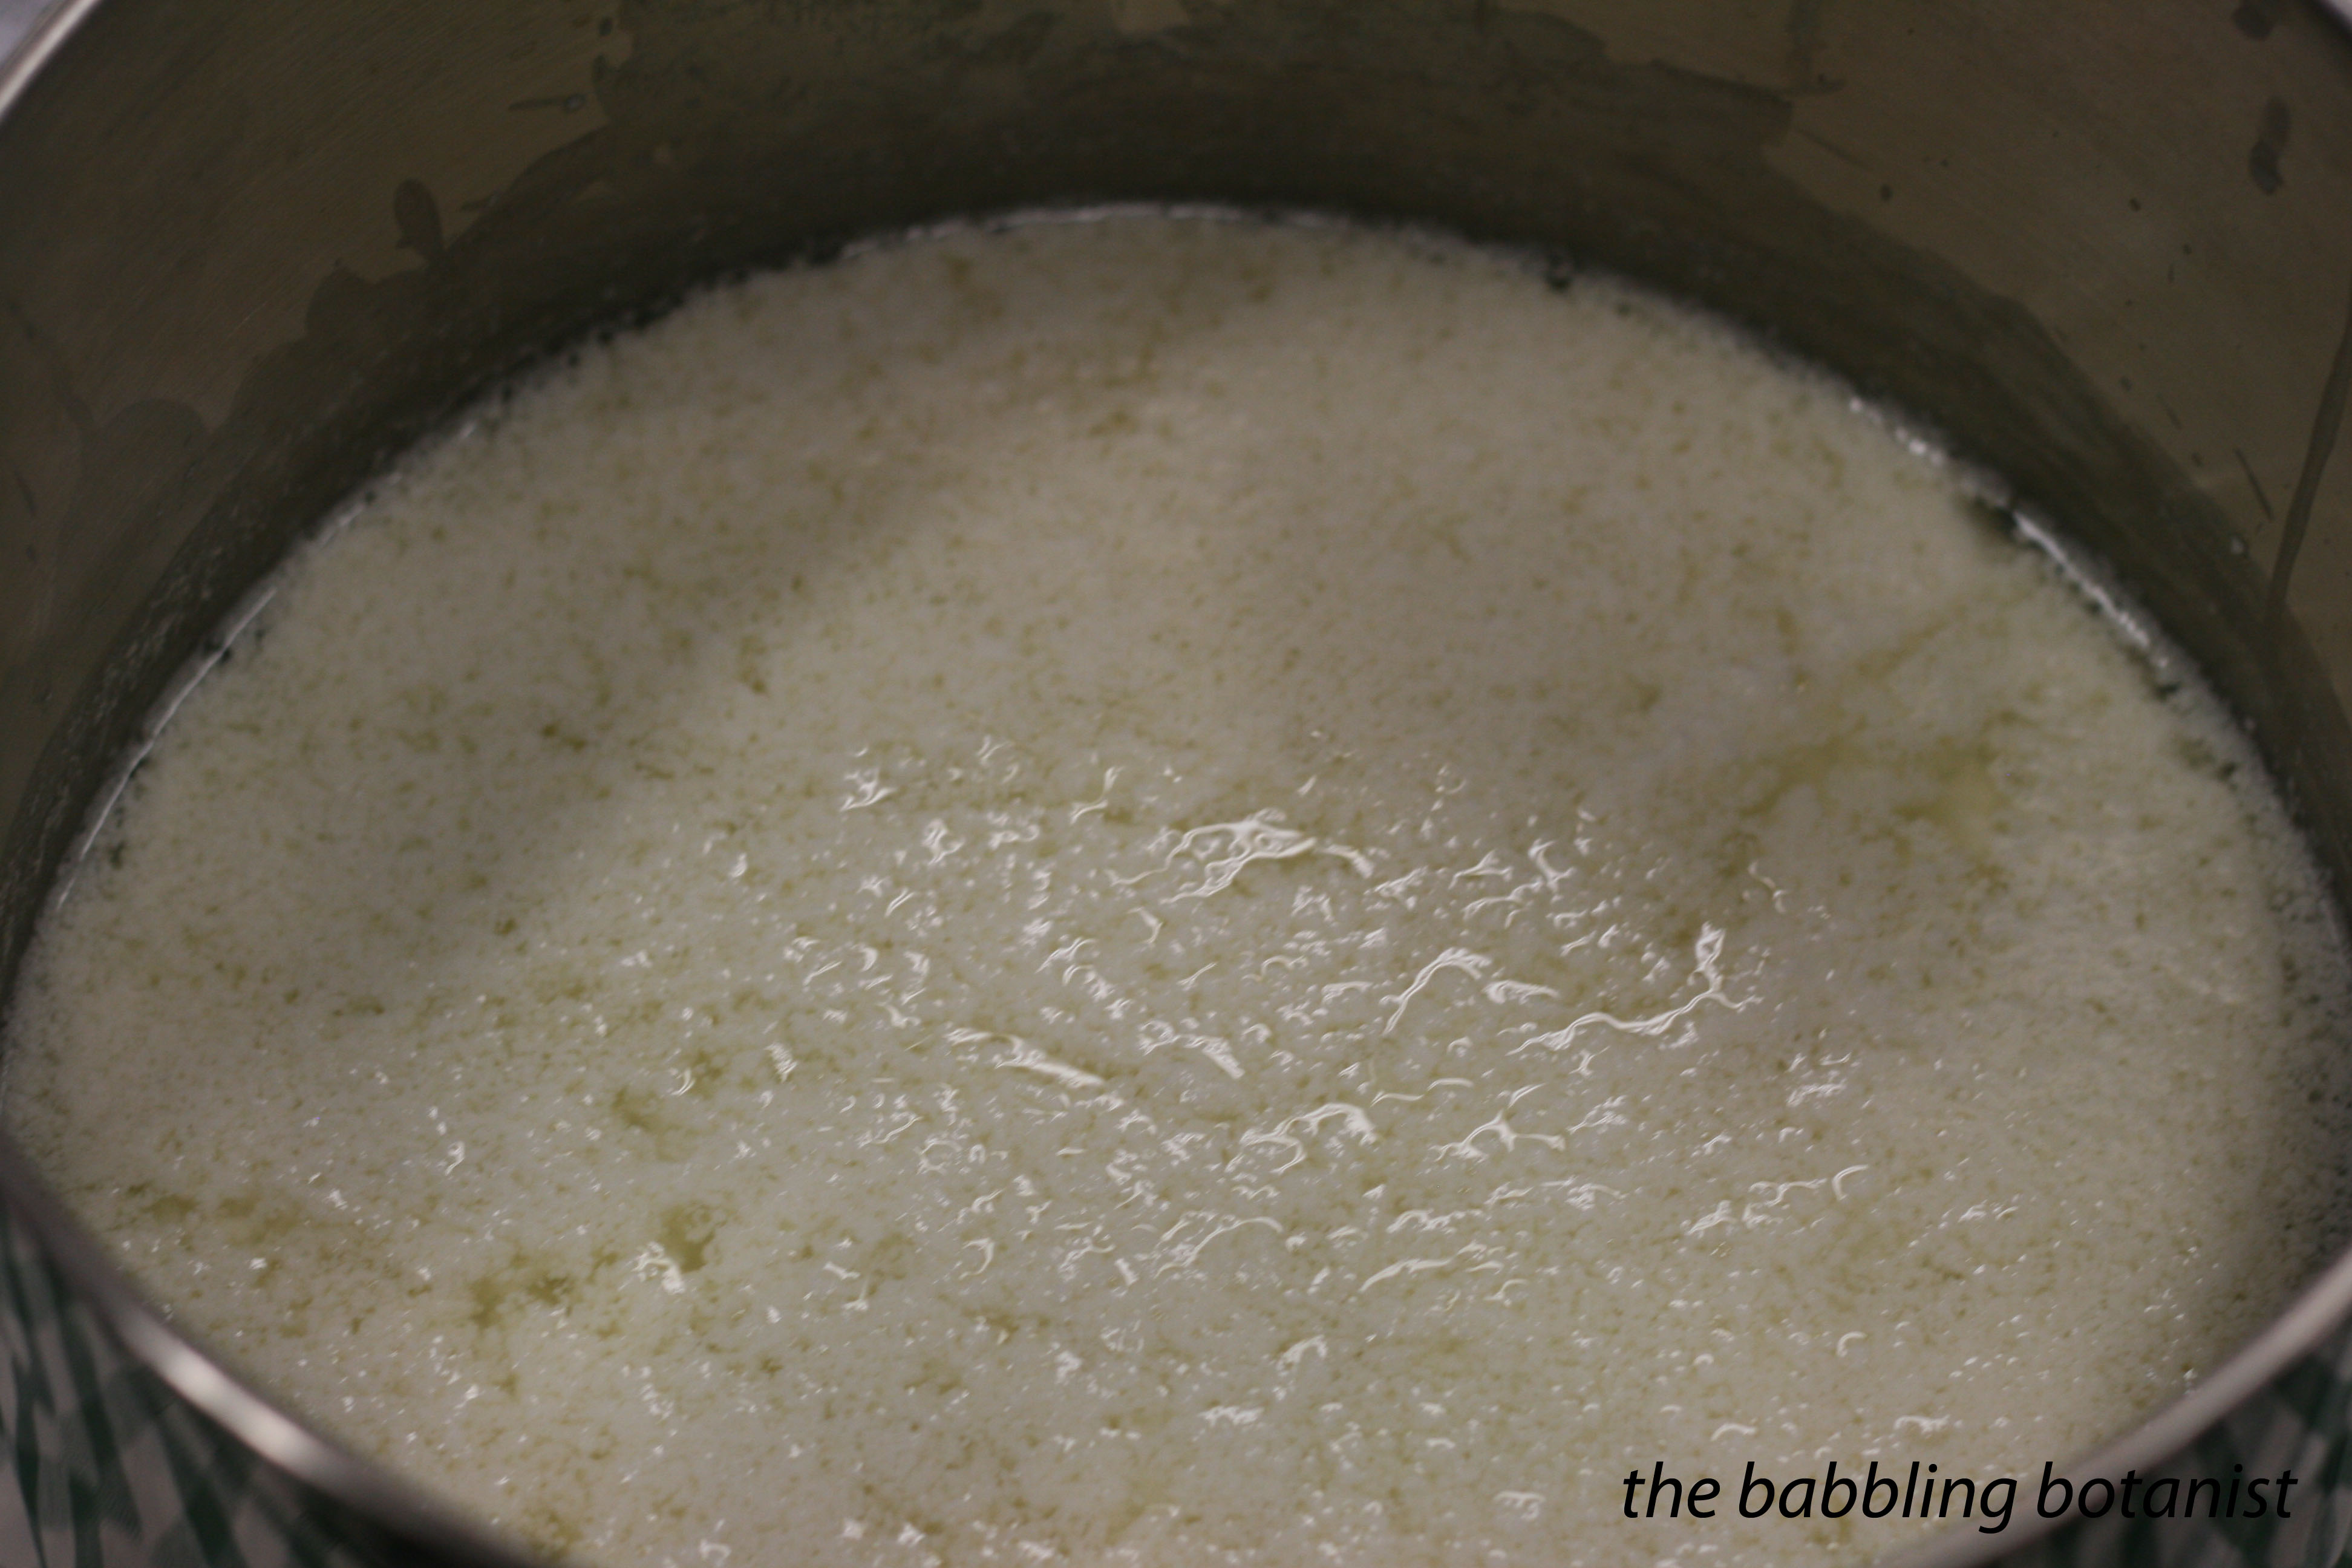
Now comes the patience part. Fermenting your cabbage will take a few weeks, so now we wait, and let the magic happen! OK, it’s not magic, it’s science! Bacteria will get to work on that cabbage, making the lactic acid that give sauerkraut its tart flavour. It can take up to 6 weeks, so be patient. Keep it at room temperatures, about 70-75F (21-23C).

IMG_2157 copy

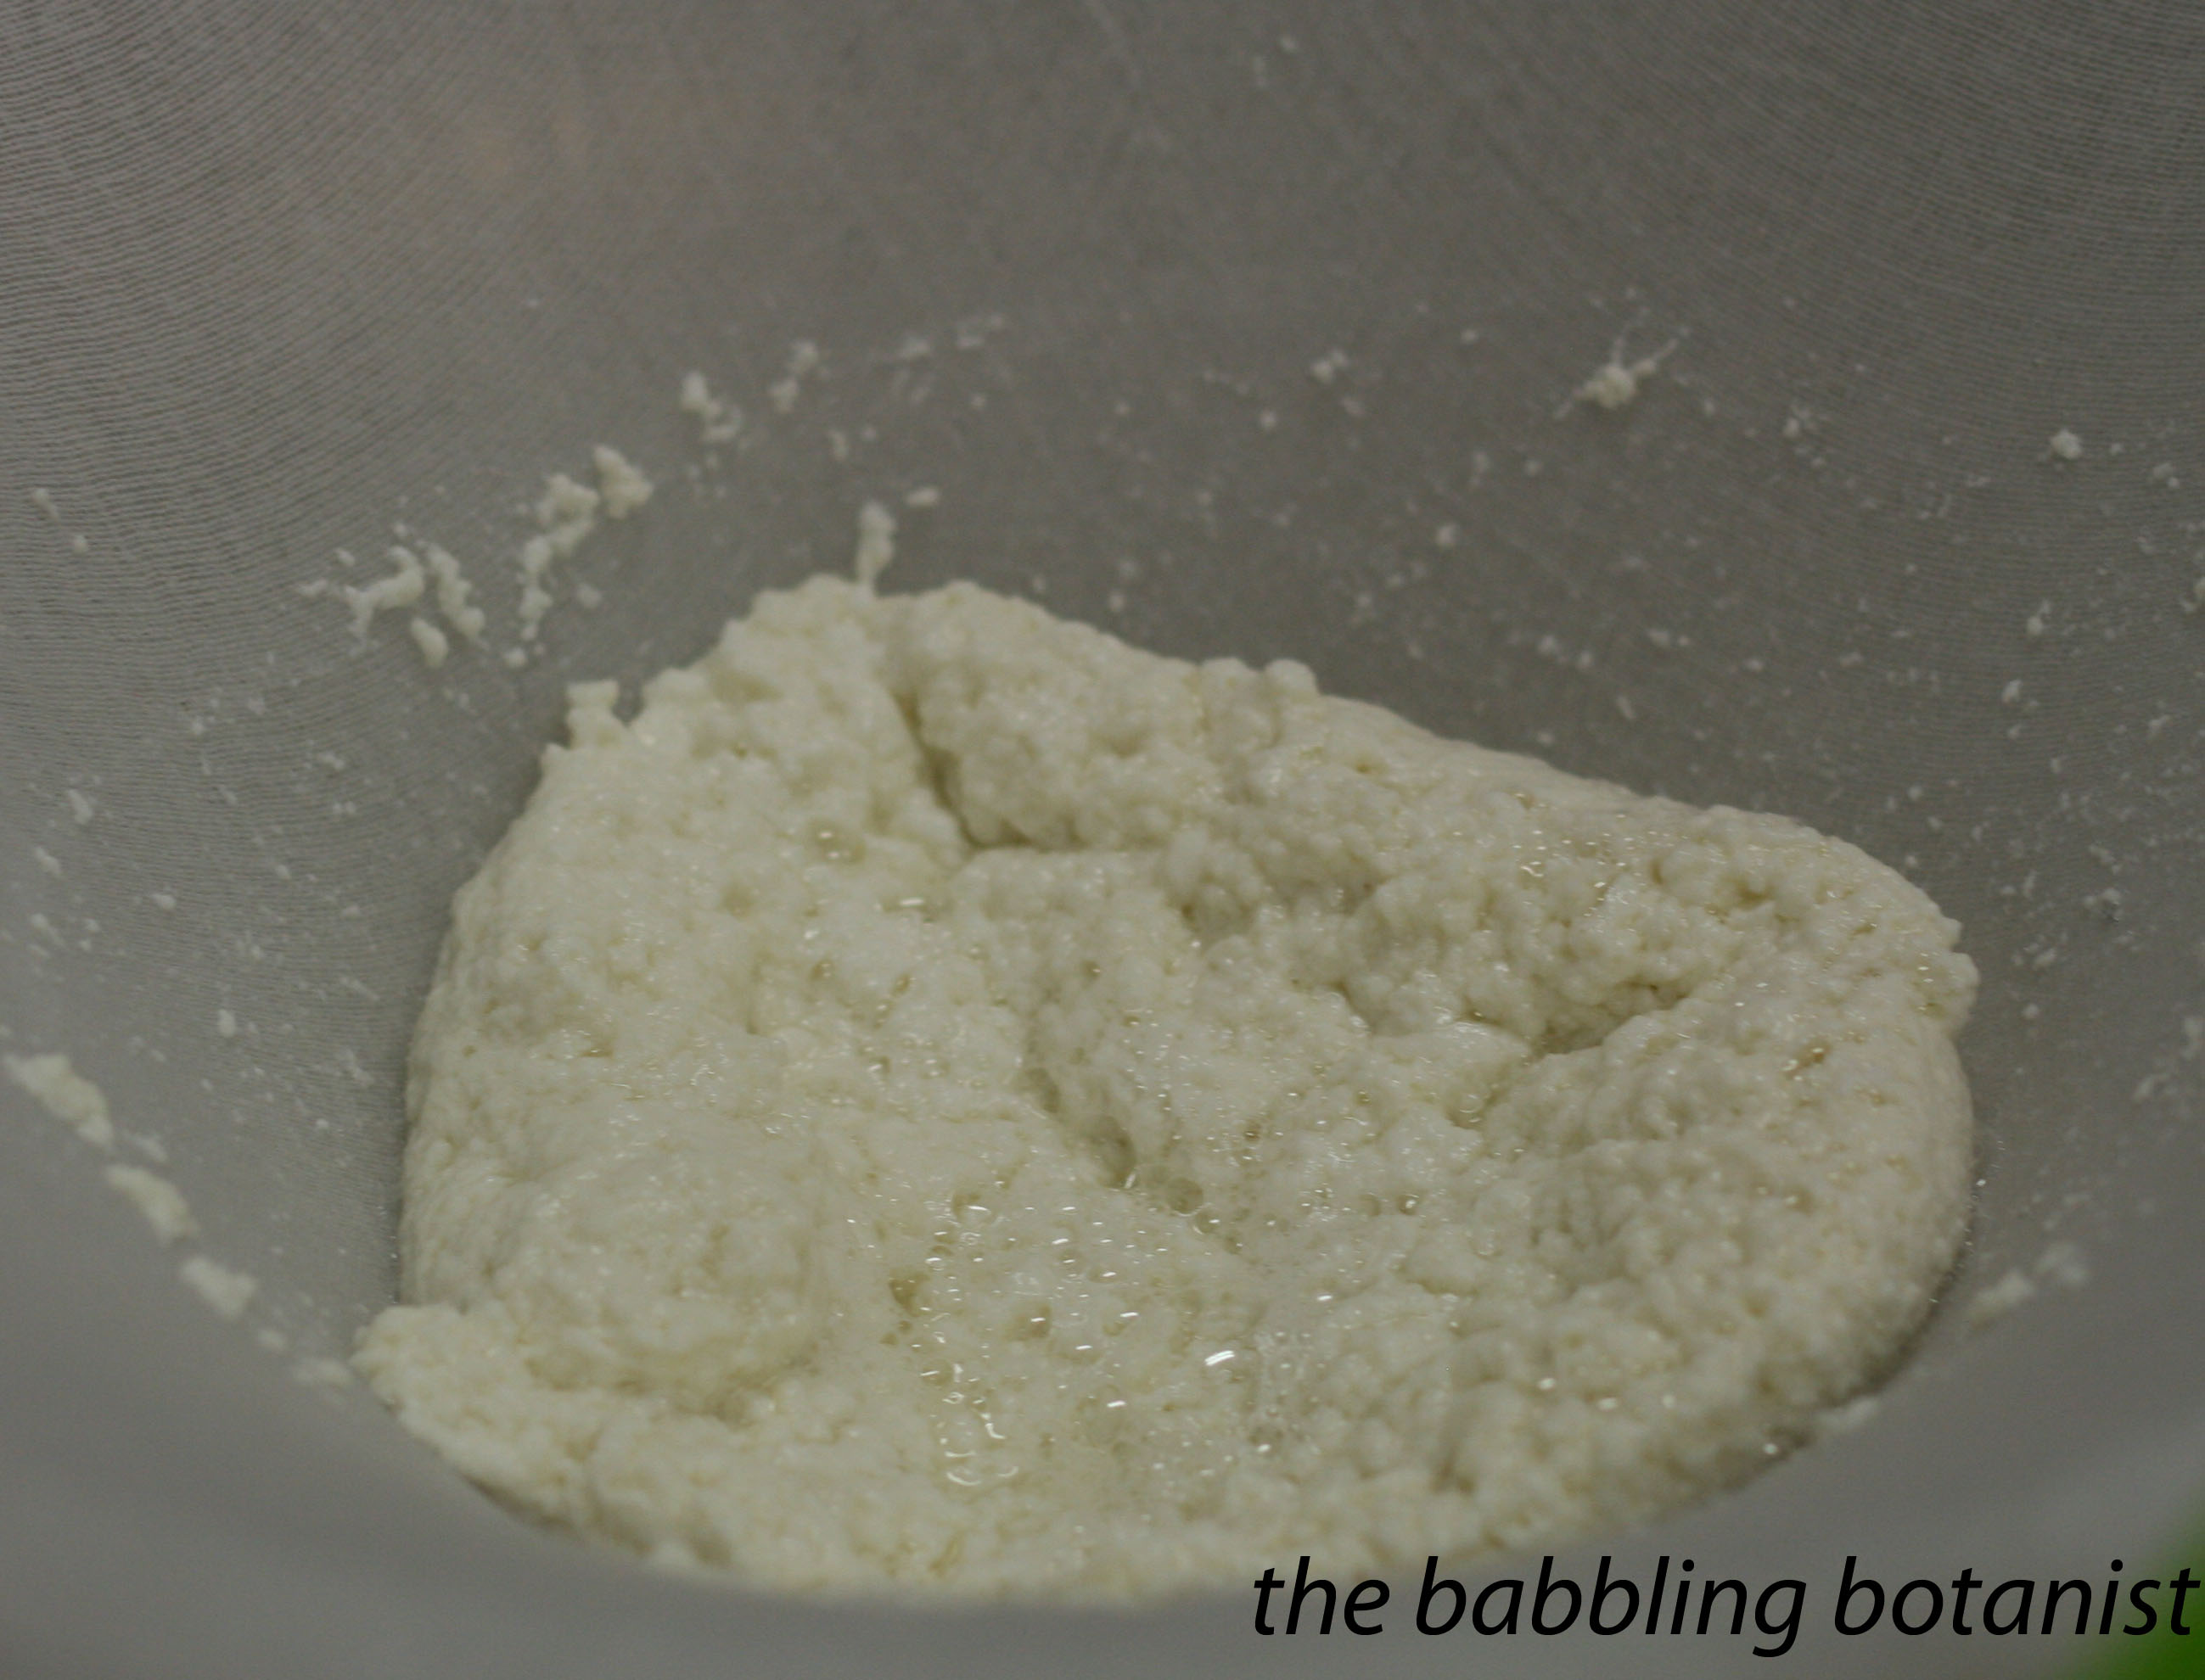
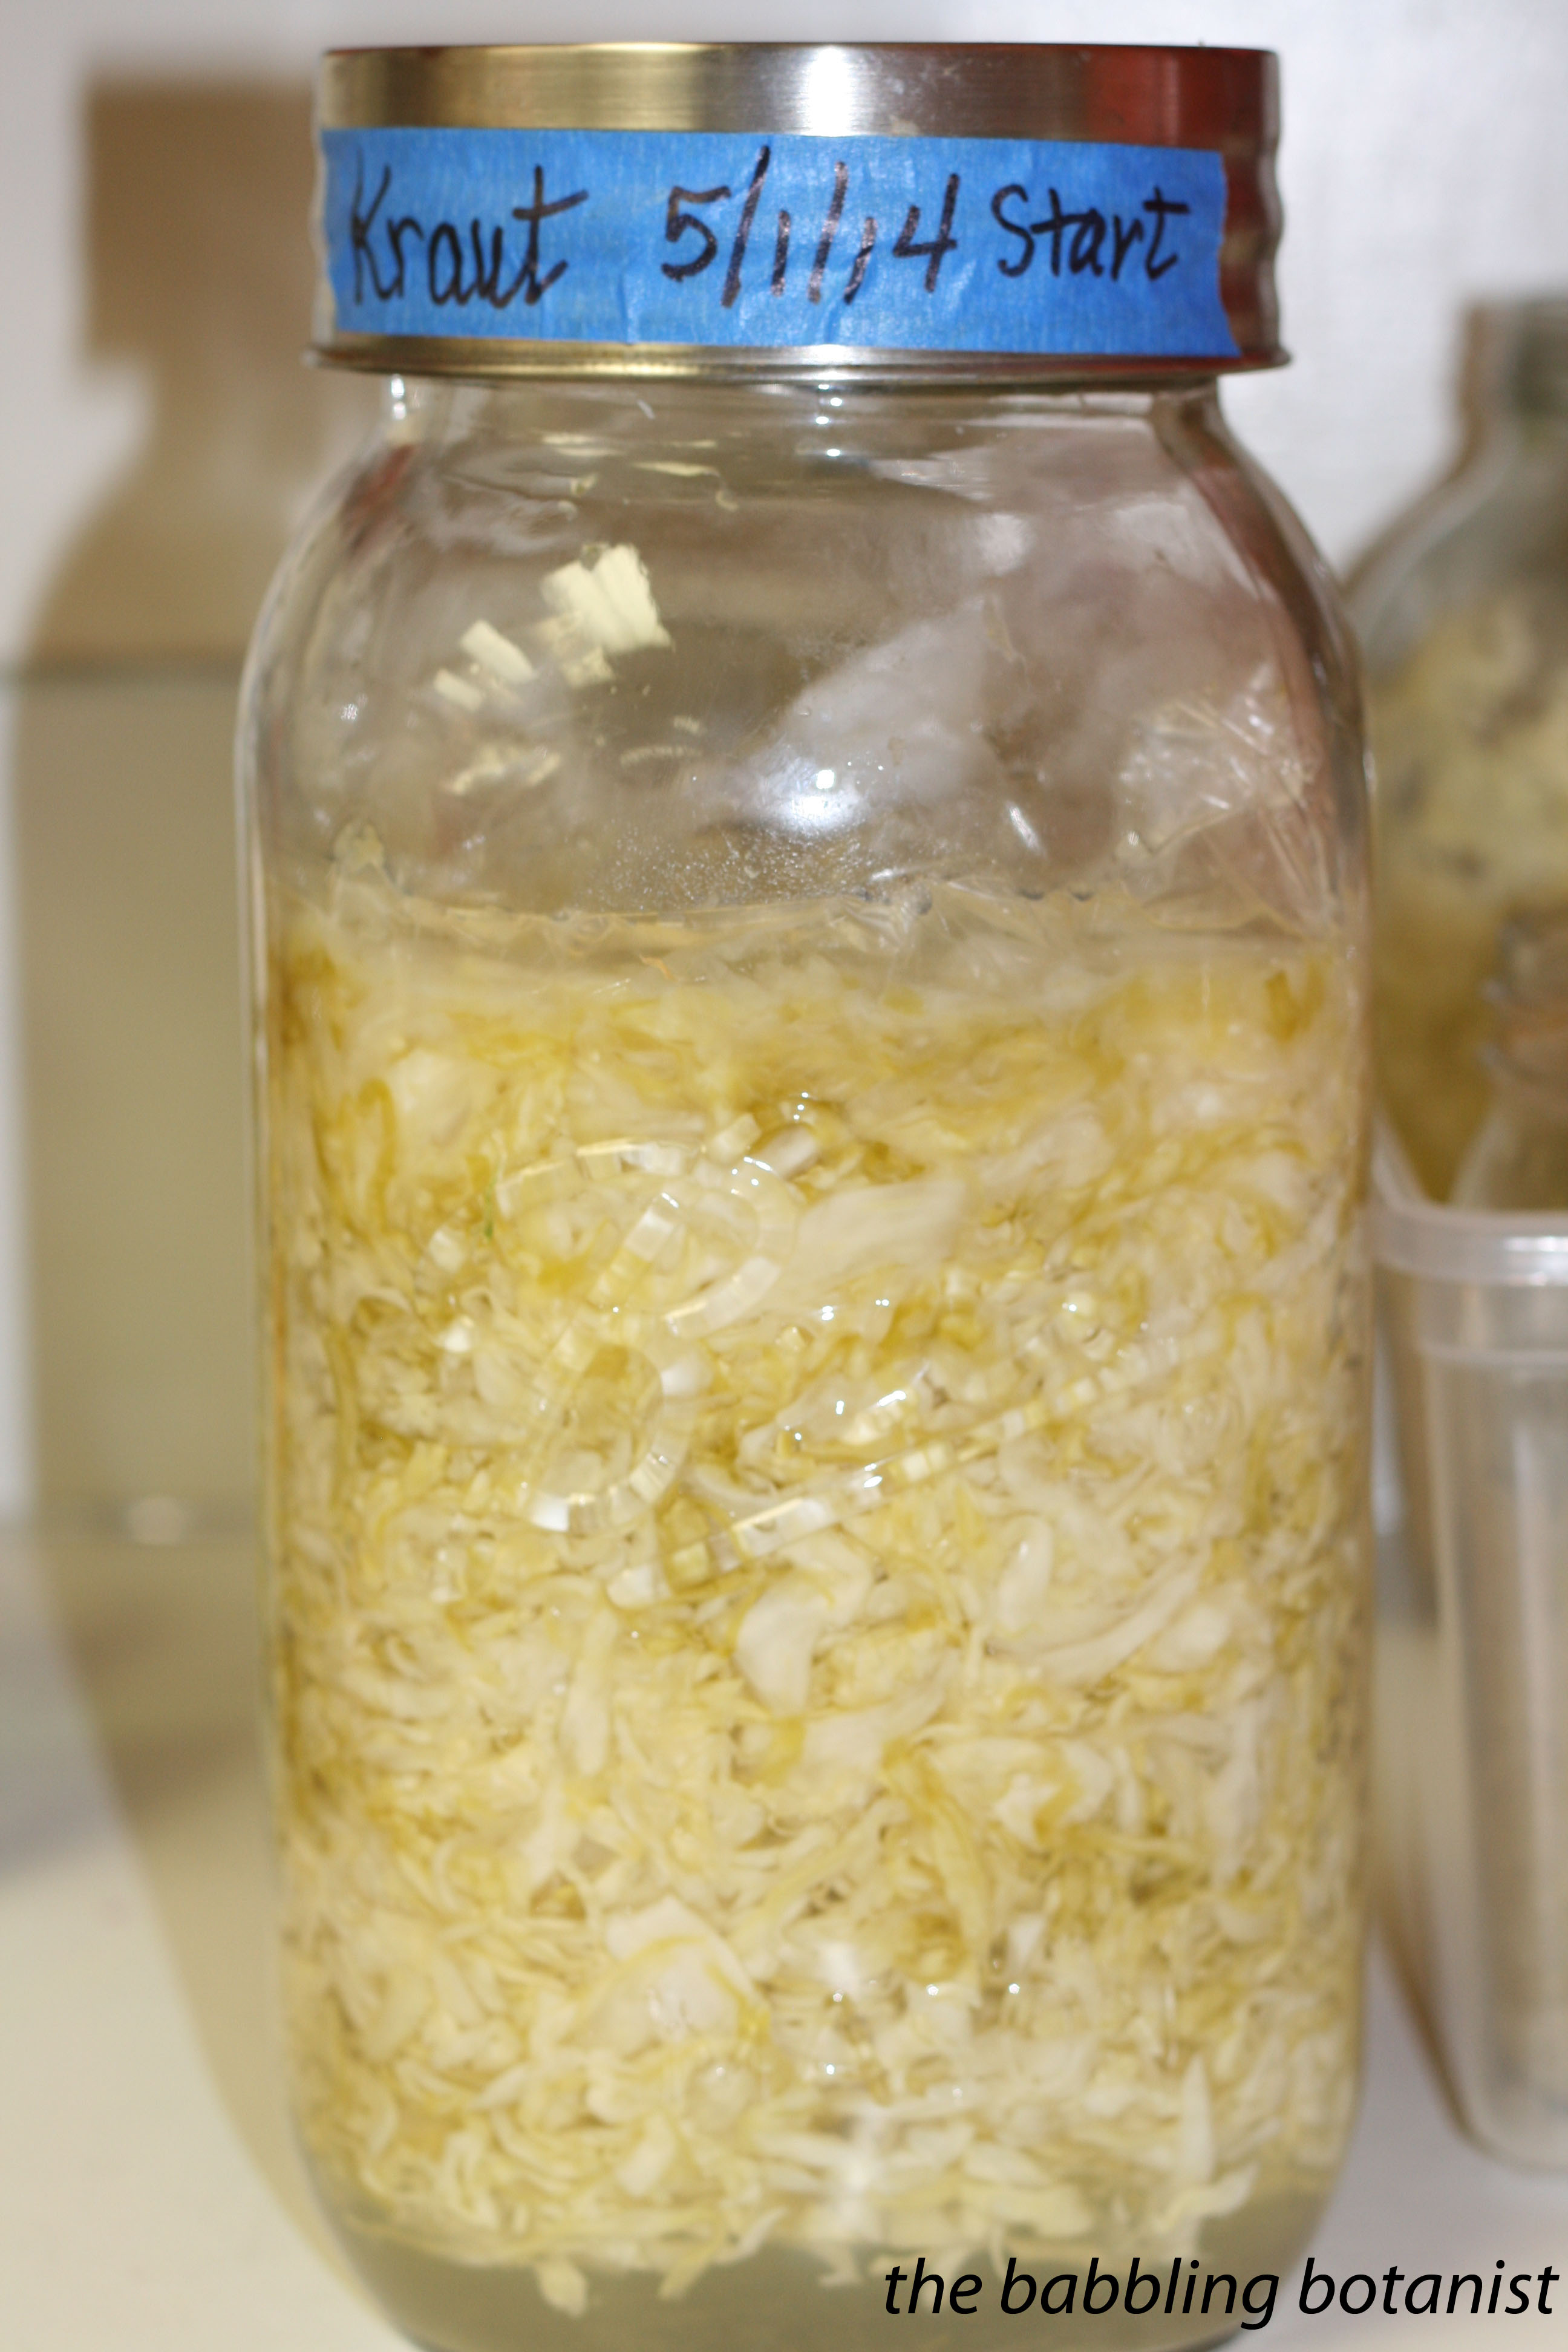
The way that you know your sauerkraut is ready is that it will be sour when you taste it. Do not can it until it tastes sour, or it is not acidic enough, and not safe to can. As you can see below, when it’s done it is a little lighter in colour, and loses a bit of the green colour.

IMG_3252 copy

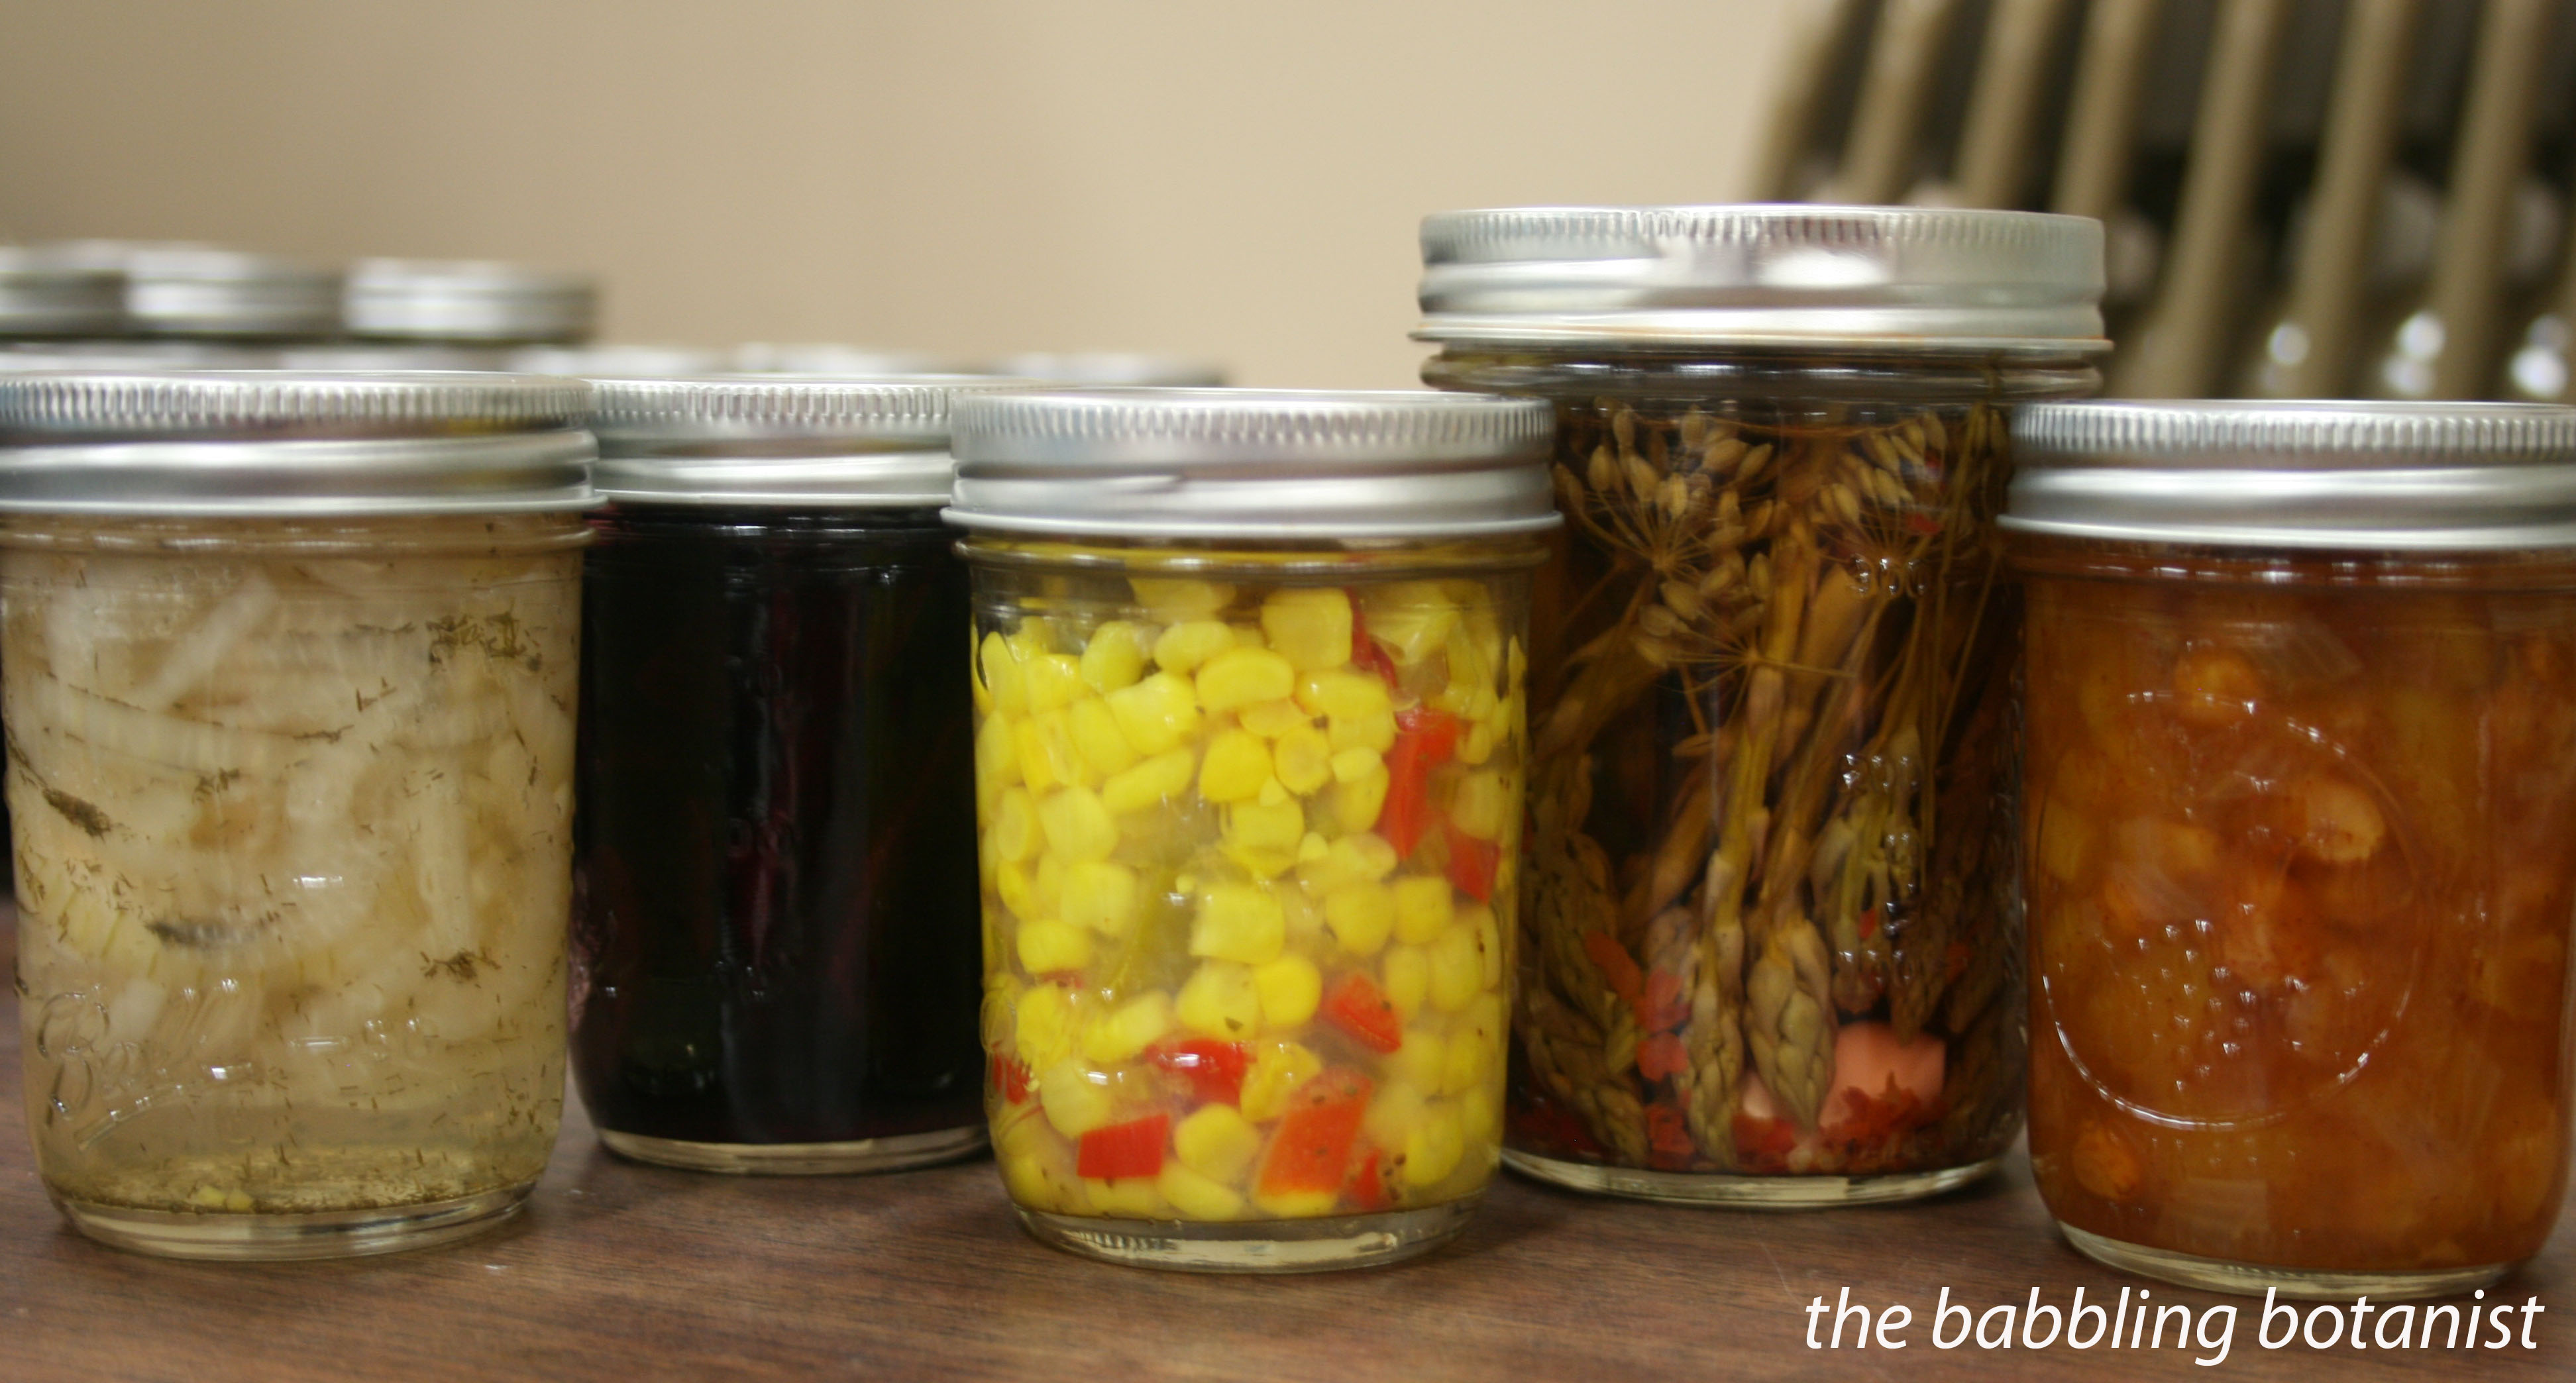
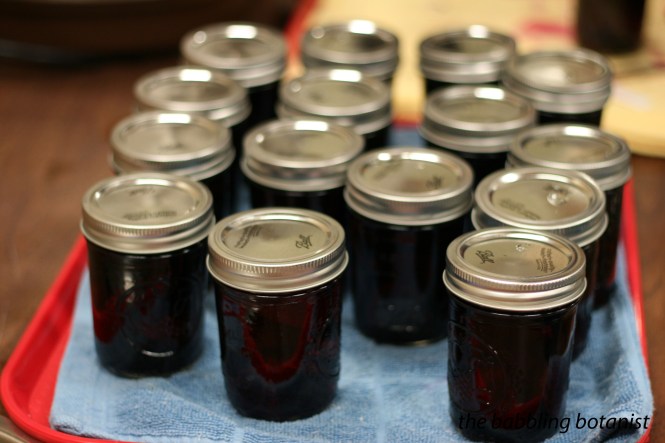
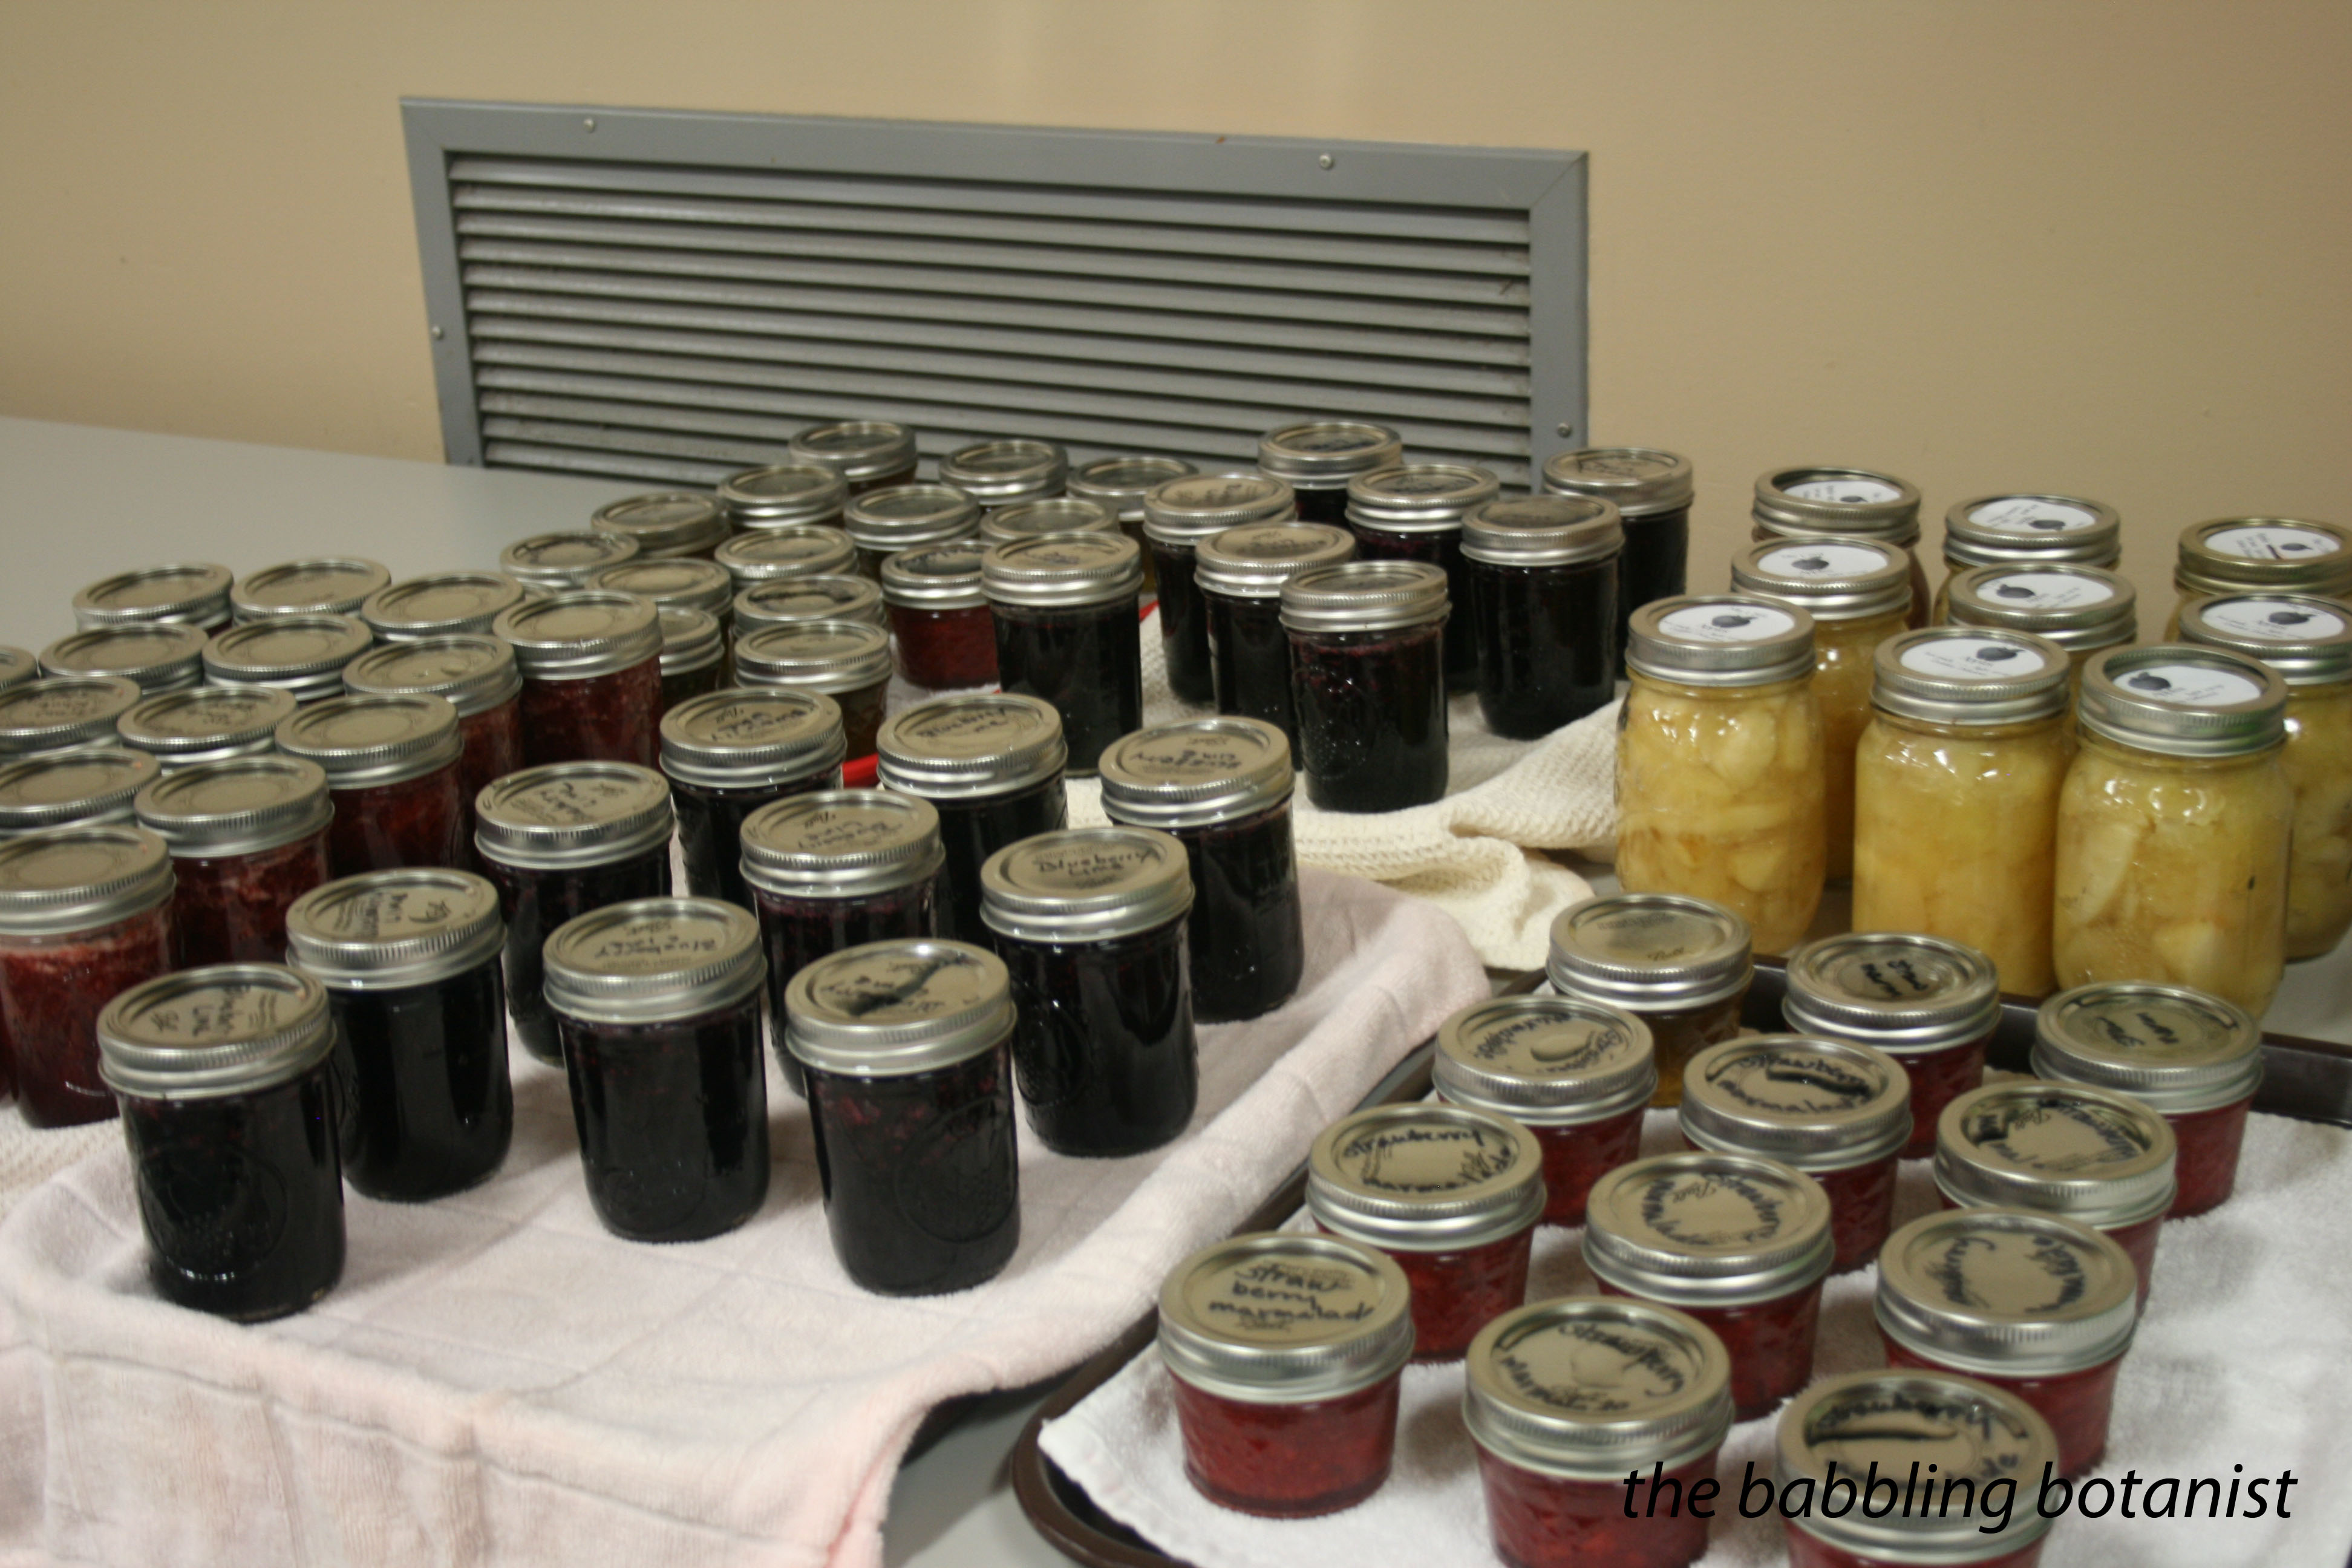
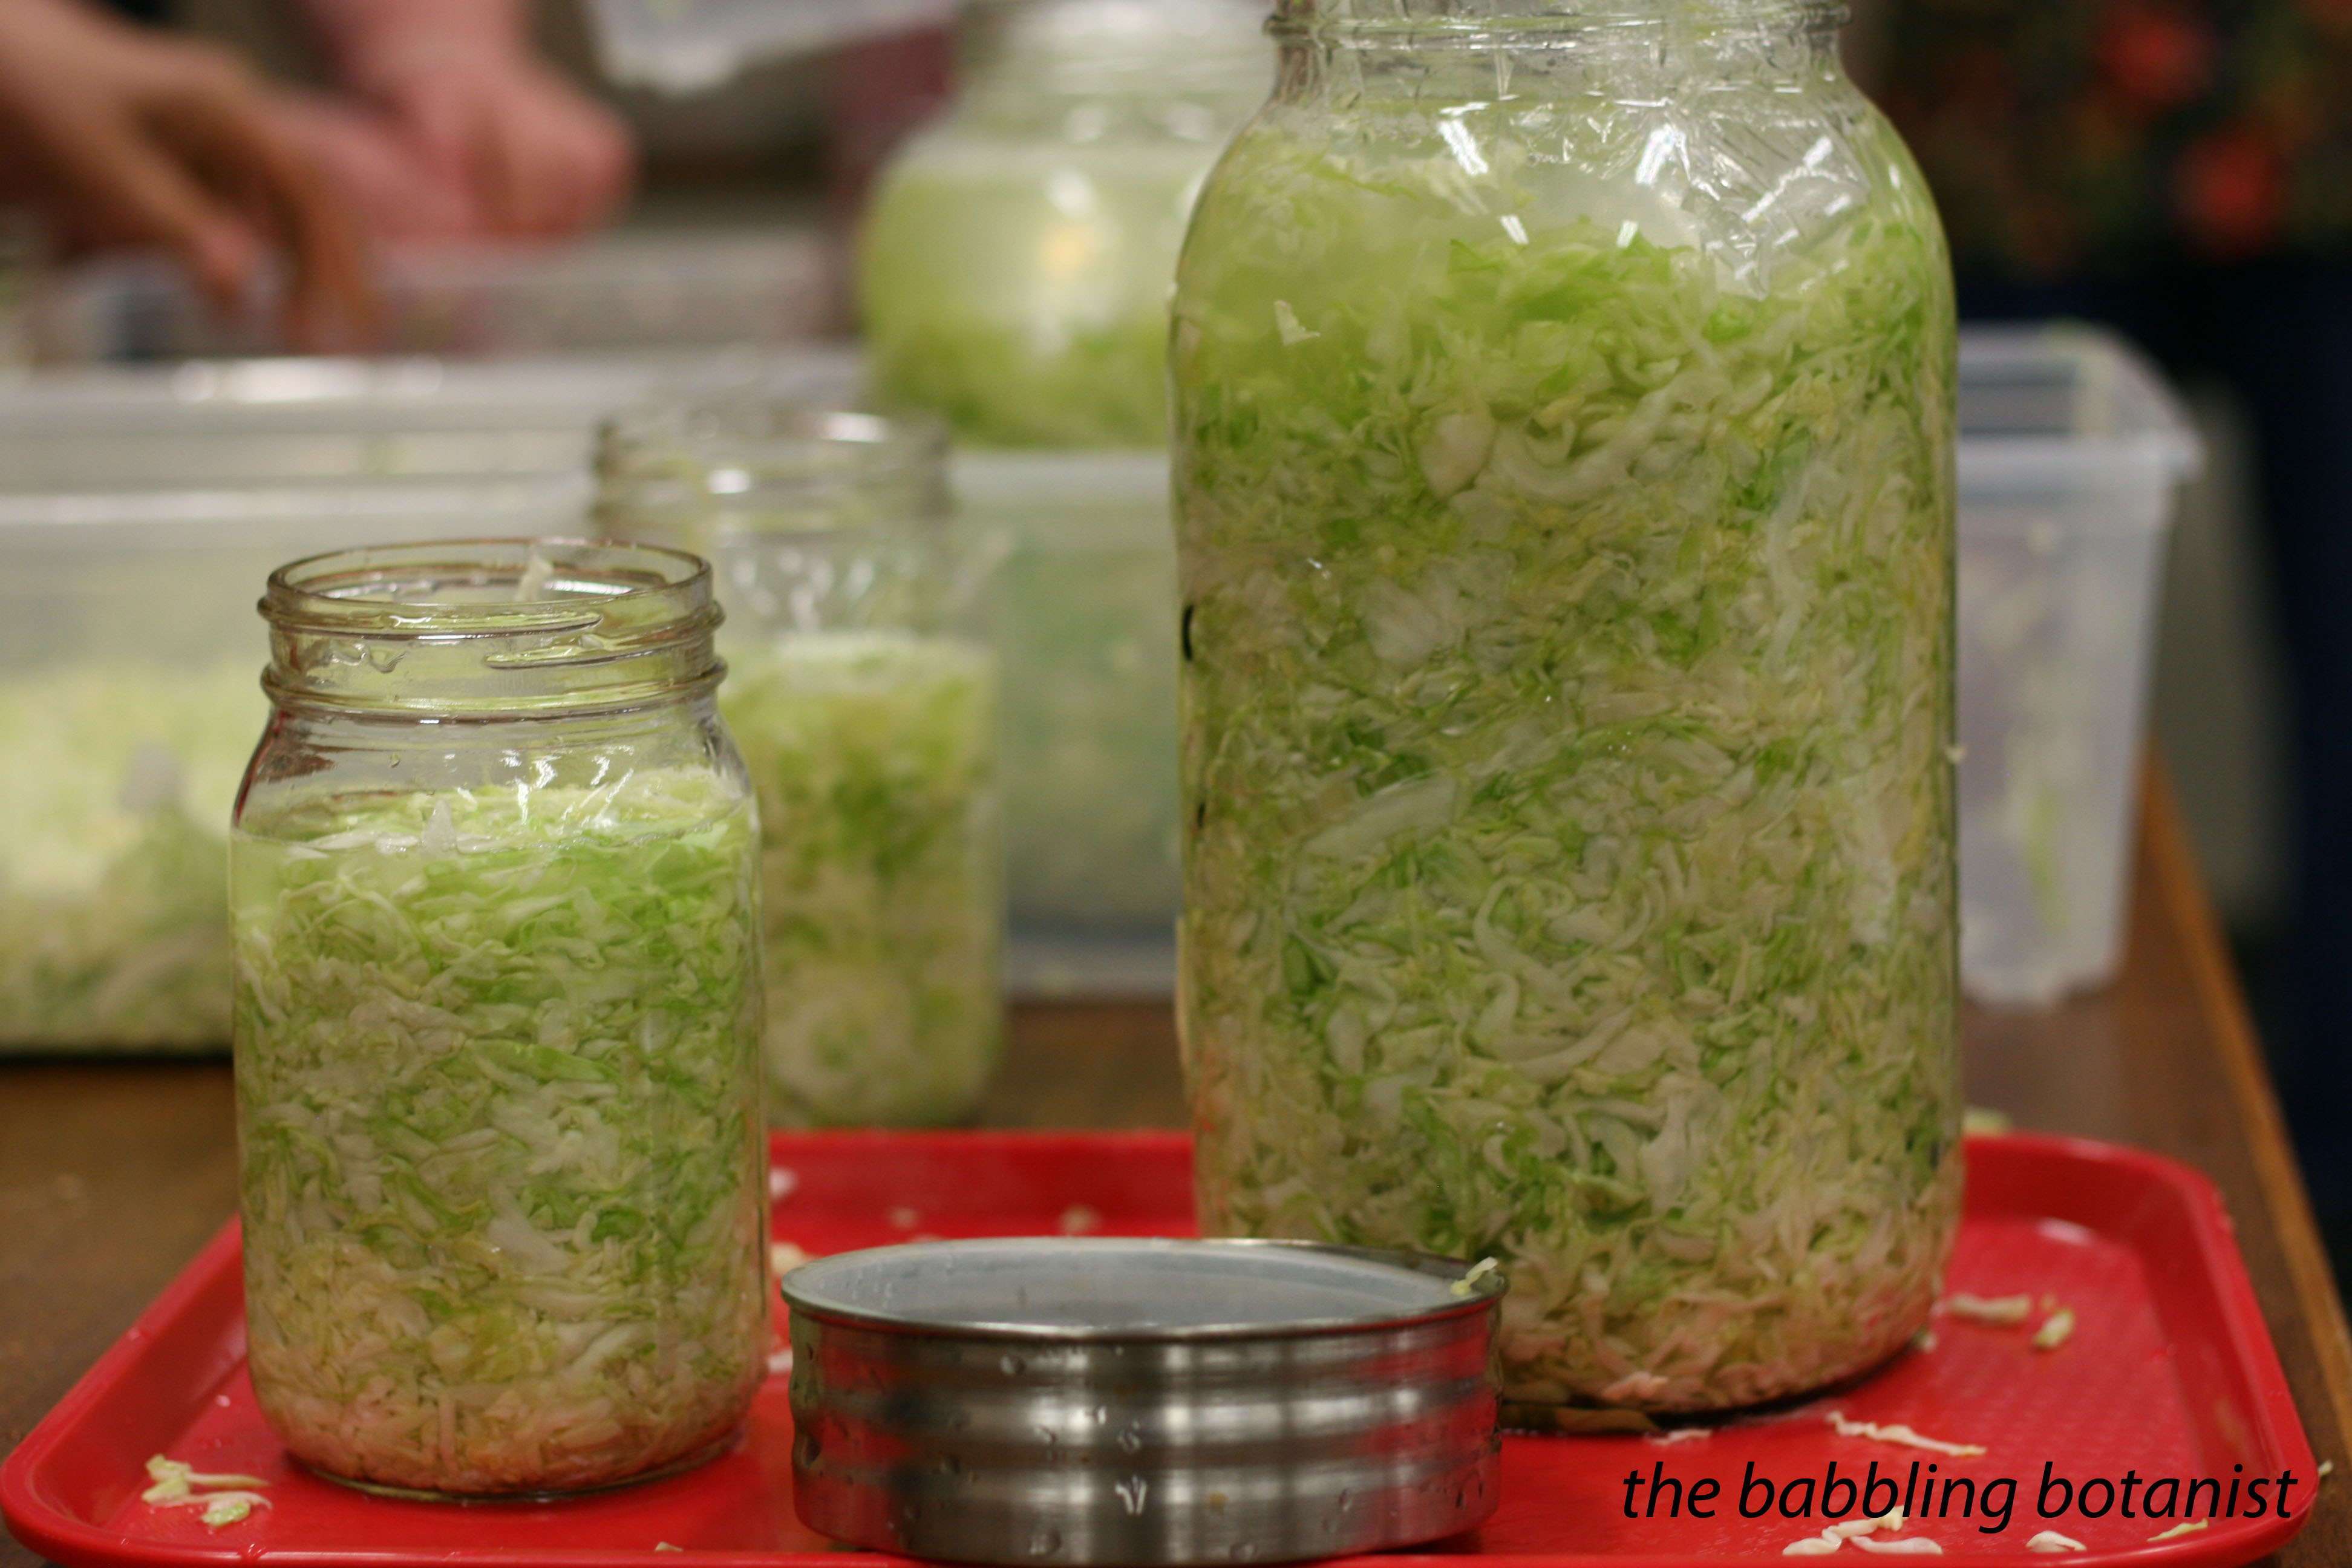
So now that it’s done what do you do? Well you have a few options. It keeps for a few months just fine in the fridge, so that’s a good option, especially if you only made a small batch as I did at home. I did 4 cabbages and filled 3.5 quart jars to give you an idea of how much it compacts. You can also can it though, if you so desire. It can be raw or hot packed. For both, prepare the canner, jars and lids. For the raw pack, you pack the kraut into hot jars, remove air bubbles, leave a half inch headspace, and process pints for 20 minutes and quarts for 25 minutes in a boiling water bath canner. If you hot pack it, you bring it to a simmer with the brine over medium high (don’t boil), then fill the jars, again leaving a half inch head space and removing bubbles. For the hot pack though, you only need to process 10 minutes for pints and 15 for quarts, since you already warmed it up. For both of course process at a full rolling boil with the jars covered by at least 1-2 inches of water. After the processing time is done, turn off the heat, remove the canner lid, wait 5 minutes and remove the jars. I have no pictures, however, because I plan to just keep it in the fridge. So, there you have it – you can choose from three ways to store it, and it’s super easy to make. Now get out there and kraut!

Master Food Preserver Class – Week 5

Tomatoes are one of my very favourite things to preserve, so I was pretty happy that week 5 of our Master Food Preserver class was devoted to tomatoes (and also cheese!). No, it’s not tomato season here in the PNW, but hey class has to cover everything before the season ramps up, so we got a little tease and now have to wait a few months before we can make all these recipes.

IMG_2797 copy

Canning tomatoes is awesome and amazing and definitely something that you should do, but it’s an area where you definitely need to be following tested and trusted recipes for things like salsas and sauces. Tomatoes are acidic enough to hot water bath can, but they are on the borderline between low and high acid, so we must add a little extra acid when we can them. This is because some may not be quite acidic enough, and if they are not remember we have the potential for botulism growth. We also learned that there are a couple bacteria that are only really found on tomatoes, and these bacteria can reduce the acidity and create conditions that are ideal for botulism. Adding that extra acid eliminates these risks.

In class we canned crushed tomatoes. When filling the jars, you add a bit of extra acid to each jar. 1 tablespoon of lemon juice per pint or 1/4 teaspoon of citric acid. This ensures your tomatoes are definitely out of the pH range in which botulism can grow. It takes two extra seconds to do, so don’t skip it.

The hardest part of canning tomatoes is the peeling. I always can with a friend doing tomatoes because it’s a lot of work. But totally worth it. Look at those naked ‘maters!

IMG_2810 copy

For the crushed tomatoes, we hot packed them. Here we are bringing them to a boil. Hot packing tomatoes is definitely the way to go, or else they have to process for 85 minutes!! That’s crazy talk!

IMG_2841 copy

Crushed tomatoes!

IMG_2866 copy

My favourite thing to do with tomatoes is to make salsa. We made three different salsas in class this week. Two tomato salsas and a tomatillo salsa. Salsa are delcious and amazing, but again, this is one area where you really need to follow a tested recipe, such as a recipe from Ball, So Easy to Preserve or from an extension service publication or the National Center for Home Food Preservation. The reason for this is that adding peppers and onions to the tomatoes to create salsa reduces the acidity, putting it into a range where botulism can definitely grow. Vinegar or lemon or lime juice must be added to compensate for these low-acid foods. But do you know exactly how much acid is needed for a cup of peppers or a cup of onions? No, so try out some of those tested recipes and find one you like. There really are a good number of options out there.

IMG_2823 copy

The one that I helped make is actually this one that I posted last fall. It’s a great one if you like a salsa with a lot of peppers in it. I would recommend making about a million jars of this come tomato season. It’s that good. Although one alteration from the way I did it would be to make the recipe as written, then repeat rather than trying to bring twice as much to a boil. It just took forever to boil and I think holds together better if you get it boiling and into the jars faster. You live and you learn.

IMG_2838 copy

OH MAN I JUST WANT TO EAT IT ALL RIGHT NOW!

IMG_2855 copy

The second recipe was also an OSU extension recipe but it’s more similar to the other one from Ball I posted last year, found here. This one has proportionally more tomatoes than pepper and onions, and has a bit of added tomato paste. They are both delicious and which one you like better will just depend on your taste for salsa.

IMG_2860 copy

Beautiful little fellows.

IMG_2876 copy

Finally, we made a salsa verde using tomatillos. You could also make this with green tomatoes as I did last year with this recipe.

IMG_2863 copy

Filling the jars.

IMG_2873 copy

OK. Well now I am drooling and wishing tomatoes were ready…. but never mind let’s not wish the summer away. Let’s talk about some salsa and tomato rules.

– I already mentioned this, but always follow a tested recipe when canning salsa
– Never reduce the vinegar or lemon juice or add extra vegetables
– Altering spices is OK, like adding some cumin, cilantro or oregano to your taste
– You can swap peppers for different peppers, like if you want your salsa milder or hotter – just ensure you use the volume of total peppers called for in the recipe
– Don’t can overripe, spoiled tomatoes, or those from frost-killed vines. They have lower acidity so may not be safe to can
– Tomatillos and tomatoes are interchangeable in salsa recipes
– Use 5% acidity vinegar and bottled lemon or lime juice in salsa
– Equal amounts of lemon juice can be substituted for vinegar but not vice versa since the lemon juice is more acidic
– Don’t use thickeners in canned salsas, this can cause uneven heating and produce and unsafe product

Whew! OK that seems a bit overwhelming, but basically just be safe and smart making salsa. Follow a tested recipe, don’t be stupid, and you will enjoy many a delicious jar of salsa.

The last thing we did in class was learn to make soft cheese! Honestly, I thought it was a bit of a gross process, but maybe now that I’ve done it once it won’t be so bad next time. ha. And the cheese did taste pretty good. We made queso fresco. I’ll do a full post on it when I have a chance, but here are some pictures.

Milk and buttermilk

IMG_2882 copy

The formation of the curd.

IMG_2886 copy

The curd is setting up.

IMG_2890 copy

Eww. Straining it.

IMG_2892

Squeezing out the whey.

IMG_2896 copy

Ta-da!

IMG_2903 copy

I think it was just the early stages and the smell that bothered me a bit. But it actually tasted surprisingly good. Have you ever made cheese? What’s your favourite kind to make?


Master Food Preserver Class – Week 4

Week 4 of Master Food Preserver class was all about pickling!

IMG_2807 copy

What is pickling anyway? Well Janice, our awesome instructor, had a funny quote up on the board: “A pickle is a cucumber soured by a jarring experience.” HA! Well, I was entertained at least. But this is not entirely true; A pickle doesn’t need to be a cucumber, and it doesn’t always need to be jarred either! In fact, there wasn’t one cucumber in class, we did all sorts of other types of pickles instead. Pickling is basically the process of adding a high concentration of acid to a food to prevent the growth of microorganisms.

There are 4 basic types of pickles – you can pickle a lot more things than just cucumbers!
– Fresh pack or quick pickles
– Brined of fermented pickles
– Fruit pickles
– Relishes and Chutneys

Quick pickles are made when you combine the ingredients and immediately process, versus a fermented pickle that sits for a few weeks and ferments, producing its own acids. Fermentation in vegetables and fruits is the anaerobic breakdown of sugars into acid. In veggies, naturally present bacteria breaks down the sugars, and in fruits, it is yeast that converts the sugar first to alcohol, then to acid. The acid formed is lactic acid, as opposed to the acetic acid from vinegar which we use in quick pickles.

Relishes are seasoned sauces made from chopped fruits or veggies, and chutneys are fruit relishes with fruits and/or veggies and nuts. They are a sweet and sour blend of vinegar and spices.

The first thing we did in class was asparagus pickles. This is a fresh pack or quick pickle, because what we did was combine the asparagus with spices, water, vinegar and salt, put it into jars, and immediately process it in a boiling water bath canner.

Asparagus ready to be pickled.

IMG_2653 copy

Mmmm. Now we wait a few weeks for them to absorb that vinegary deliciousness.

IMG_2721 copy

We then split into four groups and each made a different pickled product. One group was in charge of this mango chutney.

IMG_2667 copy

Chutneys are a little weird to me. I haven’t actually tried it yet, but I will let you know if I find an amazing use for my jar of this.

IMG_2694 copy

All prepared and in the jars.

IMG_2714 copy

Another group made this corn relish.

IMG_2699 copy

I was on team beet pickle. If you know me you know I love me some beets.

IMG_2659

It looks like a bit of a murder scene when you cut up beets. Especially precooked ones.

IMG_2677 copy

I would definitely recommend gloves, unless you love having red hands. It doesn’t really bother me, but it does stain quite nicely. Helps you understand the term “beet red” 😉

IMG_2681

I would not recommend doing this in half pints. This was simply so that the whole class got a jar to take home. Go pints or even quarts for sure. If you are looking for a recipe, I actually posted one a little while ago here.

IMG_2693 copy

And finally, we pickled some onions.

IMG_2662 copy

They made for a pretty attractive pickle.

IMG_2688 copy

Pretty good haul! I never really used to be a big fan of pickles, but they sure are growing on me.

IMG_2800 copy

OK now that you’ve enjoyed the picture show, we’ll finish with some pickling rules:
– Always use at least a 1:1 ratio of water to vinegar making quick pickles. It’s not safe to use less vinegar or more water. If it’s too tart for your taste, add a teeny bit of sugar
– Use vinegar with 5% acidity, there are some tricky brands out there that are only 4%
– When making fermented pickles, don’t reduce the salt. And if you want to can it, don’t do so until they have a sour flavour.
– Always use pickling/canning salt rather than regular table salt
– You can swap the type of vinegar, as long as it is 5% acidity. Some people prefer the milder flavour of cider vinegar, go for it!
– The spices can be changed to taste. Adding more garlic or dill to your pickles is a-ok. This is one thing that is not a safety issue.

The last thing we did on pickling day was make flavoured vinegar. And this is a nice way to end, because as Janice said – there are no rules. When you make flavoured vinegar, it’s basically safe to chuck in whatever you like. Buy some cheap white wine vinegar in bulk and flavour it yourself by filling a jar with whatever spices you like and cover with vinegar. We tried some delicious berry ones as well, and I am super excited to make some this summer for some delicious vinaigrette. These are fine stored at room temperature. Once they have steeped to your satisfaction, they can also be processed in a boiling water bath canner if you really want to.

IMG_2673 copy

My white wine vinegar, full of herbs, and a chive flower.

IMG_3260 copy

Victorian Barbecue Sauce

I’ve had a lot of rhubarb coming in lately, so I decided to go for something a little different this time, and whipped up some Victorian barbecue sauce from the Ball Complete Book of Home Preserving. This is great on chicken, and I bet it would be nice on pork as well. It tastes surprisingly good and is quite easy to make. I am trying to get away from store bought braises and sauces for meat, and this is a delicious replacement; a nice combo of sweet and tart.

Ingredients:
8 cups chopped rhubarb
3.5 cups lightly packed brown sugar
1.5 cups chopped raisins
1/2 cup chopped onions
1/2 cup white vinegar
1 tsp ground allspice
1 tsp ground cinamon
1 tsp ground ginger
1 tsp salt

Here’s how we made it:

Chop up the rhubarb, onions, and raisins.

IMG_2444 copy

Combine all the ingredients in a stainless steal pot.

IMG_2447 copy

This turns to brown muck pretty fast! Bring to a boil over high heat. Stir frequently and reduce to a simmer. We cooked the sauce for about a half hour. You want it to be the consistency of a barbecue sauce. Not too thick though… spreadable.

IMG_2467 copy

I ended up pureeing it because I forgot to chop the raisins. This dummie just through them in. It should kind of be a pureed consistency anyways since it’s a sauce, so just don’t forget to chop the raisins 😉 Meanwhile, prepare the canner, jars and lids. This makes about 4 pints.

IMG_2495 copy

Fill the hot jars, leaving a half inch head space. I hate to say it, but it kind of looks like we were canning up diarrhea. Yep, I said it. Gross. But it tastes really good. Anyways, that was awkward. Wipe the rims, apply the lids, and tighten the bands finger tip tight. Place jars in canner, covered by at least 1-2 inches of water, bring to a full rolling boil and process for 15 minutes. After 15 minutes remove canner lid, wait 5 minutes, and remove the jars to a hot pad or towel. Listen to them ping! Cool 12-24 hours, wipe jars, label and store.

IMG_2501 copy

Try this sauce on barbecued chicken. It’s really delicious.

IMG_2634 copy

*this post contains affiliate links, please see the “About the Blogger” page for more information

Master Food Preserver Class – Week 3

Week three of Master Food Preserver Class was all about preserving low acid foods. Which means pressure canning! A lot of people are scared of pressure canning, and there are a few things that I think you should have a healthy fear of  – like botulism, but done correctly there is no reason to be afraid of pressure canning. Your pressure canner is not going to explode or anything like that. Even if you accidentally over pressurized it, there is a little safety value that pops off. So ya, you could have a mess on your ceiling, but that’s also only if you really aren’t paying attention. So, I am here to give you some facts about canning, and hopefully dispel some of the pressure canning jitters.

A pressure canner is mandatory if you want to can anything with a pH of 4.6 or above. These low acid foods include any vegetables, meats and combo foods like soups. To toss in some pictures, here is my very first canning project – green beans!

https://thebabblingbotanist.com/wp-content/uploads/2014/05/b9e96-5fc91546f2a411e2816722000a1f93c3_7.jpg

When picking a pressure canner, there are a couple things to consider. For one, to safely heat the food, a pressure canner must be large enough to hold 4 quart jars minimum. Most are designed for 7 quarts, and the taller ones can fit two layers of pints. The one below is mine, a 23-quart presto. There are two types of pressure canners: weighted gauge and dial guage (dial pictured below). Dial gauges need to be tested every year for accuracy, and the dial replaced if it is off by more than two psi. Usually they stay accurate a long time unless they are bumped, or dropped or something, but you definitely want to check it every year. Your local extension office should be able to do it for you! Dial gauge canners never need to be tested, but only do 5, 10 and 15 psi, so if you need to adjust for altitude, you have to use the 15psi weight. I prefer the dial gauge just because I am a very visual person and like to be able to see that I am at the correct pressure. Some weighted gauge ones also have a dial though. With the weighted gauge you just listen for it venting every 15-20 seconds.

OK, so why do we need pressure canners anyways? Why can’t we just hot water bath can everything? The answer to this is basically one bacteria – Clostridium botulinum, which is the bacteria that produces the botulism toxin, causing severe neurological illness. C. botulinum thrives at pH 4.6-7.0, which is why anything with a pH above 4.6 must be pressure canned (for extra safety most recipes are desgined with 4.2 as the goal). Ideal growing conditions for C. botulinum are anaerobic conditions (without air), moist conditions, around room temperature, with the pH 4.6-7. These are the exact conditions created in a canning jar. However, there is a way to kill C. botulinum, and that is by bringing it to a temperature of 240 F and holding it there for a set amount of time. This cannot be achieved in a boiling water bath – water boils at 212 F.

Other facts about pressure canning:
– When pressure canning (actually any canning) follow safe, approved recipes, like from Ball, So Easy to Preserve, or the National Center for Home Food Preservation website
– Canning times differ for different products due to their texture, density and pH
– Canning at sea level is at 11 psi. Always adjust for your altitude.
– If your canner ever drops below 11 psi while canning, return to pressure and start the time over
– Don’t skip the 10 minute vent time. This vents cold air from the canner to ensure proper processing.
– Pack the jars as listed in the recipe. For example, use appropriate head space. Also, for soups you need to fill half with solids (no more) and top off with liquid.
– Never try to force a canner to cool, just let it cool naturally at room temperature until the safety plug drops. At that point, remove the weight, wait 10 more minutes, then it can be emptied.

OK, and on too the fun pictures. We did beans in class (two types) and a spicy tomato veggie soup. So delish. I’ll update this post with links to the recipes once I post them.

White beans ready to be heated.

IMG_2565 copy

Spooning the rehydrated beans into jars.

IMG_2601 copy

Small red beans.

IMG_2564 copy

With bacon!!

IMG_2587 copy

Most pressure canned items need 1 or 1.5 inch head space. This is below the bottom of the threading by a good centimetre.

IMG_2608 copy

Beans in syrup with bacon!

IMG_2613 copy

My group worked on the spicy tomato soup. SO GOOD! I need to make a giant batch of this when tomato season hits!

IMG_2576 copy

Half full of solids first, then you top off with liquid.

IMG_2624 copy

Eating the leftovers.

IMG_2631 copy

Sorry to taunt you with these pictures and not the full details, but the recipes are coming soon!

*this post contains affiliate links, please see the “About the Blogger” page for more information

Master Food Preserver Class – Week 2

I promised to post about master food preserver class each week, so here is what we learned in last Thursday’s class! I took 116 photos in class during week 2, and it didn’t feel like enough, so you know it must have been a good class! And of course it means this post will basically be a picture show. 😉 This week we covered freezing, fruit pie fillings and soft spreads. So I would like to start off with some fun facts that I learned in class that you may or may not already know.

Freezing
– The best way to freeze if you are going to do a bunch of stuff, is to turn your freezer extra cold (down to -10F) the day before so that things freeze quickly. Frozen goods should be kept at 0F or below, so once frozen return the temperature to 0.
– Vegetables should always be blanched before freezing to stop enzymes that would otherwise cause changes in colour, texture, flavour and nutritional value. Recommended blanching times vary by vegetable and range from 1-10 minutes

One thing we covered for freezing was freezing convenience foods. So we did just that, and will eat these food later in the class! YUM.

One convenience food we froze was a “meal in a bag”:
-1 chicken breast cooked and diced
– 2 cups blanched veggies (or frozen ones)
– 1 cup pasta cooked until almost done
– seasoning packet in a separate baggie (such as 2t chicken bouillon, 1/2t garlic powder, 1/2t onion powder, 1/2t paprika, 1t parsley, 2T parmesan cheese)

Freeze it all up in a baggie. When you want to eat it, dump it all in a wok, stir fry it up and … presto!

Chicken for the meal in a bag.

IMG_2326 copy

Blanched veggies for the meal in a bag.

IMG_2350 copy

Combine it all and freeze. A great idea if you have a free weekend day and freezer space!

IMG_2367 copy

Another convenience food we froze was twice baked potatoes. nom nom nom.

Bake potatoes, halve, and remove innards to a large bowl.

IMG_2335 copy

Mash and mix in milk, sour cream, garlic, salt, pepper and cheese.

IMG_2346 copy

Refill, top with more cheese if desired, then freeze on a baking sheet. Once frozen, transfer to freezer containers. When you want to eat it, bake at 375F for 25-30 minutes.

IMG_2348 copy

The last convenience food we did was cookies. Works with most cookie recipes.

Mix up the recipe.

IMG_2344 copy

Mold into balls (and in this case dip in sugar – yum!)

IMG_2359 copy

Freeze on a cookie sheet and then transfer to a freezer container. When you want to eat them bake without thawing at 400F for 10-15 minutes.

IMG_2361 copy

Fruit pie filling (and juice hiding in back)

Most fruit pie filling recipes for canning call for clear jel. What is clear jel anyways? It’s a starch used for thickening, and is basically a modified corn starch. You shouldn’t used regular corn starch or other thickening agents in canning, because they are not specifically designed for canning like clear jel. Clear jel has been modified to make it more heat stable, so it can take the heat of the canning process. It is also stable in low pH, like the pH of fruits. It makes products more shelf stable, and doesn’t separate over time like other starches can. It can be reduced in recipes too if you don’t want quite as much. If you don’t like the starchy pie fillings though, don’t try and can a pie filling recipe without it. Either follow a recipe for canning fruit in syrup, and then drain the syrup to use it in pies, or freeze the fruit instead!

IMG_2402 copy

Soft spreads

Fun fact. Do you know the difference between a jelly, jam, conserve, preserve and a marmalade?
Jam – made from crushed or chopped fruit
Jelly – made from fruit juice
Conserve – made with two or more fruits and nuts or raisins
Preserves – made with whole fruits, or large pieces, in a clear, slightly gelled syrup
Marmalade – made with soft fruit and citrus peel in a clear jel

In class we made the following soft spreads. Click the names to link to the full recipe posts.

Blueberry lime jam

IMG_2393 copy

and all canned up.

IMG_2428 copy

Jalapeno pepper jelly.

IMG_2417 copy

Strawberry lemon marmalade.

IMG_2418 copy

And strawberry rhubarb jam.

IMG_2422 copy

So many delicious treats! And the day’s excellent haul.

IMG_2425 copy

Master Food Preserver Class – Week 1

Week 1 of my Master Food Preserver class was pretty fun. We didn’t get to a ton of food preservation being the first week, but we did start sauerkraut and can up some apples. The major thing we got through was a lot of food safety, which makes sense for week 1. There honestly weren’t too many things that were news to me, but here are some interesting tidbits from the day that you may or may not be aware of.

“Danger zone” is not just a song. It’s also a range of temperatures which are optimal for bacterial growth, and therefore not optimal for food safety. 40-140 degrees Fahrenheit. Food shouldn’t remain in the danger zone for more than 2-3 hours or it can be unsafe. For me I think my biggest offence against this would be putting a really big pot of something in the fridge. It cools slowly enough that it can remain in the danger zone too long. Spreading food out in shallower dishes would help me to avoid remaining in the danger zone.

We also learned about foods that are more likely to be contaminated by bacteria (and should therefore be avoided by the young, sick, pregnant etc.) I knew almost all of these, but didn’t realize the sprouts were due to bacteria related reasons, and didn’t realize lunch meat was on the list.
– rare ground beef
– unpasteurized apple cider/juice
– uncooked hot dogs/ lunch meat
– alfalfa and bean sprouts
– lox (cold smoked fish)
-raw milk and raw cheese
– soft cheeses (feta, Brie, Camembert, Roquefort etc.)
– raw eggs

We also talked about basic canning equipment, a bit about the history of canning, and basic canning guidelines. But I could write about that for pages and pages, so I think I’ll work on this as a page of it’s own to eventually bring this blog to a full canning resource. In the meanwhile, refer to the USDA National Center for Home Food Preservation website http://nchfp.uga.edu/publications/publications_usda.html 🙂

Another fun fact – the cut-off for what is a low acid food is pH 4.6. Anything above this must always be pressure canned. This includes all meats, vegetables, soups and stocks. And I’ll do full pages on these things some day because they are super interesting and important concepts.

Now for the fun part, we started out by getting sauerkraut started. Full recipe to come once it is ready. Yup, I’m going to make you wait.

Shredding the lettuce with a mandolin.

IMG_2101 copy

After letting it sit with salt, filling the jars.

IMG_2152 copy

So pretty!

IMG_2157 copy

We also canned apples. Honestly I wouldn’t normally can apple slices straight up, but it is a good way to learn the concept of canning sliced fruit.

IMG_2125 copy

And we did a fun experiment. We canned the apples in something like 16 different liquids, and we’ll taste test them later. I think this is a great idea because I’d never want to test these myself and then open all 16 at once, but there are almost 20 of us, including instructors, so I think it’s a great idea. I’m going to suggest we do it with pickle recipes too on that week. We did water, light syrup, medium syrup, heavy syrup, extra heavy syrup, brown sugar, honey, agave, stevia, splenda, orange juice, cranberry juice, pineapple juice, grape juice, apple juice… there may be one more I’m forgetting. But yes – what a fun idea!

IMG_2136 copy

Well that about sums up the highlights for the day. More next week, mostly about jams and jellies, fruit pie filling, and freezing. Fun fun!!


A jam contest winner and an announcement – becoming a master food preserver

Congratulations to my jam content winner – Jenna! The random number gods have chosen you! I sent you an email about getting the jam from me. Yayyyyyy jam. Thanks to all of you who entered, I’ll do another giveaway soon.

My second announcement is another fun one. Starting this week I am taking the Master Food Preserver program through OSU Extension Service. Here’s the website if you’re interesting in looking into it. http://extension.oregonstate.edu/linn/linn-benton-county-master-food-preserver-program
It’s an awesome 8 week class where we’ll learn everything there is to know about food preservation. I feel like I know a lot already (got perfect on the pre-quiz at orientation 😉 ) but there is always more to learn. Safety, recipes, and so much more! The program is definitely not something that is available everywhere, which is why I am taking it this year even though it may not be the best time management decision, taking 8 full days and requiring 48 volunteer hours. But it will great, I’m super pumped. I am going to try and post each weekend about it, it’s one day a week on Thursdays 🙂 Here is the book they gave us. So much to learn! So many tabs!

20140429-211826.jpg

And my first homework assignment. Woo! I look forward to telling you all about it 🙂

20140429-214319.jpg

Happy Earth Day! Planting golden paintbrush, convincing you to can, and a jam giveaway!

Happy 2014 Earth Day! I hope you are all doing some earth friendly things today! For me, my field work that was planned for today was postponed until tomorrow, so I’m being green by “working from home.” HA! Anyways, it’s true, well, that I’m home, but all joking aside I wanted to share a couple things that I did do for the occasion, and a few that you can do too.

The first way I celebrated Earth Day was with the Institute for Applied Ecology. Every year we recruit volunteers and plant endangered plants. This year we planted 800 golden paintbrush (so far!) at William L. Finley National Wildlife Refuge. This is my study species as many of you might know! We are proud to say it is well on its way to recovery. Here are a few pictures from the event.

Paintbrush in “cone-tainers” ready to go in the ground.

IMG_2057 copy

A lovely flowering paintbrush

IMG_2062 copy

And his comrades.

IMG_2065 copy

Volunteers working hard to get plants in the ground.

IMG_2078 copy

A paintbrush in his new home on our grid.

IMG_2079 copy

Awesome! Aren’t they gorgeous?! Great way to spend the Saturday before Earth Day!

OK, now to totally switch gears to another Earth Day topic – canning! And other food preservation. I love to can (if you haven’t realized this yet, I’m not sure what blog you’ve been reading), but it’s not just fun and delicious. It can be good for the planet too, and for you! Yes, I’ve been posting a lot of sugary jam recipes lately, but really how much jam do I actually eat? And I do often go for much less sugar. But anyways, let me get to the point – here are my top reasons that you should start preserving this Earth Day . Some of them are earth friendly and some health friendly reasons.

1. It allows you to eat local even in the dead of winter.
This should really count are more than one reason since eating local has so many benefits:
– less emissions from your food travelling
– fresher food
– knowledge of where your food came from – talk to your farmer!
So many foods are available for only a short period, but preserve very well. Berries and fruits are
great canned and some freeze well also. Many vegetables can be pressure canned or are great
pickled, and freeze well. Herbs can be dried, or frozen in oil.

2. You produce less waste
Canning jars are reusable over and over again. Every time you eat a store bought canned good,
you either produce waste throwing it away, or even if you recycle it, it takes energy to do that.
Can your own and that jar is good until it get chipped or cracked!

3. You can customize your recipes (to a safe extent)
Certain things can’t be adjusted in canning because it makes recipes unsafe, such as the
amount of vinegar or lemon juice you add, but there are countless ways that you can customize
recipes to suit your needs
– Use less sugar and a low sugar pectin
– Try sweetening things with honey or stevia
– Adjust saltiness and spiciness to your preference
– Sweeten pickled goods that are too strong with a small amount of sweetener
– Choose the size of jar you preserve in to be appropriate for how much your family eats,
reducing wasted food

4. It can save you money
– Preserve things you grow yourself
– Buy in bulk at the peak of the season, split it with a friend to possibly save even more
– Go to pick your own places to get the same produce cheaper than at the market
Canning can end up being more expensive than store bought, such as when you buy a ton of
tomatoes to make sauce, so plan accordingly by planting the most expensive produce and
things you use the most.

5. People love it when you give canned goods away!

Which leads me to why you forced yourself to read this whole post – the jam giveaway! In celebration of Earth Day, and to spread the love of canning I am giving away one jar of my rhubarb orange jam (click for the recipe). Please enter by commenting below and telling me what you are doing to celebrate Earth Day. One entry per person, and it has to be a comment on the blog not the facebook page so it’s easier for me to just draw from one pool of comments. Good luck! Contest will close one week from today – April 29th at 9pm Pacific time. And for now, just open to US and Canada please. Thanks!

IMG_1639 copy

Strawberry Rhubarb Jam

Strawberries and rhubarb are perfect for each other – a delicious match of sweet and tart! This recipe calls for a 1:1 ratio of strawberries to rhubarb, but you are welcome to do a little less rhubarb if you want. I love the tartness of it though, and would actually recommend doing this with a reduced sugar pectin and less sugar to really let the rhubarb shine. Here are the ingredients as written in the  Ball Complete Book of Home Preserving, but the low sugar sure jell does 6 cups of berries to 4 cups sugar, so I think I’d go for that level of sweetness next time.

Ingredients:
2 cups crushed strawberries
2 cups chopped rhubarb
4 tbsp lemon juice
1 package powdered fruit pectin
5.5 cups granulated sugar

IMG_1932 copy

Step one for this jam is preparing the canner, jars and lids. It’s another pectin recipe so is a quick one. This will yield about 6-7 half pints.

Mix together the crushed strawberries, rhubarb, pectin, and lemon juice in a deep stainless steel saucepan. Measure out the sugar and set it aside so it can be added all at once.

IMG_1937 copy

Bring the jam to a boil over high heat. Stir, stir, stir! Once boiling, dump in the sugar and return to a boil. Once at a full boil, maintain for one minute, remove from heat, skim foam and fill jars.

IMG_1948 copy

Fill the jars, leaving a quarter inch head space. Wipe rims, apply lids, and tighten bands finger tip tight. Place filled jars in the canner, covered by at least 1-2 inches of water. Bring to a full rolling boil, and process for 10 minutes. After 10 minutes, remove canner lid, wait 5 minutes and remove the jars to a hot pad or towel. Cool 12-24 hours, remove bands, wipe clean, label and store.

IMG_1959 copy

Such a beautiful and delicious jam!

IMG_2031 copy