Applesauce

Well as much as I hate to admit it, autumn is upon us. But don’t fret – there are still a few more canning adventures ahead! Fall means apples, so I canned up some applesauce!

20131010-155125.jpg

My strategy to avoid burning is to peel and eighth the first few apples and get them heating over medium high heat, stirring frequently.

20131010-174344.jpg

After the first few are going I get lazy and stop peeling them – I know Victorio will save me from the peels. If you don’t have a strainer though, you probably want to peel them. Get the canner, jars and lids ready while it heats.

20131010-174533.jpg

Once all the apples were heated and starting to fall apart I ran them through the strainer. Look how pretty that is! Heating them takes 10 to 20 minutes depending on the apple variety and how many you do. If you don’t have a strainer puree them in a blender or food processor.

20131010-174722.jpg

Return the sauce to the pot and bring it to a boil. This is when you would add a little sugar to taste if you like, or some nutmeg, cinnamon or other spices. In this case, I just left it plain and will add things when I open it because some of them I plan to use in baking. You can also add a little lemon juice for added safety since some apples are less acidic than others. One tablespoon per quart.

20131010-174850.jpg

Maintain the boil while you fill jars with hot sauce leaving a half inch head space. Wipe rims, apply lids, and tighten the bands finger tip tight. Process the jars at full rolling boil for 20 minutes. When the time is up remove the canner lid, wait 5 minutes and remove the jars to a hot pad or towel. 12-24 hours later check the seals, remove the bands, wipe clean and store.

20131010-174911.jpg

Roasted Red Pepper and Tomato Sauce

I’ve been wanting to do some different tomato sauce recipes and found this one in one of my newer canning books – “Preserving” by Pat Crocker. This recipe takes a little bit of work with all the roasting, but it is so freaking delicious that it’s totally worth the effort. Now because this is from one of my canning books that I don’t trust with my life necessarily (such as Ball, or an extension service publication), please see my little discussion at the end of this post about how I decided that it is safe for hot water bath canning (but don’t worry, I am posting it because I decided it is).

20131003-152208.jpg

Ingredients:
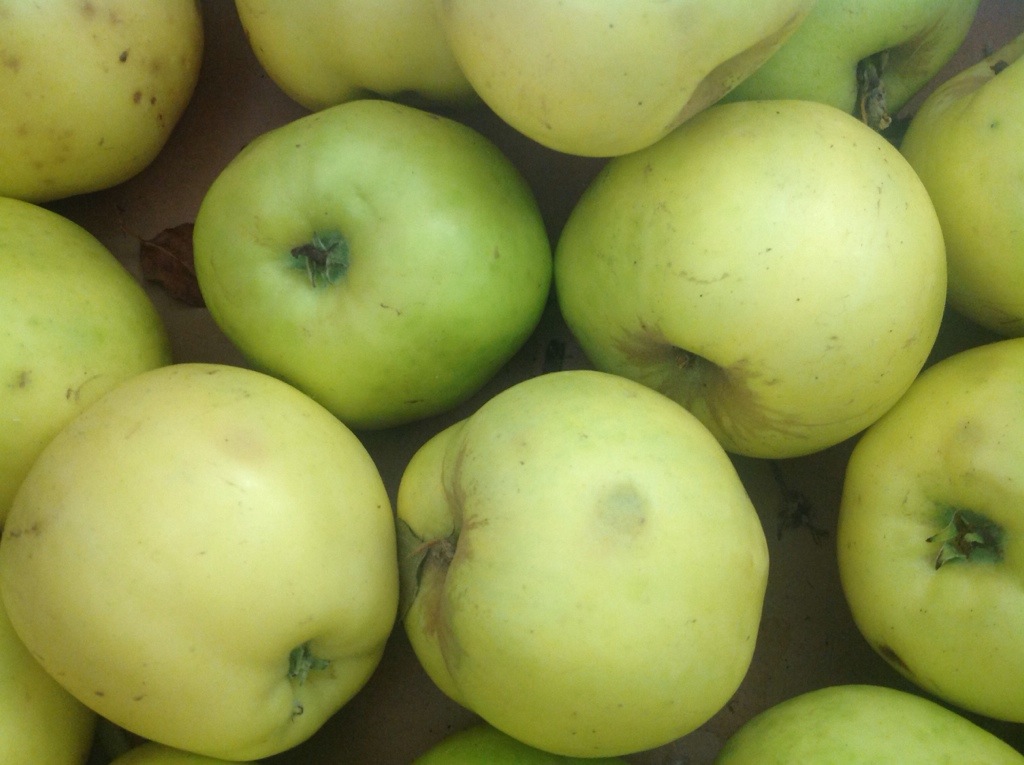
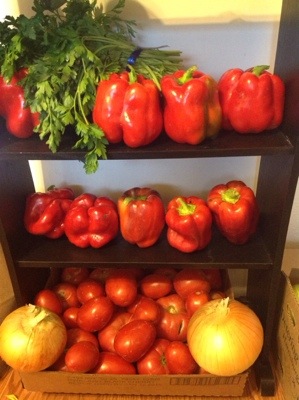
4 pounds of tomatoes, preferably roma
2 pounds red bell peppers
2 cups chopped onions
1/2 cup red wine vinegar
(or 2/3 if you want to be extra safe – see my rant at the end)
4 tbsp olive oil, divided
10 cloves garlic
1/2 cup packed brown sugar
1/4 cup red wine
1 tbsp salt
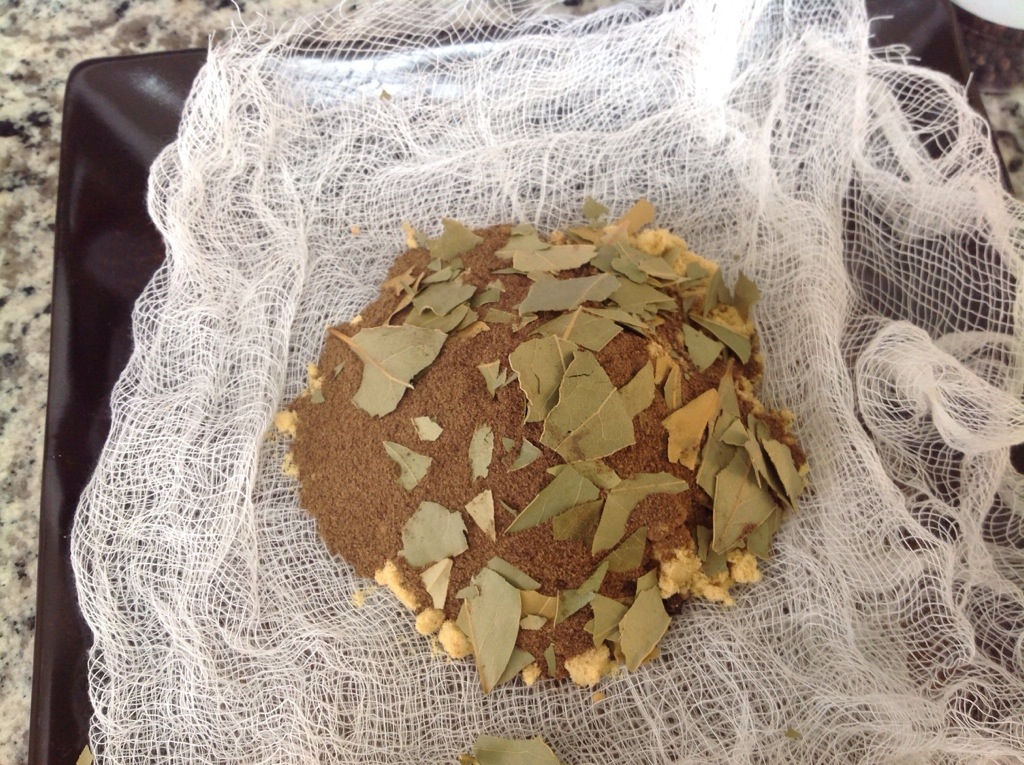
1 cup chopped fresh parsley
1/2 cup chopped fresh basil
1 tbsp chopped fresh oregano
1 tbsp chopped fresh rosemary
5 tbsp bottled lemon juice

Here is what I did:

Preheat the oven to 400F

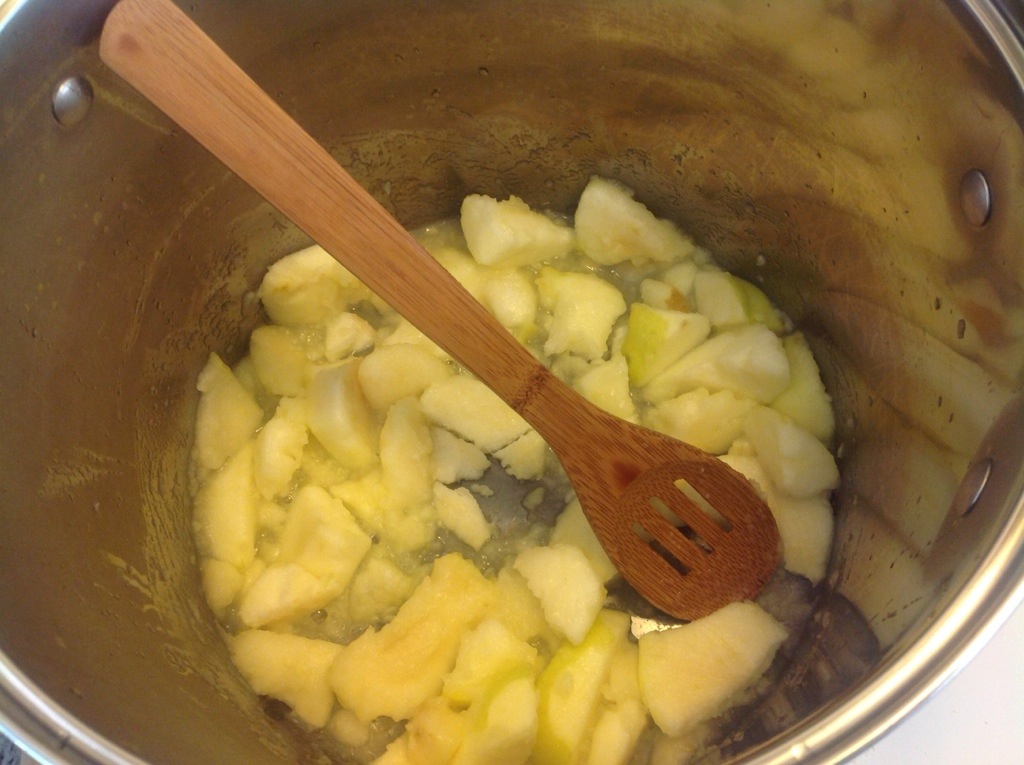
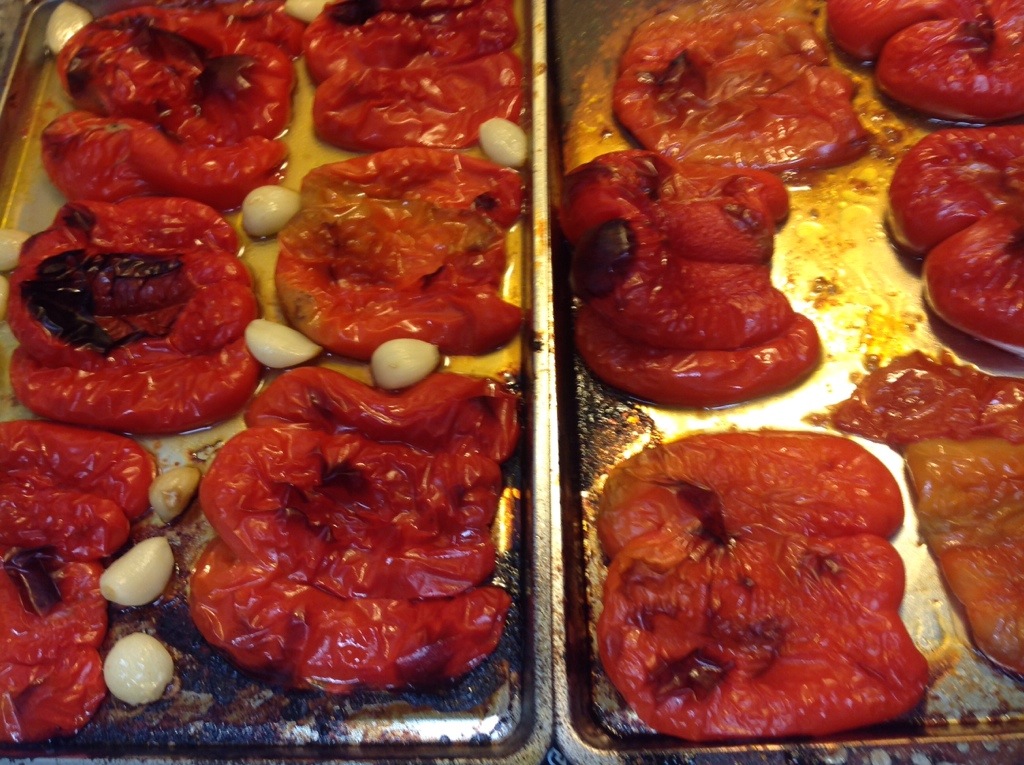
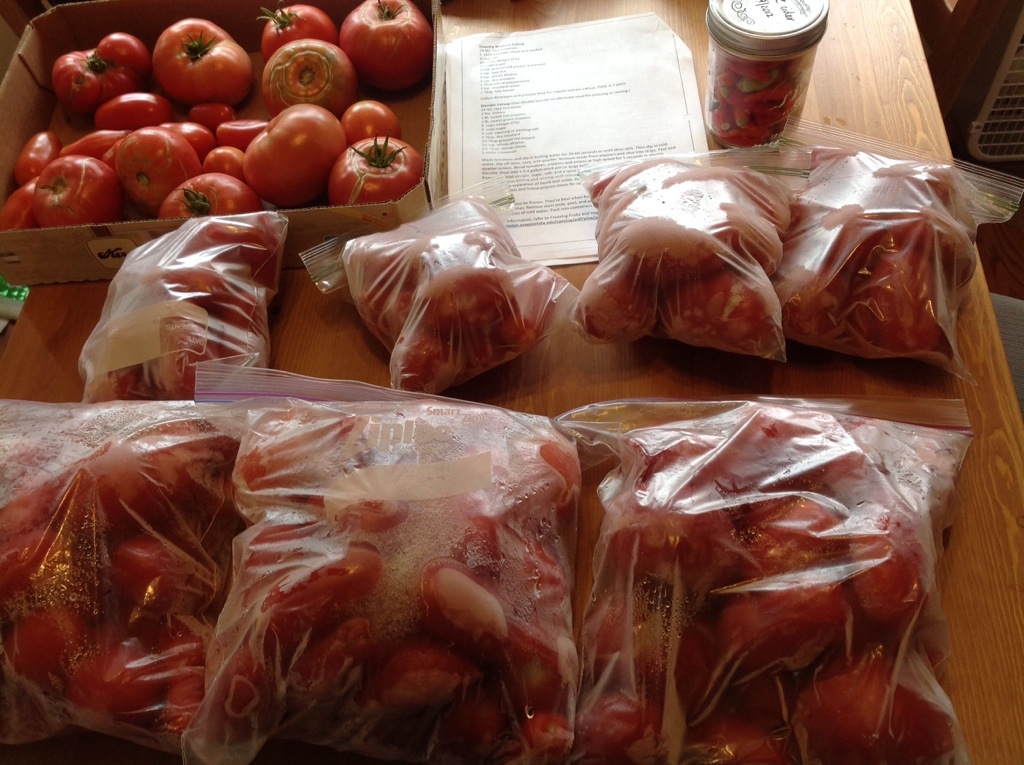
Since I tripled the recipe and I don’t have that many rimmed baking sheets, I needed to roast in phases. I did the tomatoes first. Cut them in half and seed them and place them face down on a rimmed baking sheet. Drizzle 2 tbsp of the oil over them. Roast them for 15-20 minutes.

20131003-151017.jpg

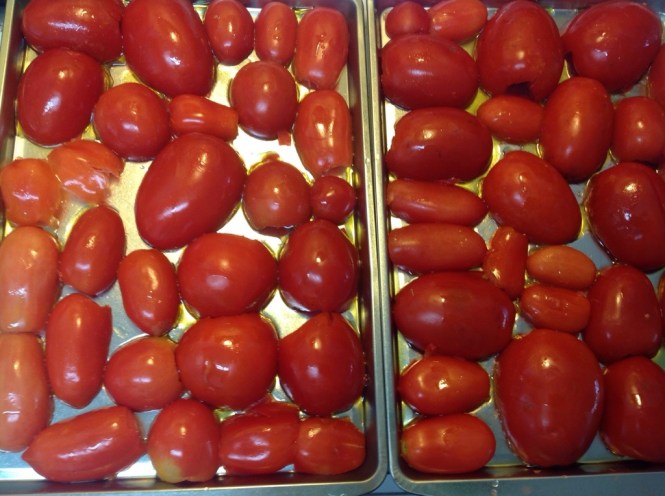
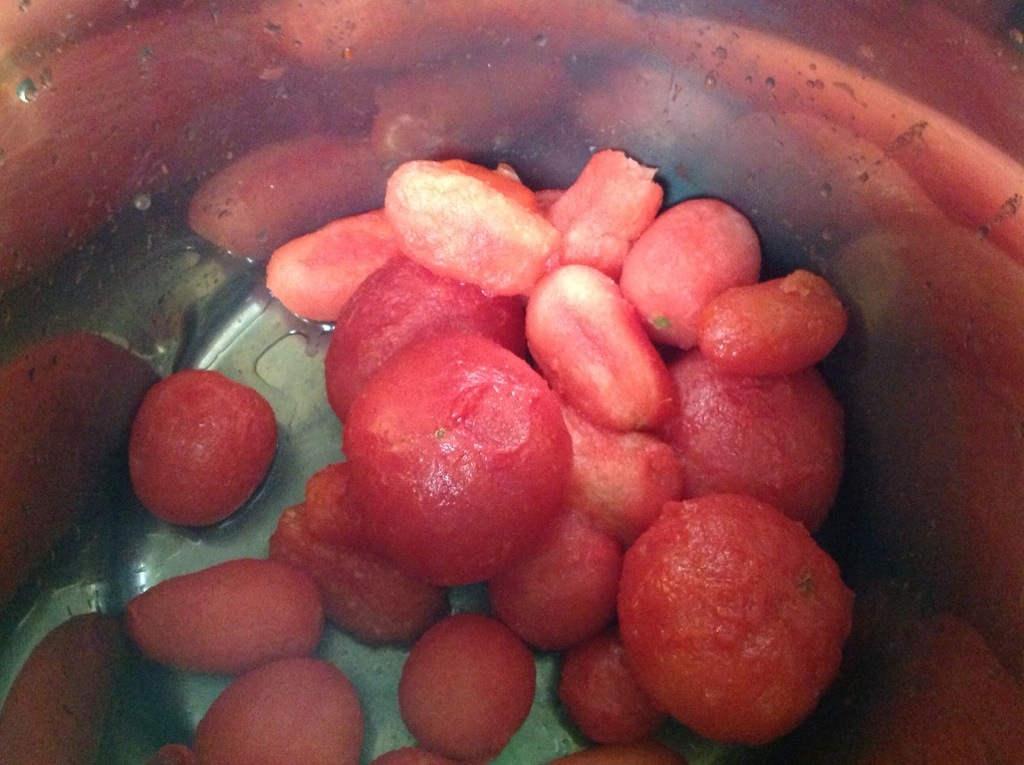
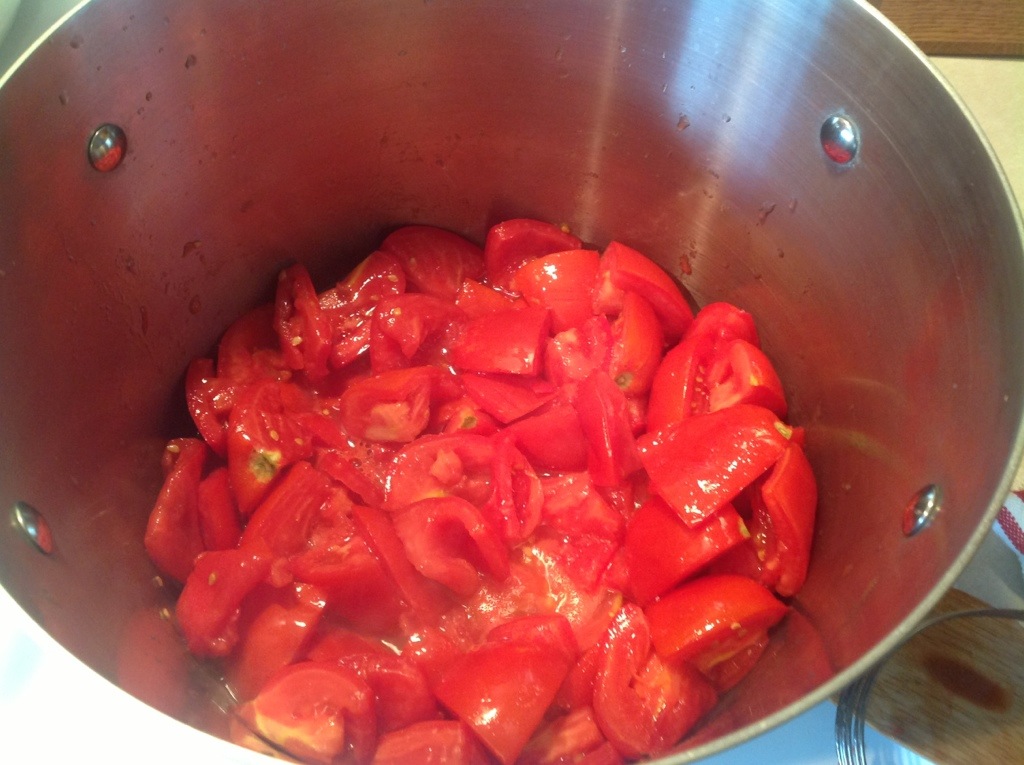
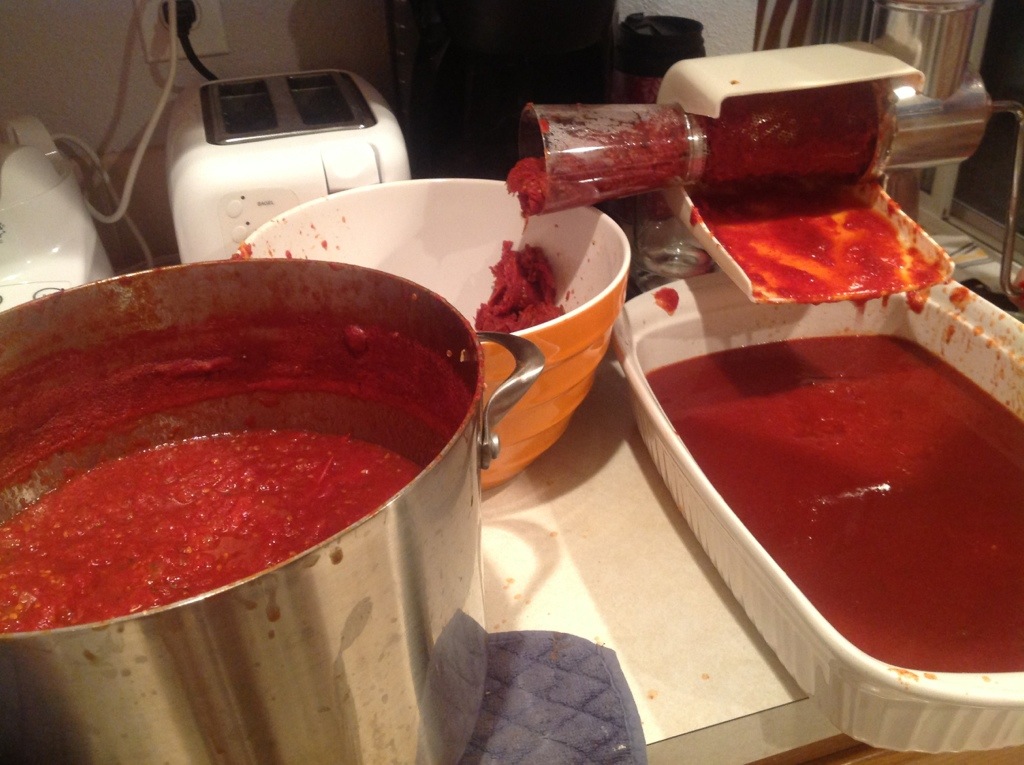
Look at those beauties! Let them cool enough to handle them, peel off the skins and put the tomatoes in your pot. You can chop them coarsely if you like but mine fell apart so easily I really didn’t need to do any chopping.

20131003-151055.jpg

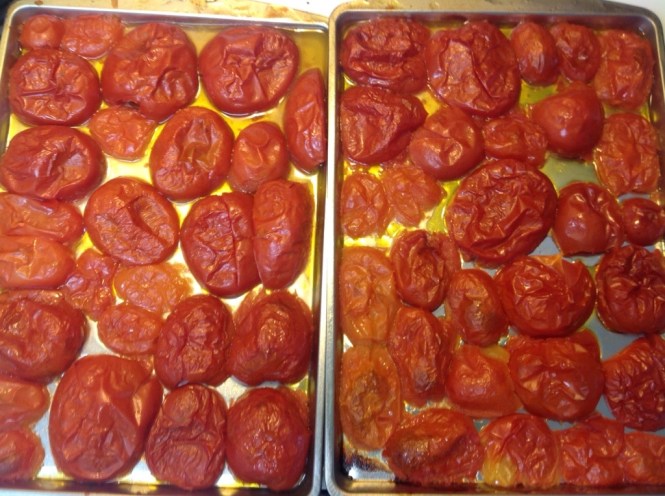
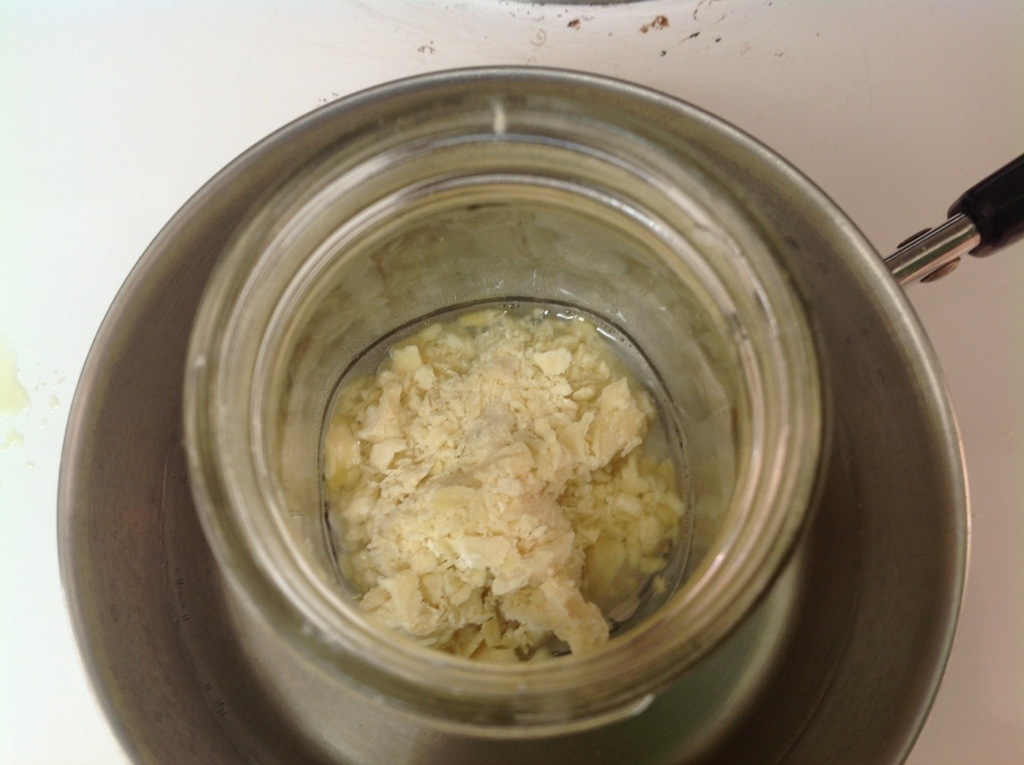
Next roast the red peppers. Place them skin side up, halved and seeded on the baking sheet and drizzle with the other 2 tbsp of oil. Roast the garlic along with them. The peppers take a little longer, maybe 25-30 minutes. Roast until the skins char a little bit. The house will smell sooooo good. Remove the garlic as soon as it is soft, it won’t need that much time, 5 or 10 minutes.

Of course if you are doing the recipe as written and have enough trays, you may be able to do all the roasting at once.

20131003-151201.jpg

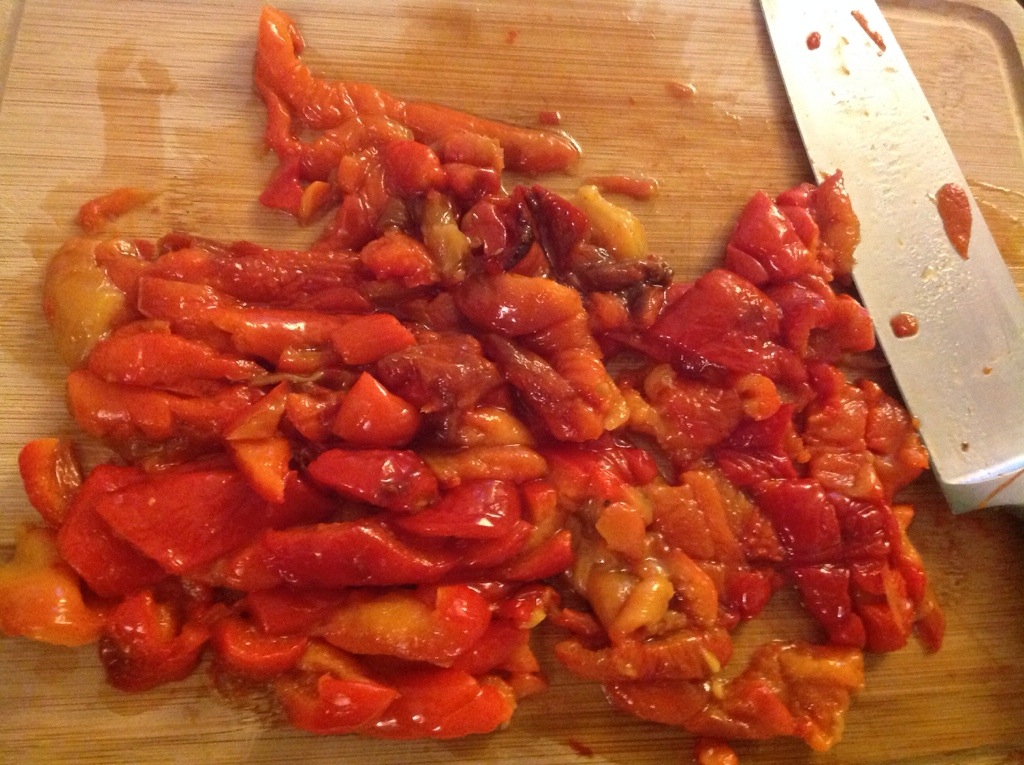
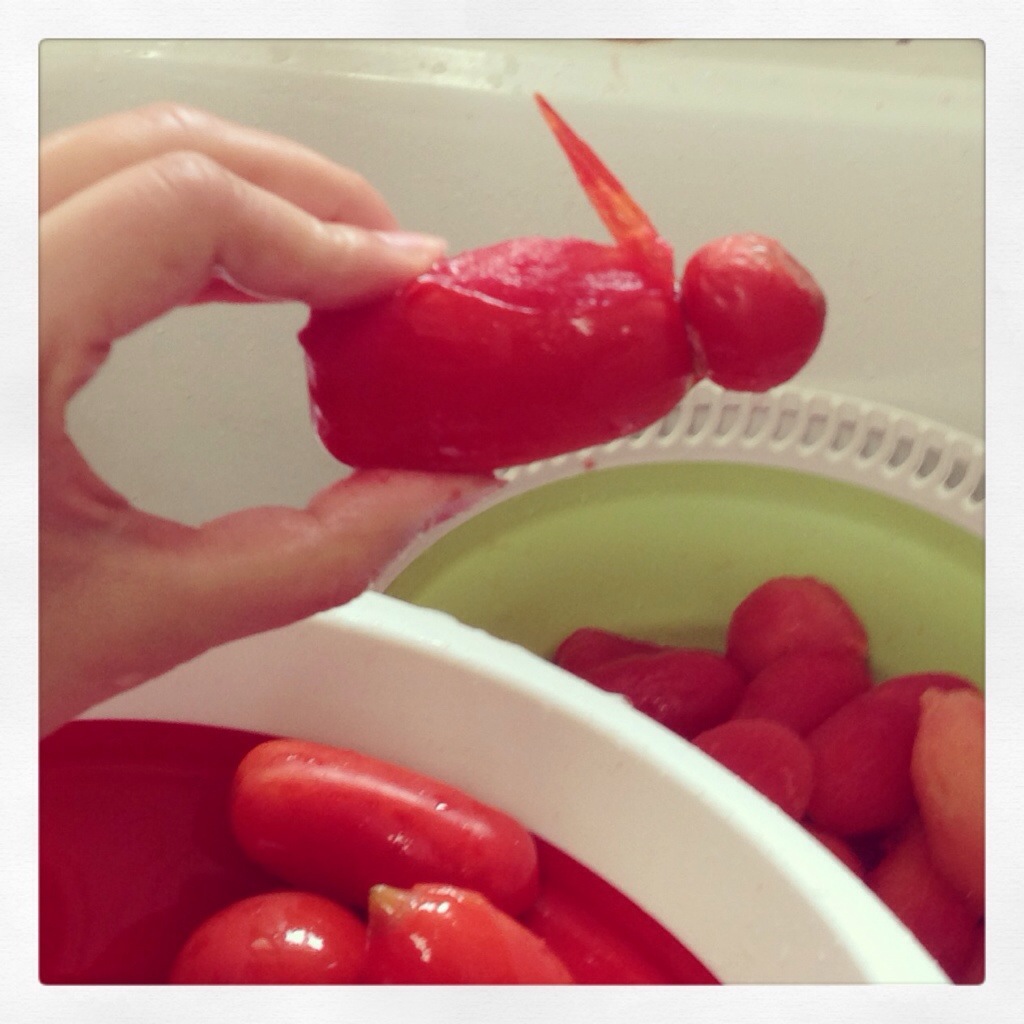
Peel the skins off the peppers once they cool enough to handle. Some slide right off but some are a terrible pain. My advice would be to try and grab it by a blister and pull off as much in one go as possible. Chop the peppers and add to the pot with the tomatoes. You can also pour some of the juices released from the tomatoes and peppers on the tray into the pot.

20131003-151224.jpg

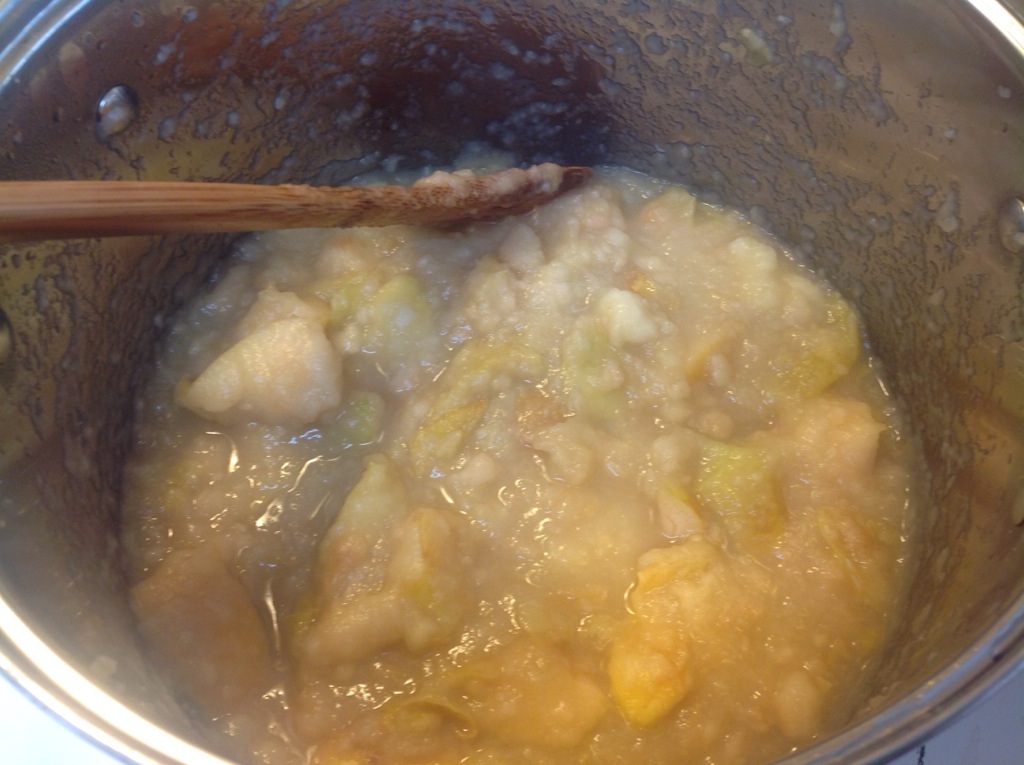
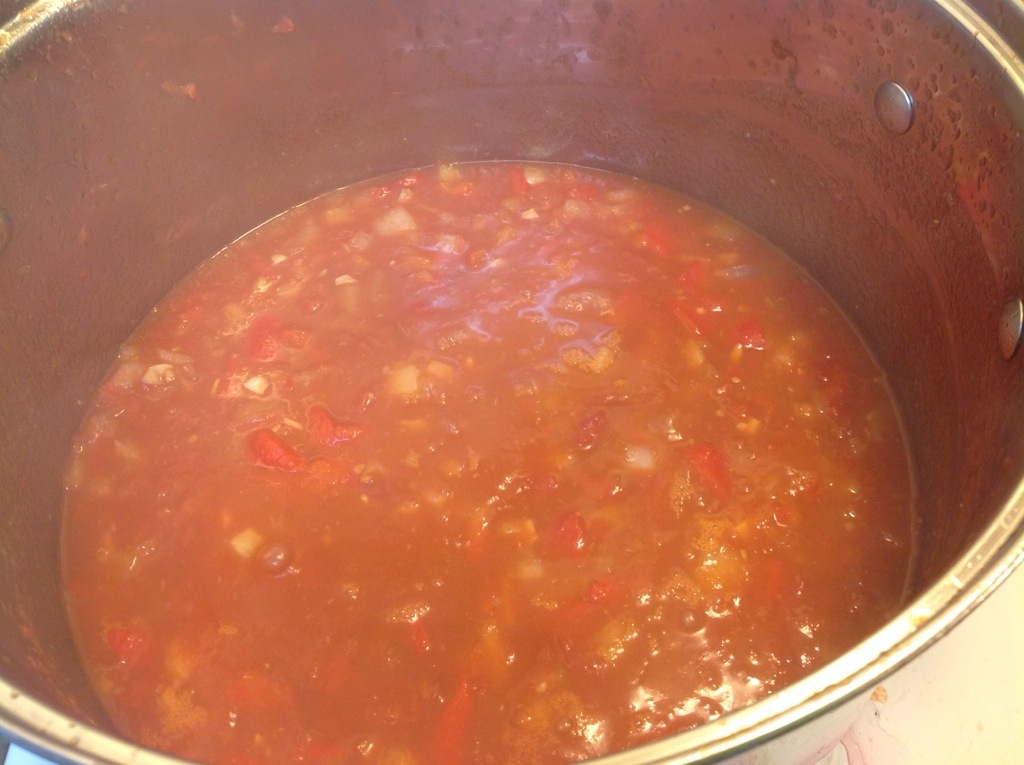
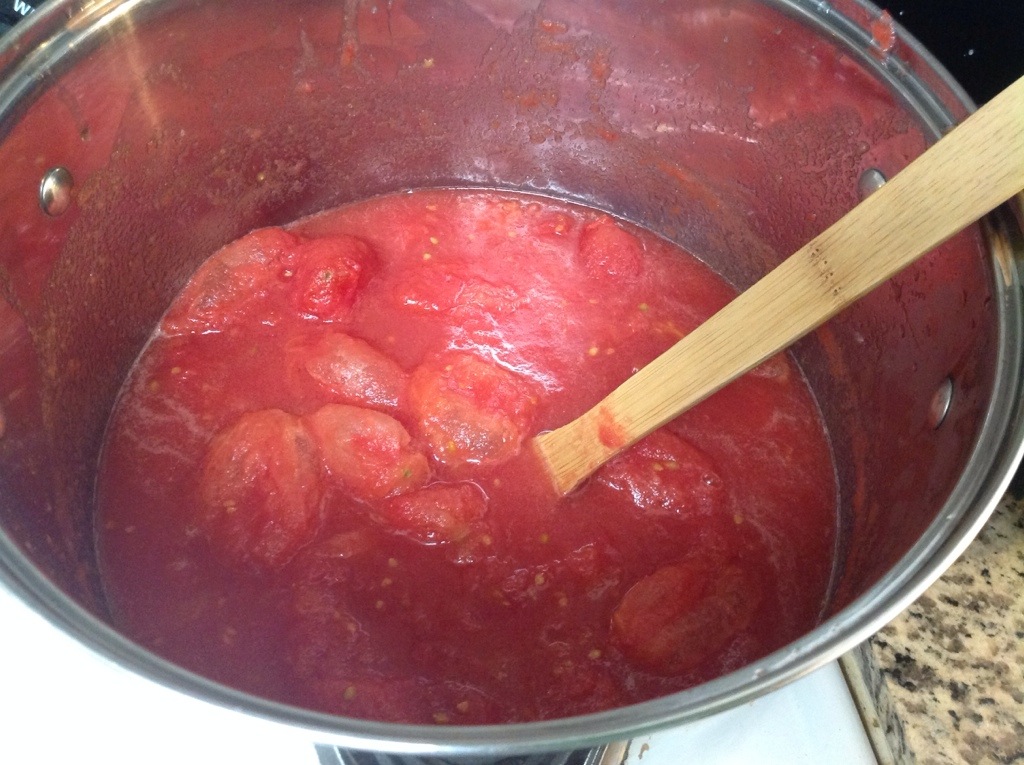
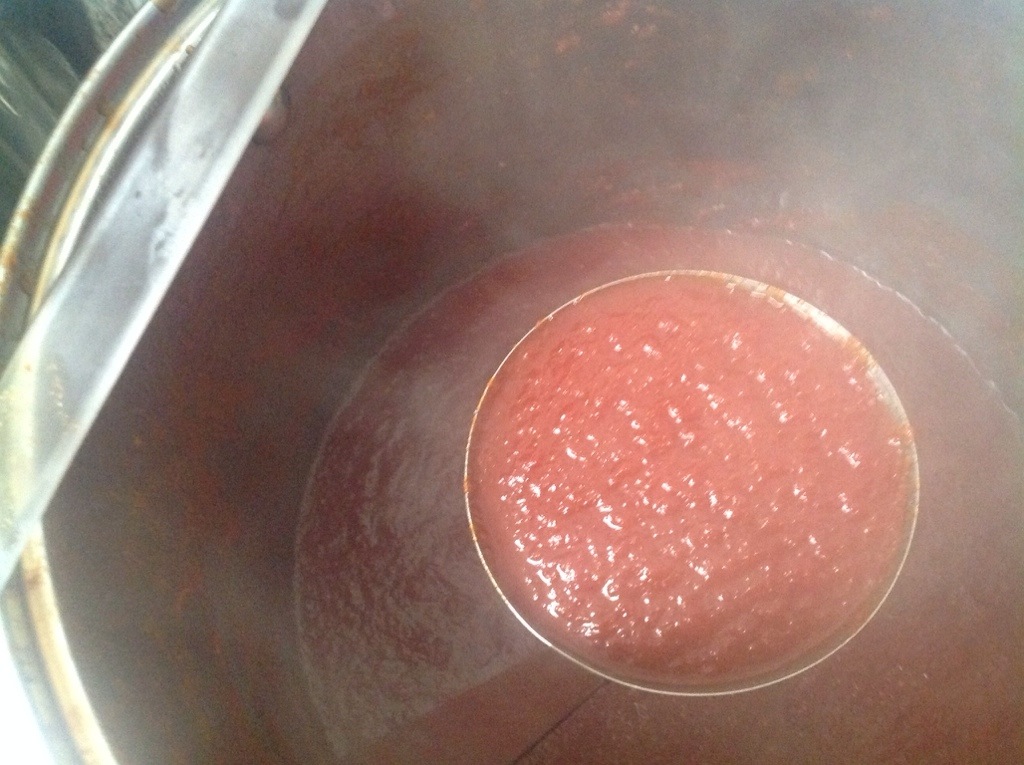
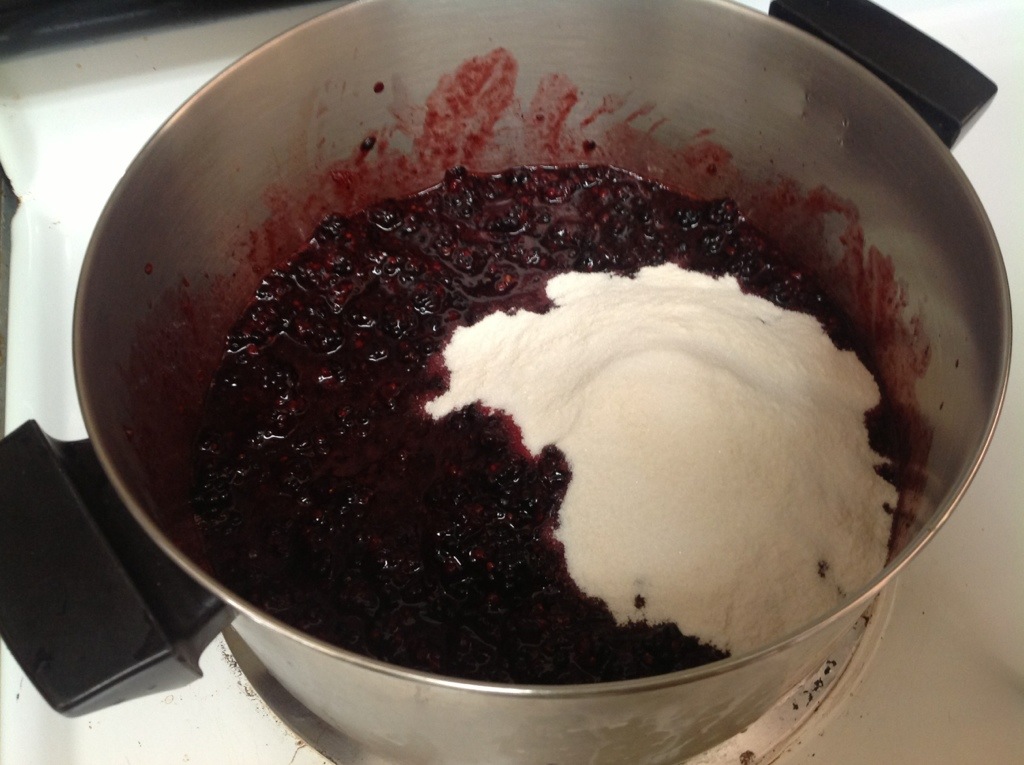
Chop the garlic and onions and add them in as well. Bring the sauce to a boil.

20131003-151334.jpg

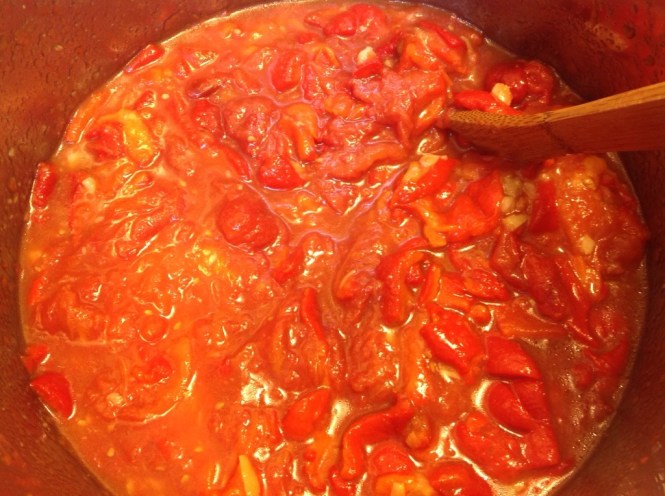
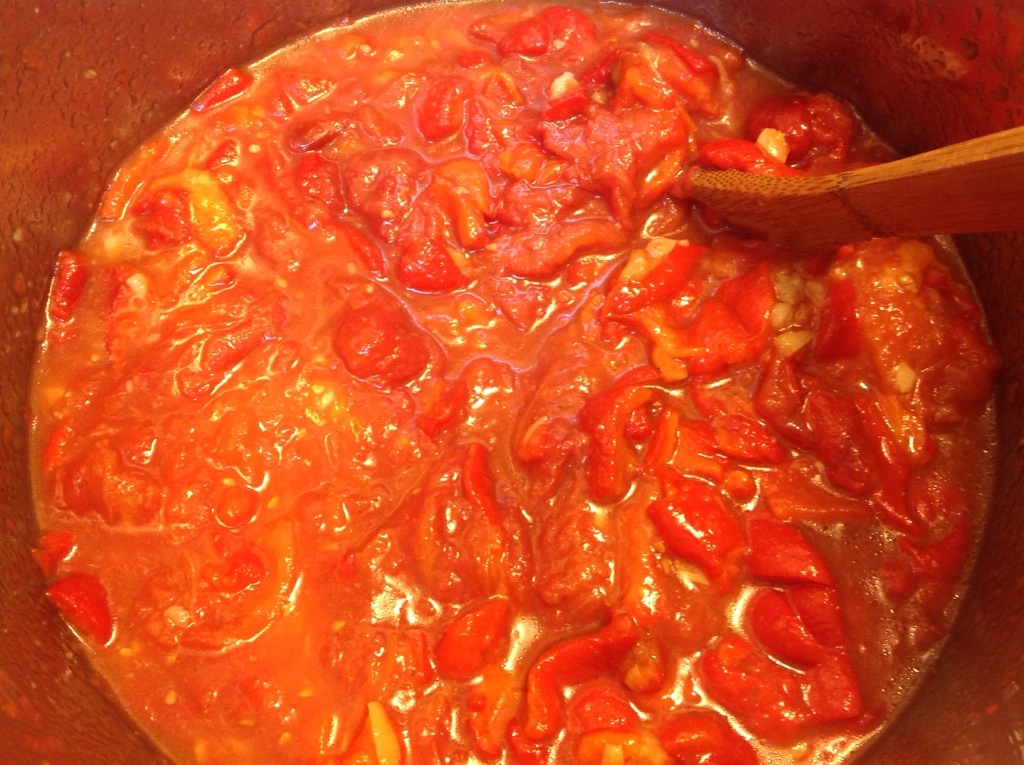
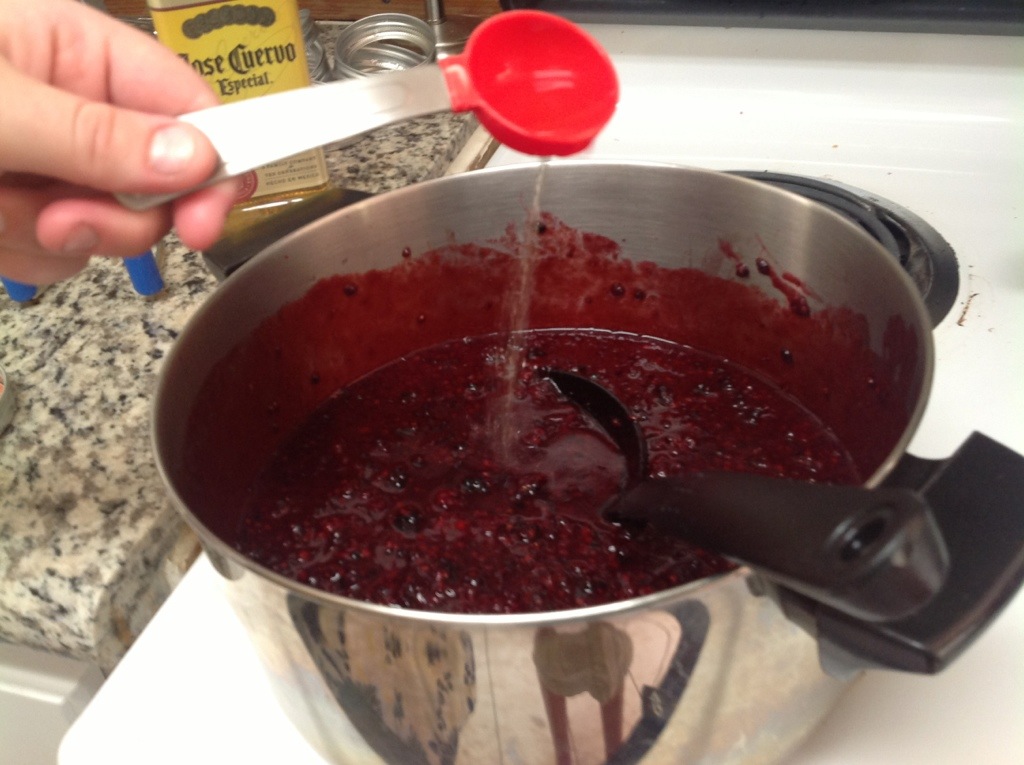
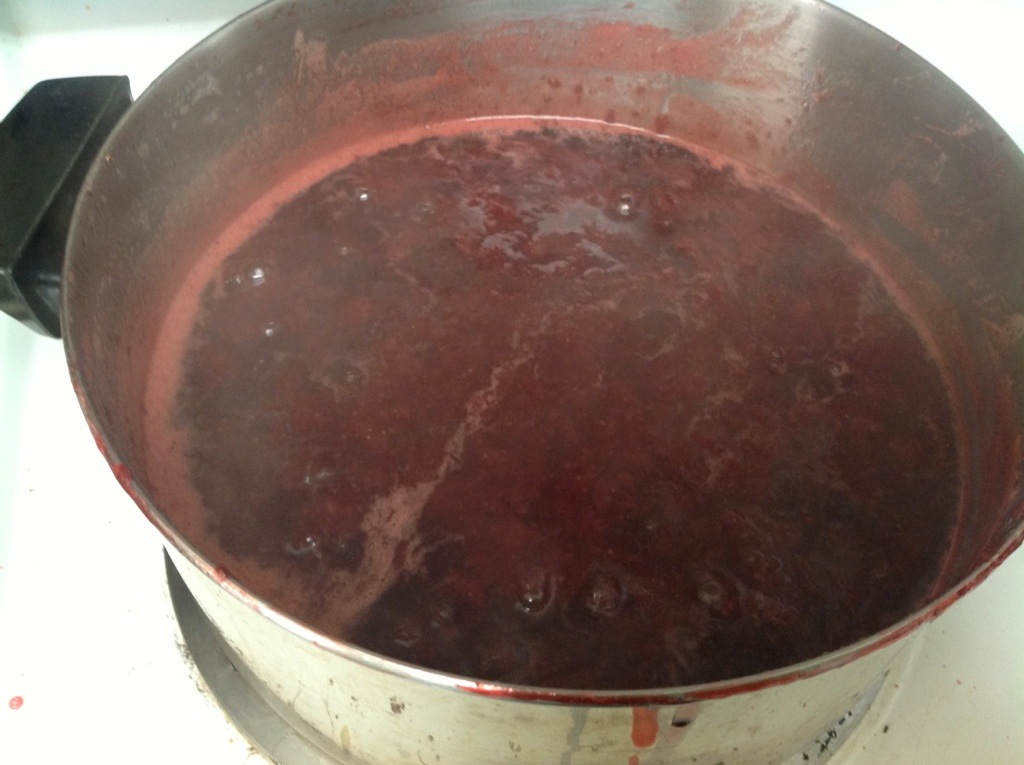
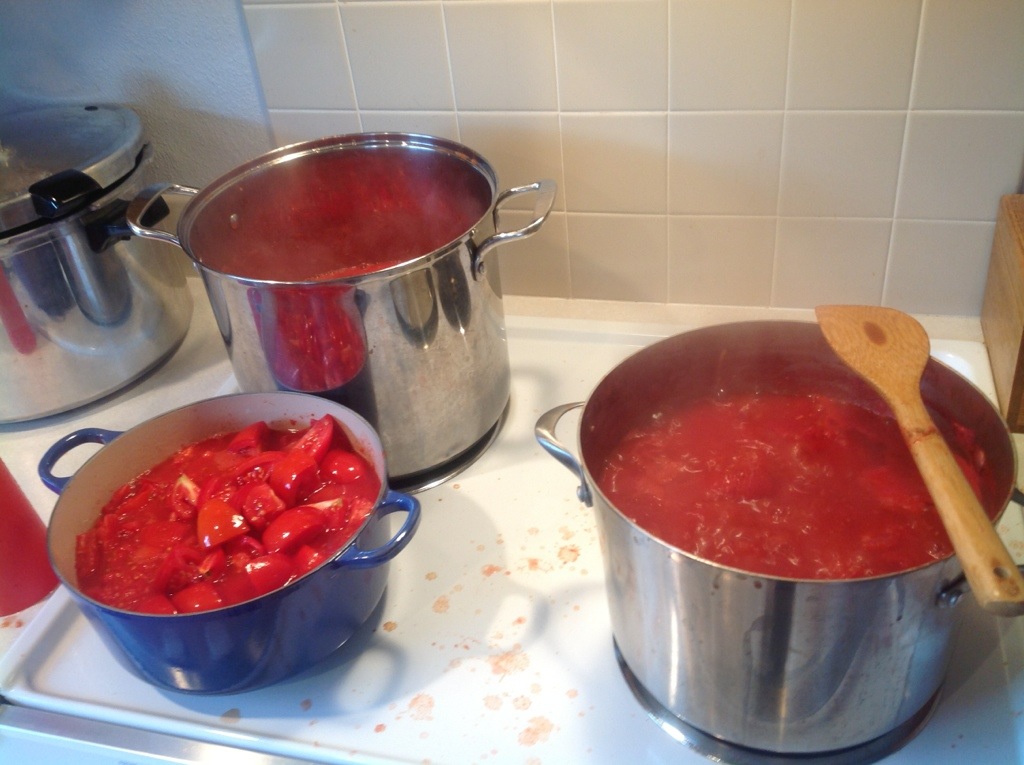
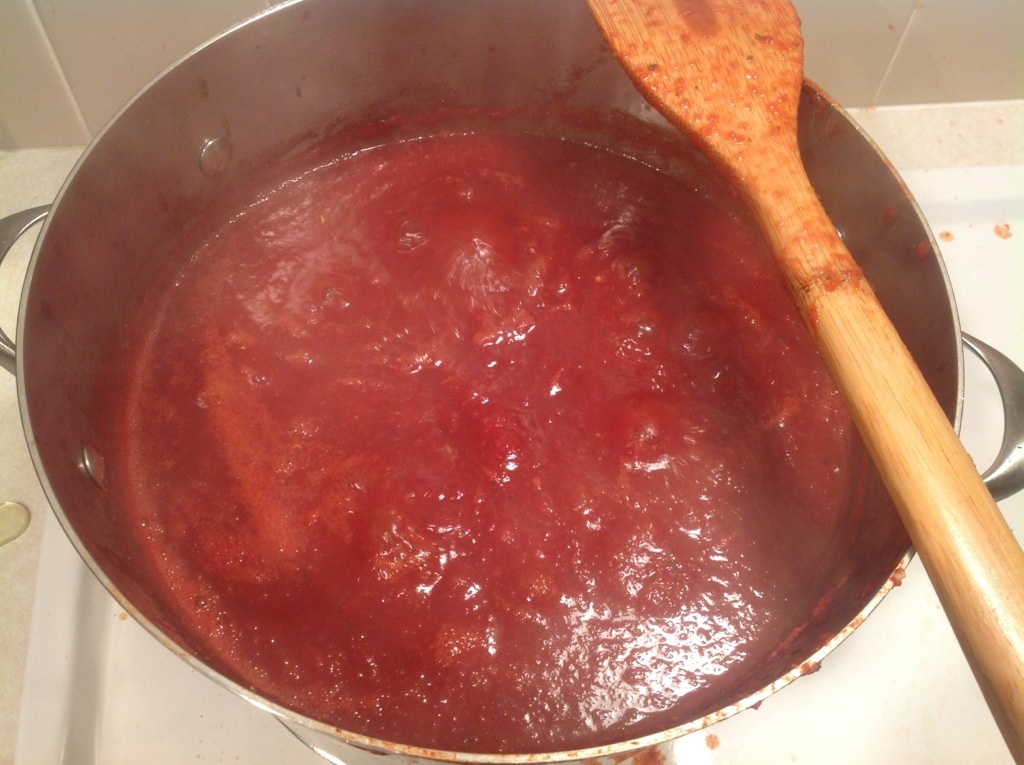
Add the vinegar, salt, sugar, and red wine and boil for 30 minutes.

20131003-151356.jpg

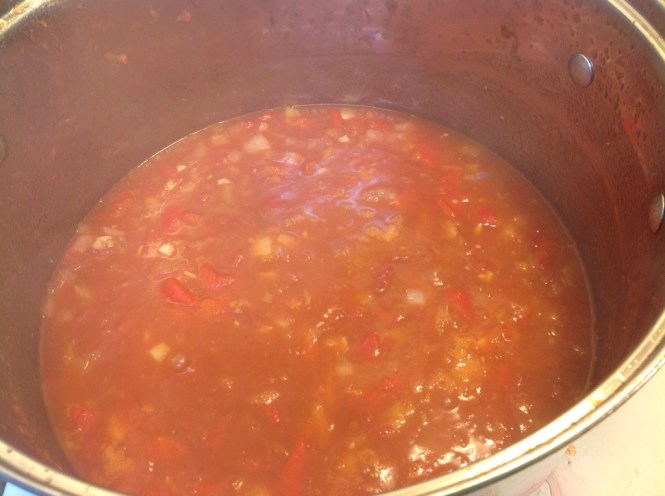
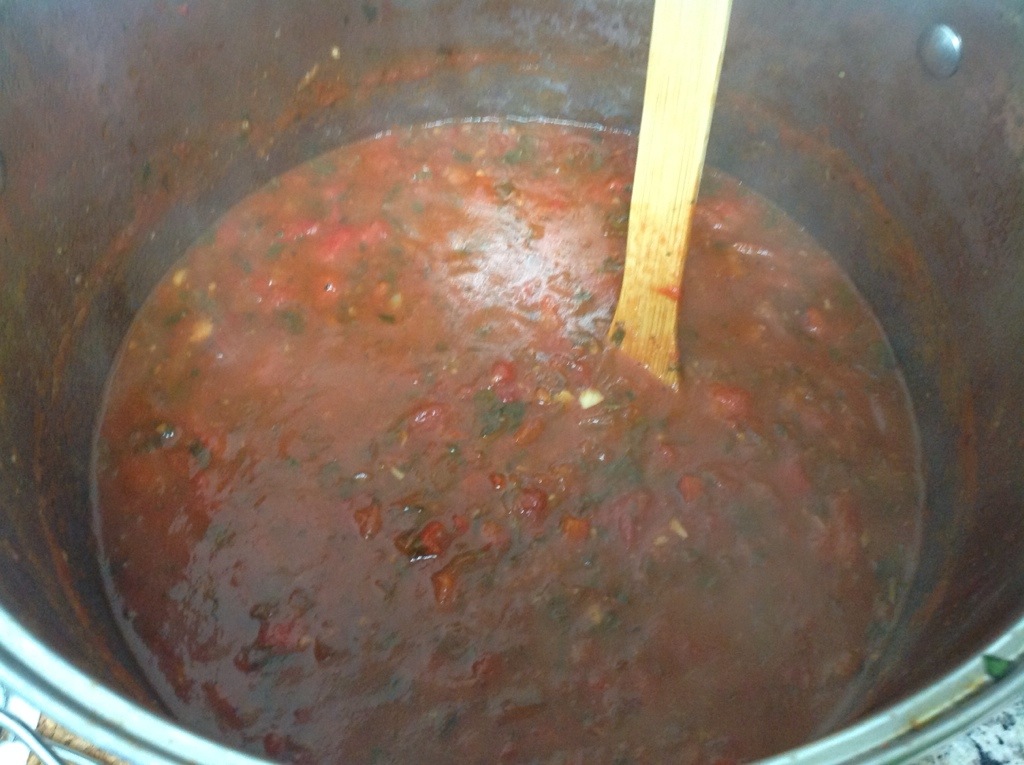
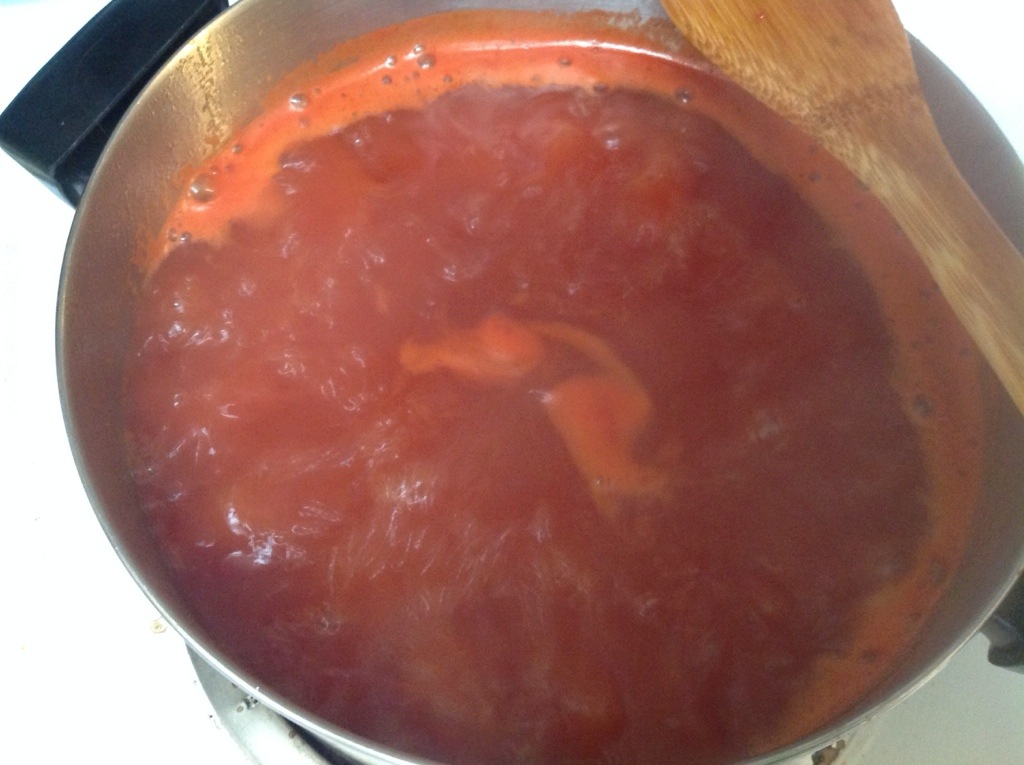
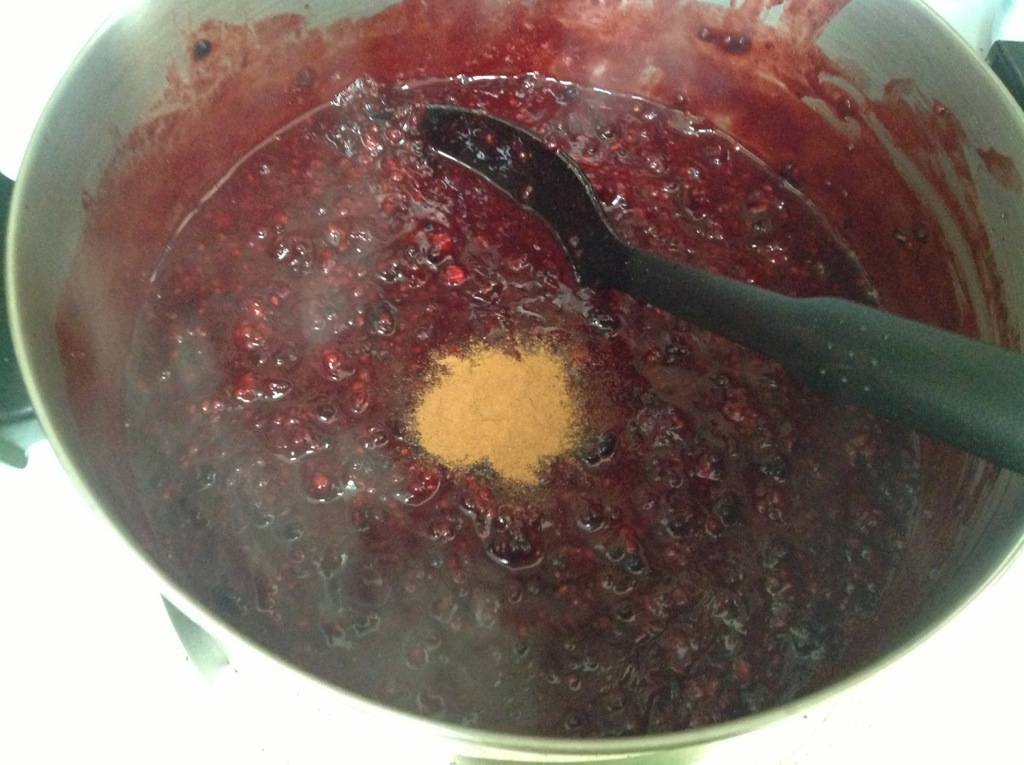
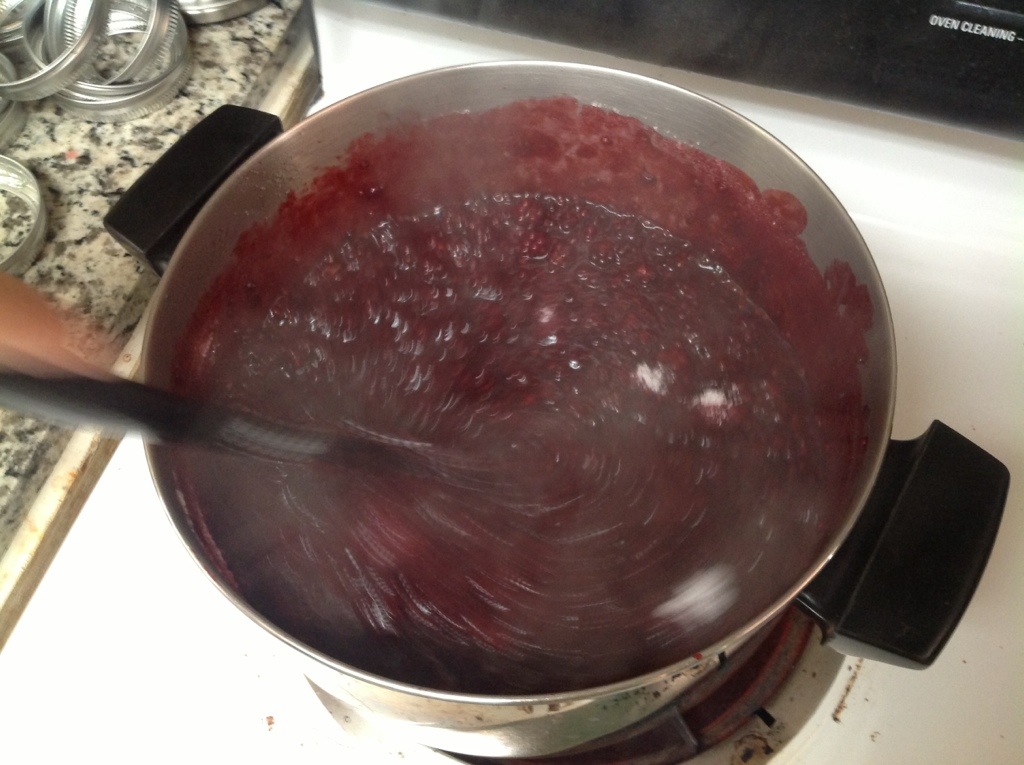
Add the herbs and continue to boil for an hour or so, until the sauce is thick.

20131003-151419.jpg

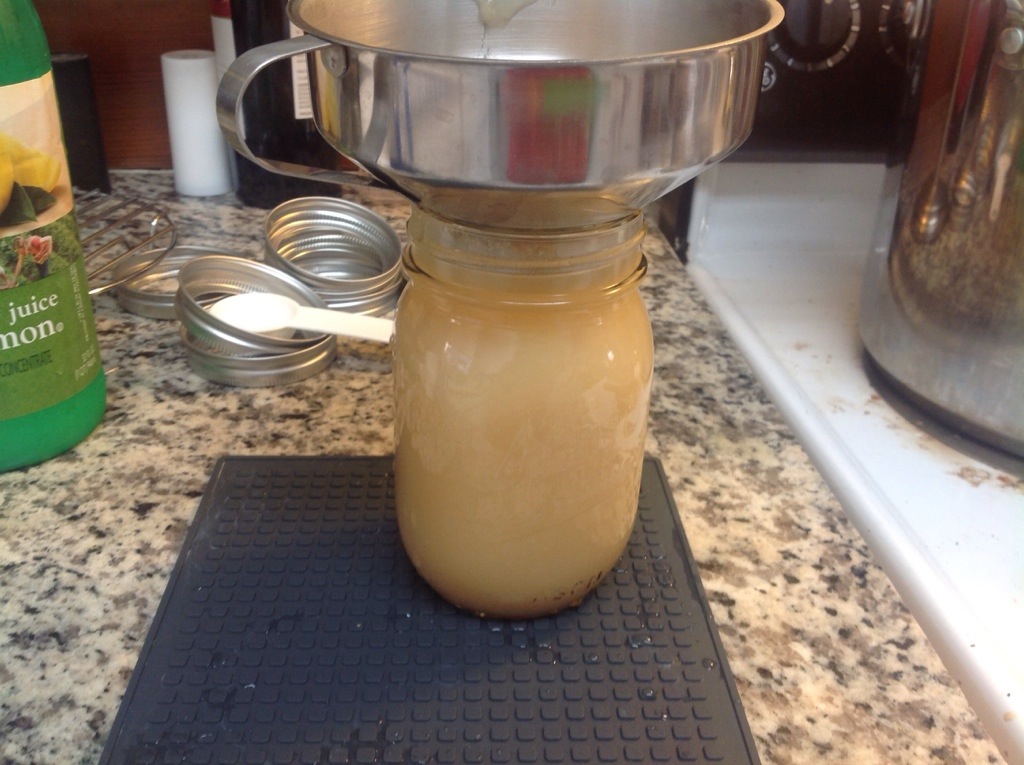
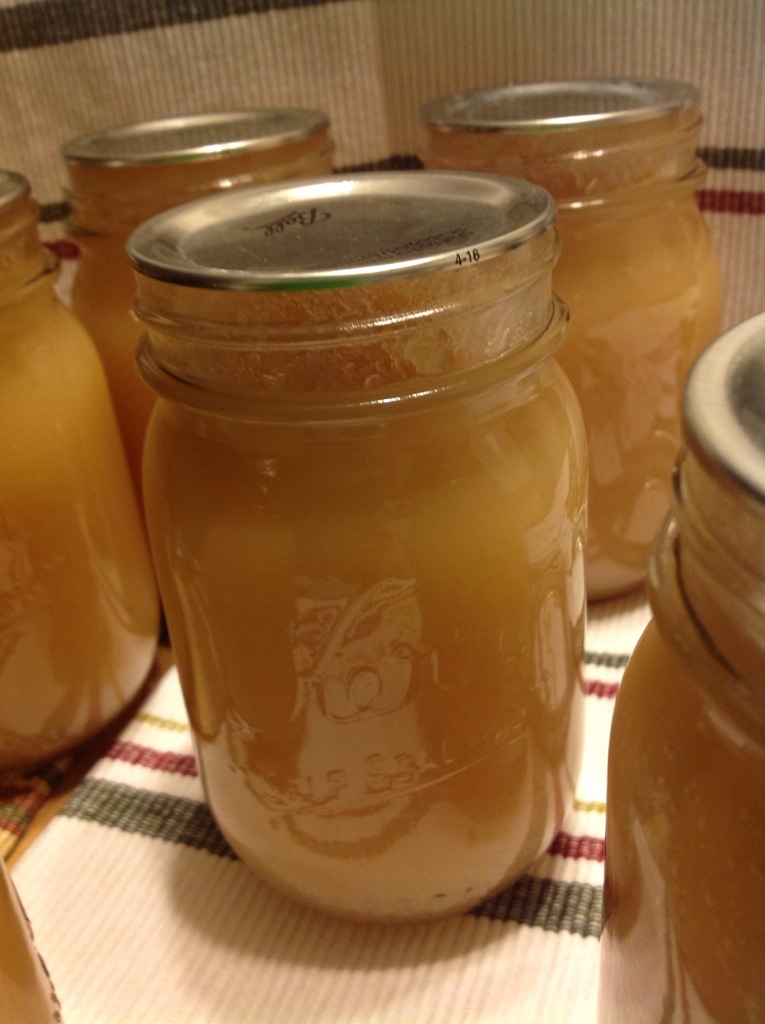
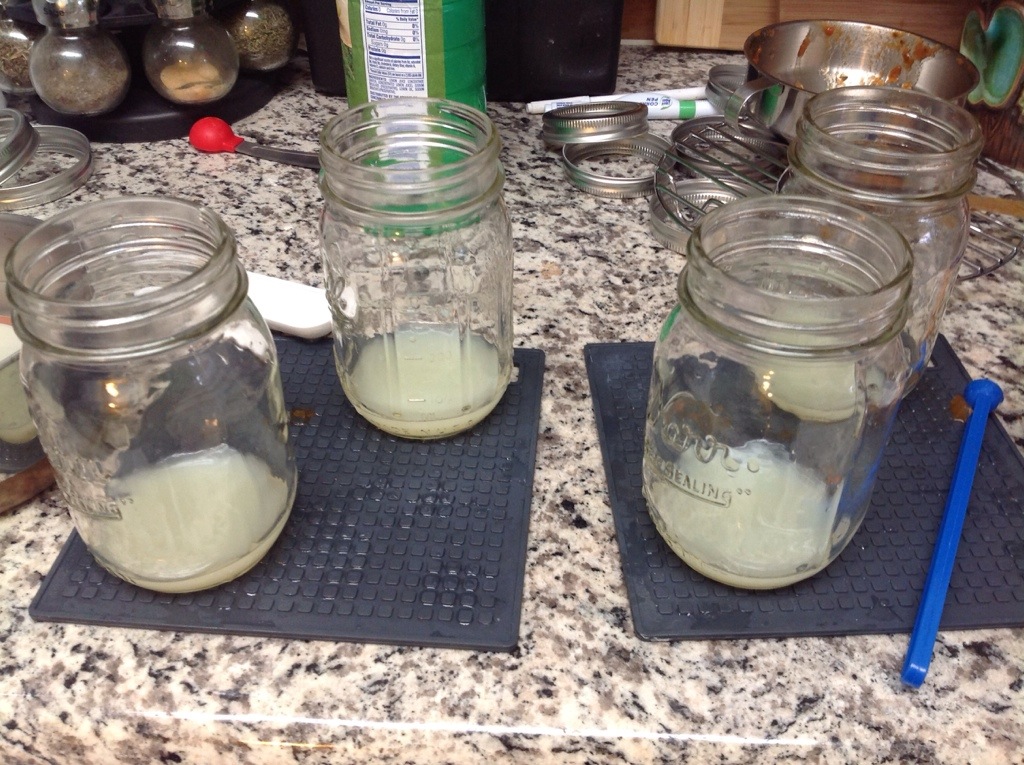
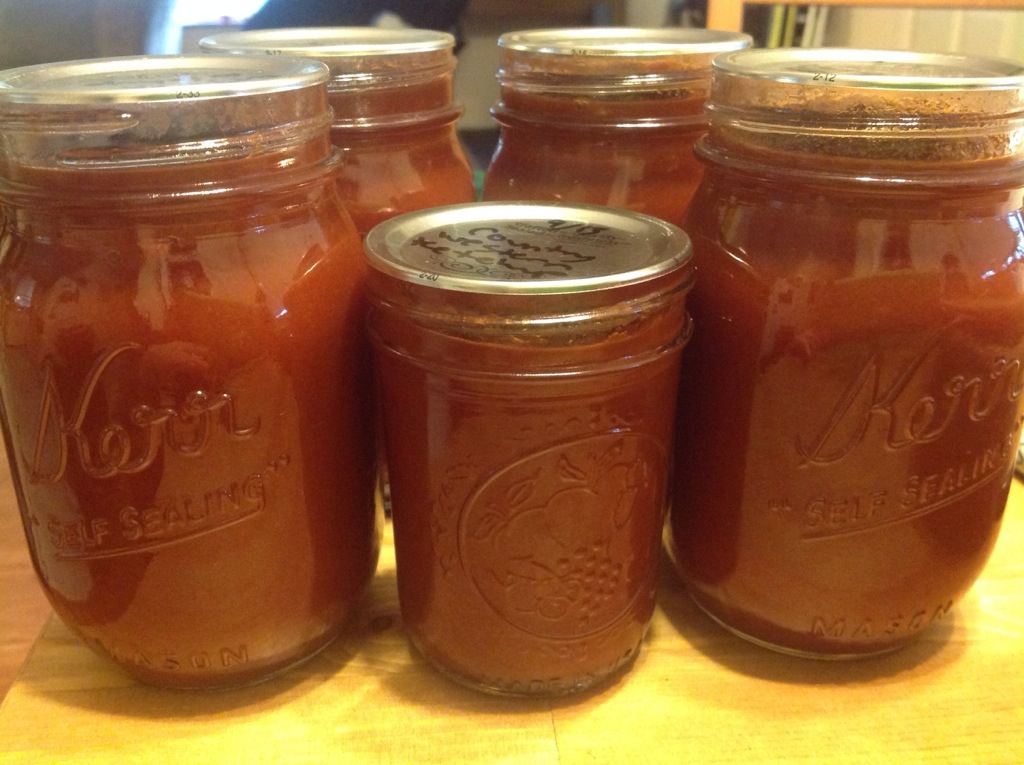
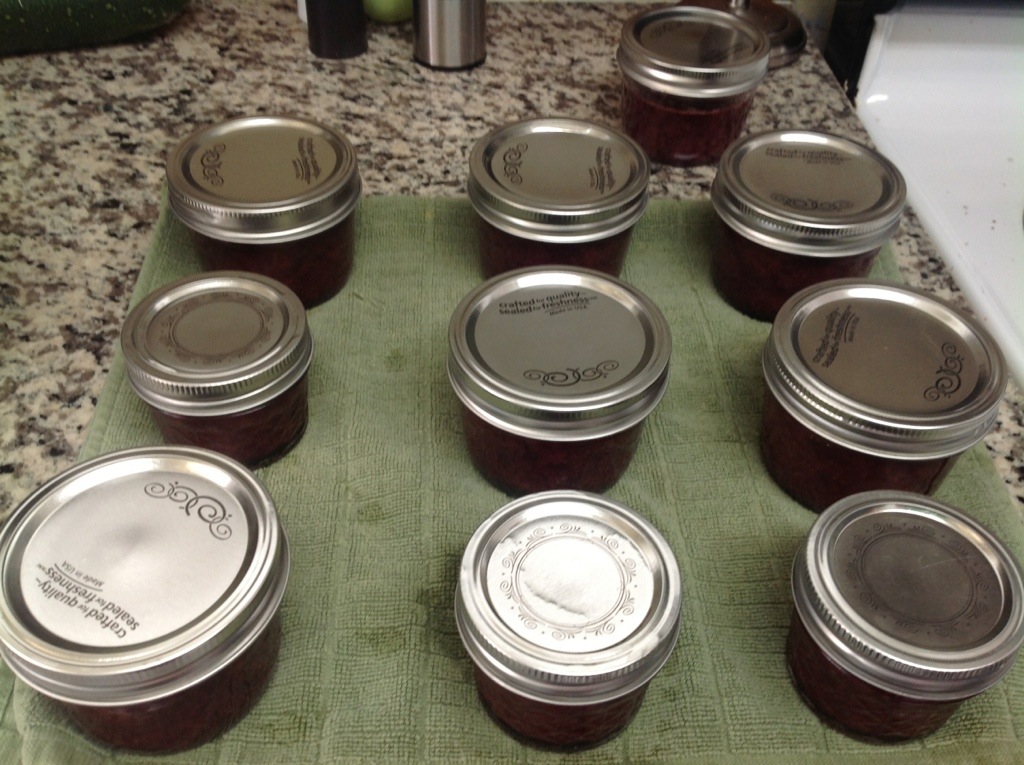
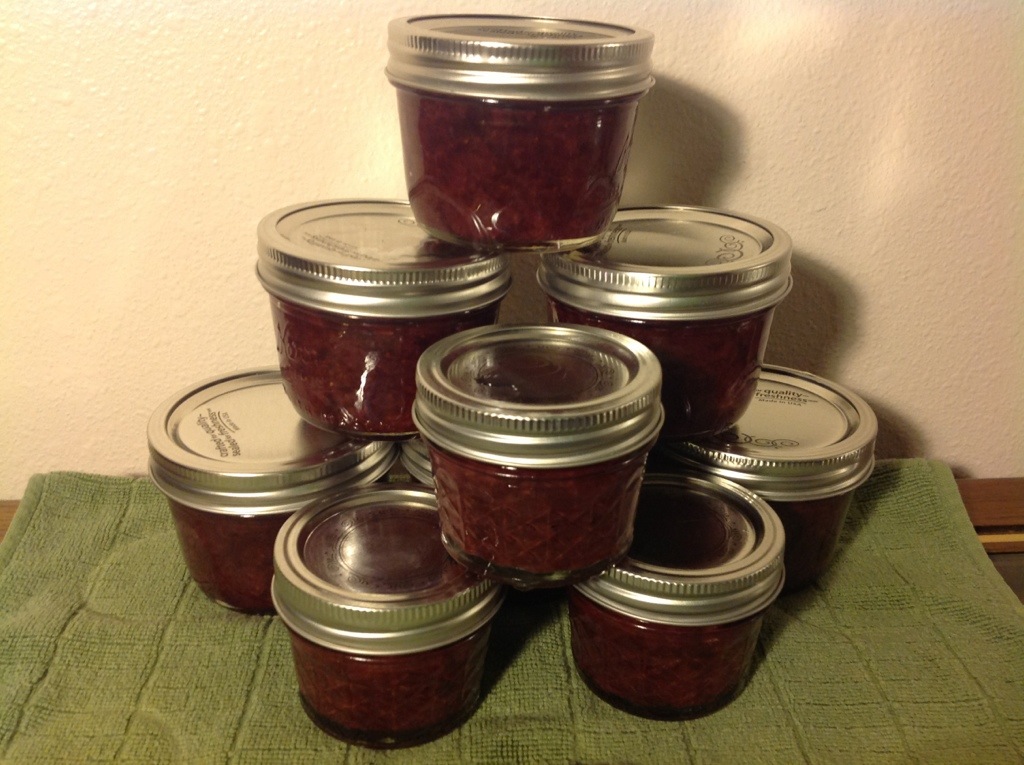
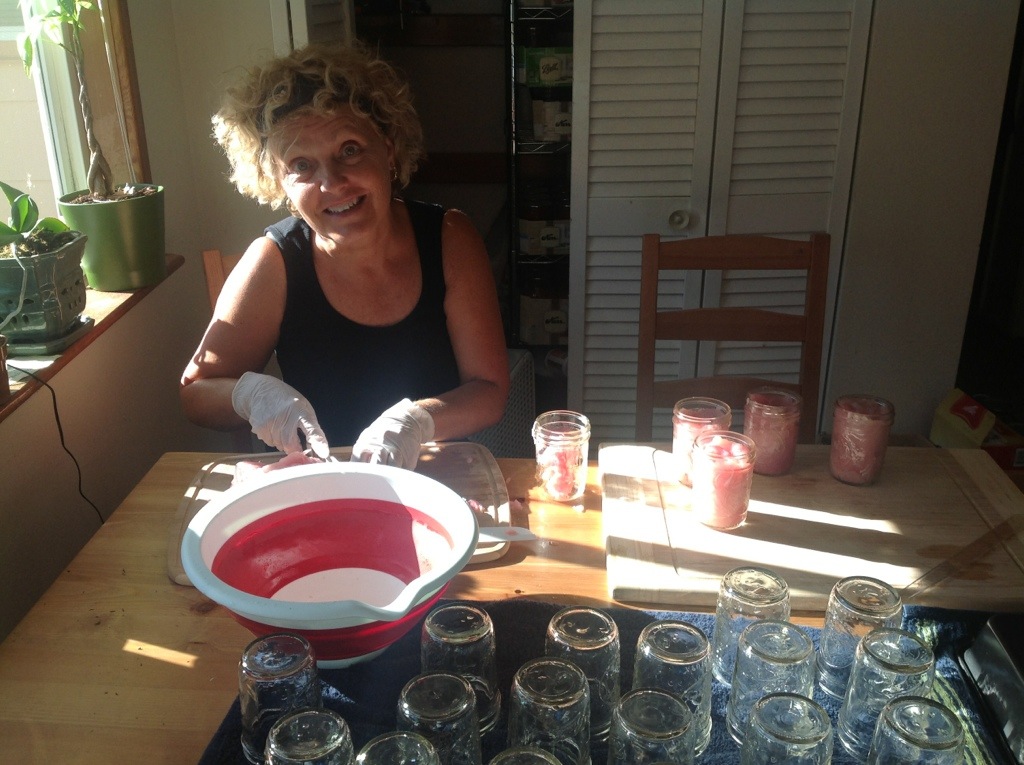
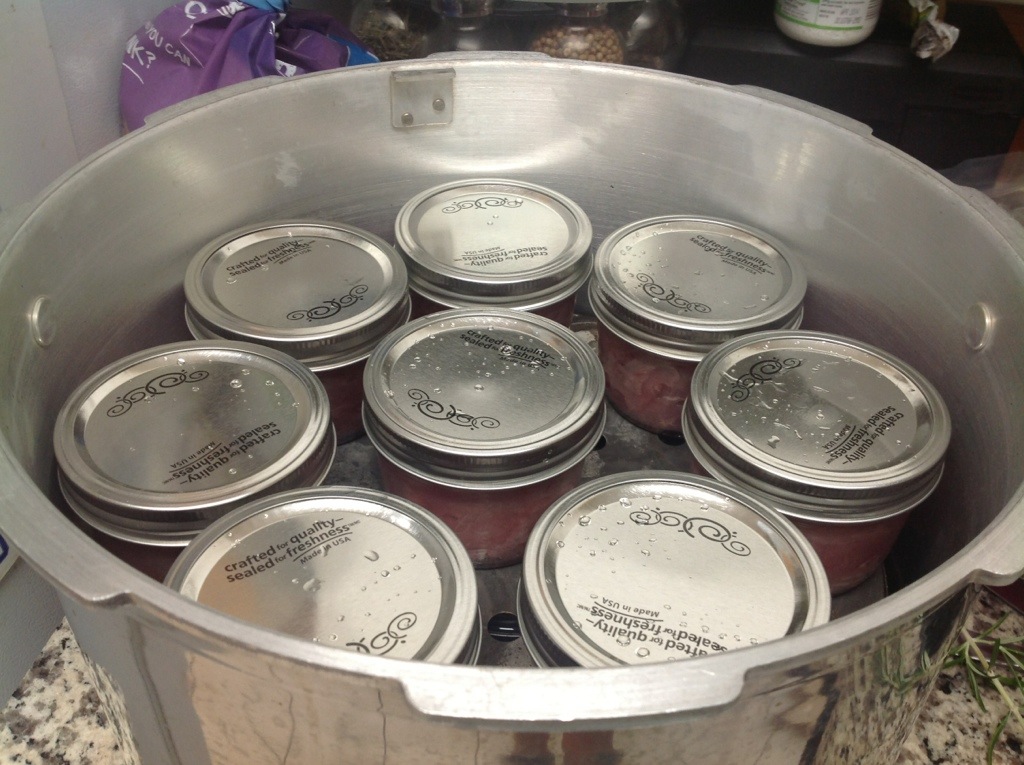
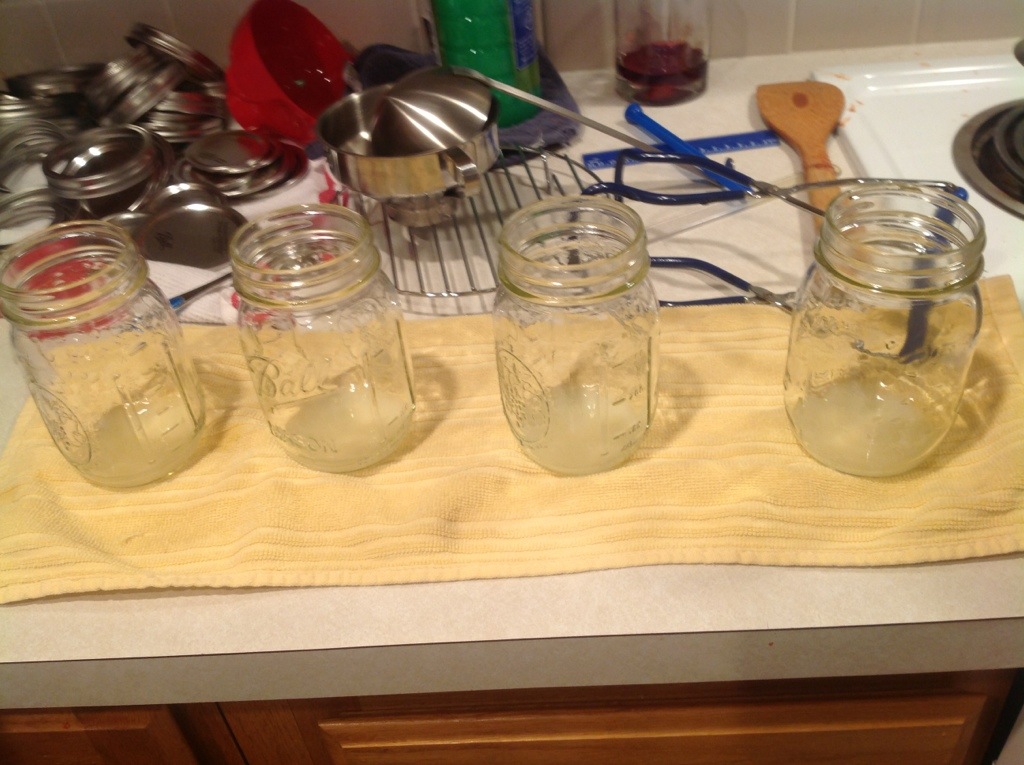
Meanwhile prepare the canner, jars and lids. The recipe says it will yield 5 pints, but tripling it it I only made just over 10. This is another reason I thought a little more acid per jar may not be a bad idea.

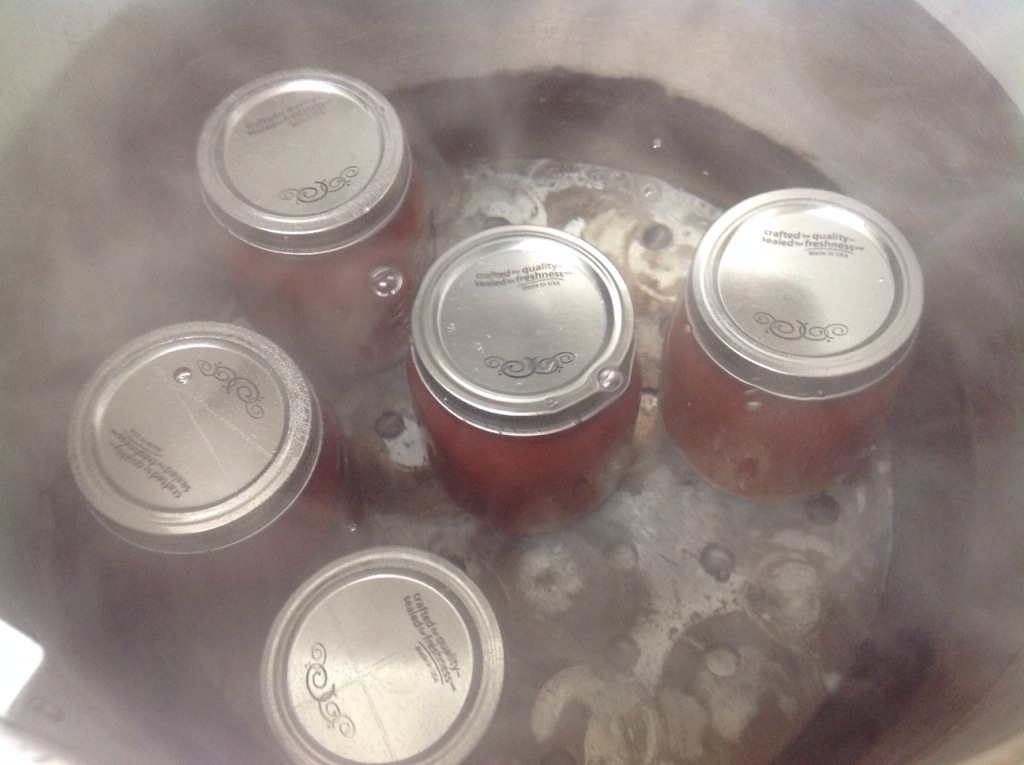
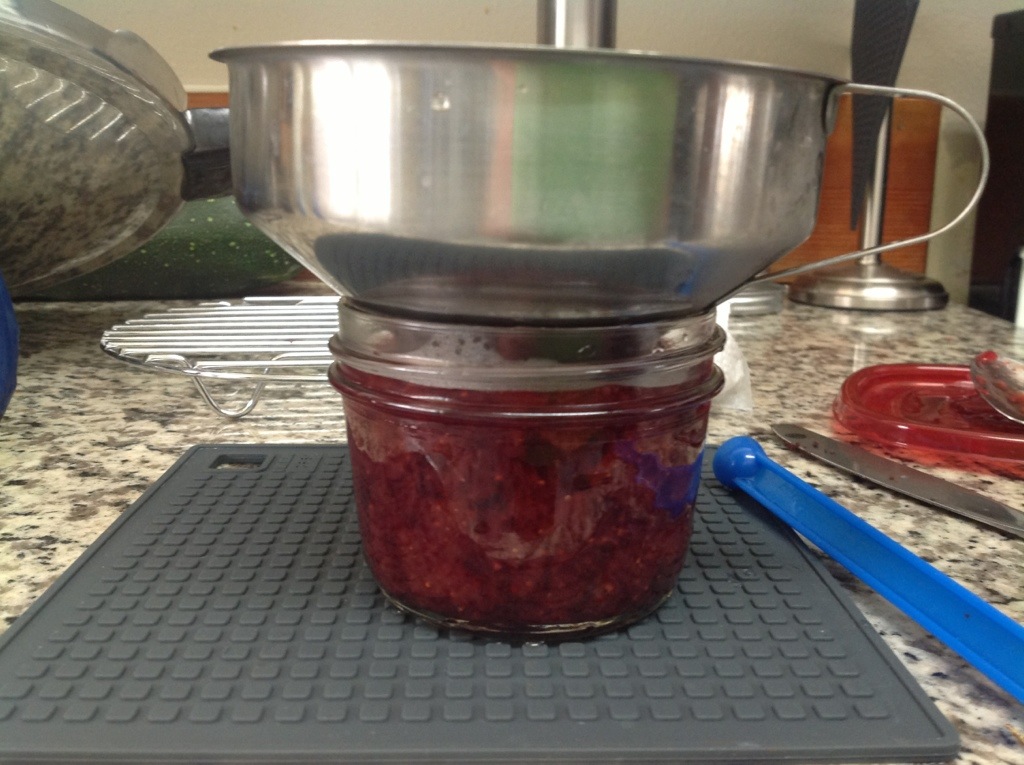
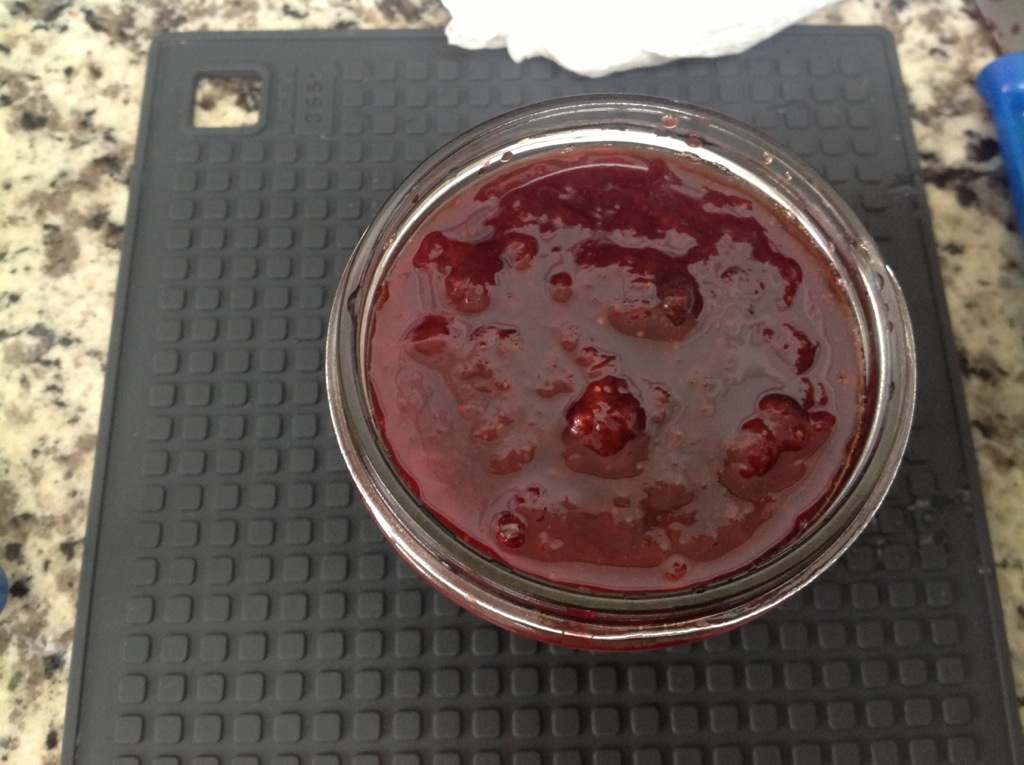
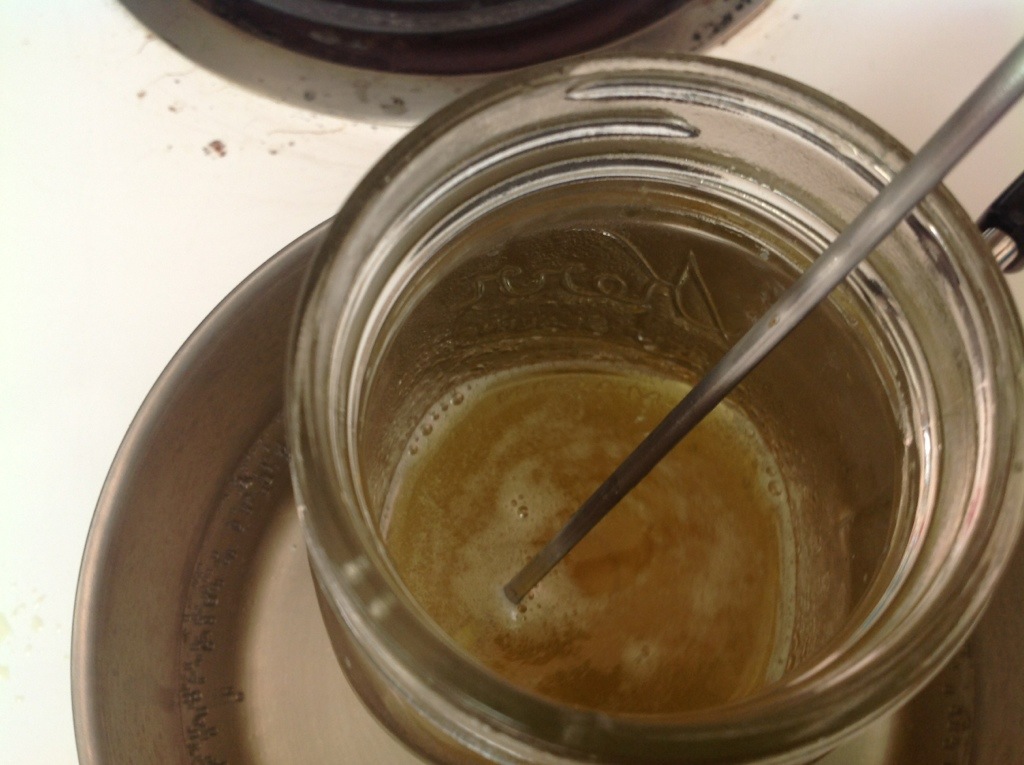
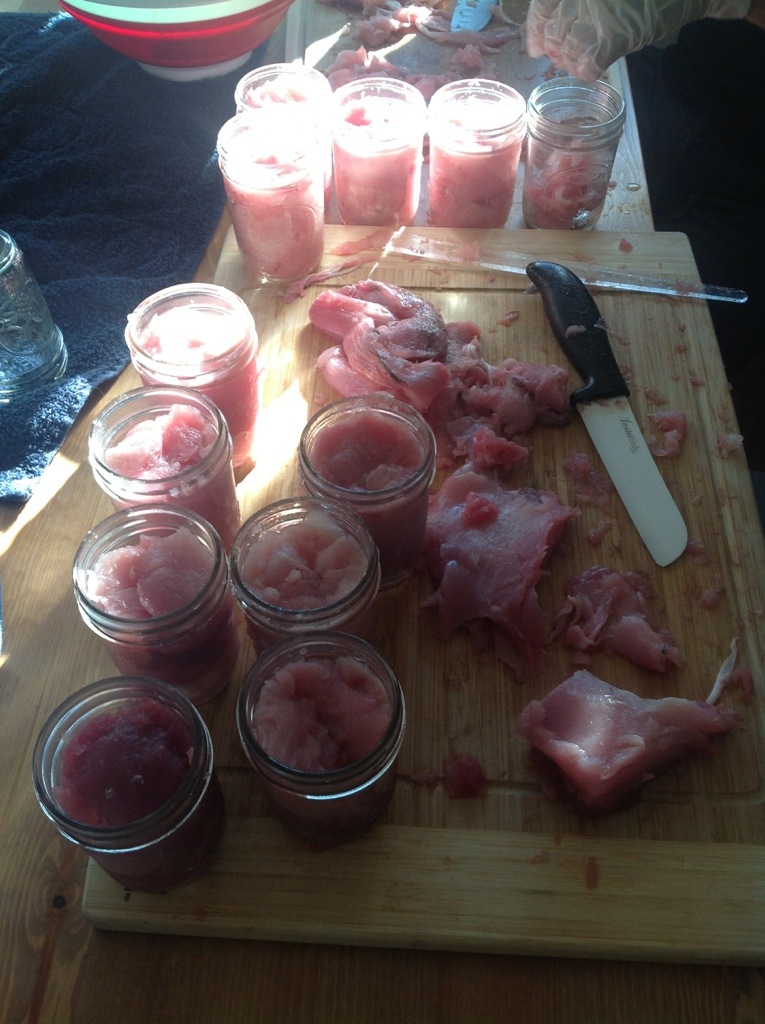
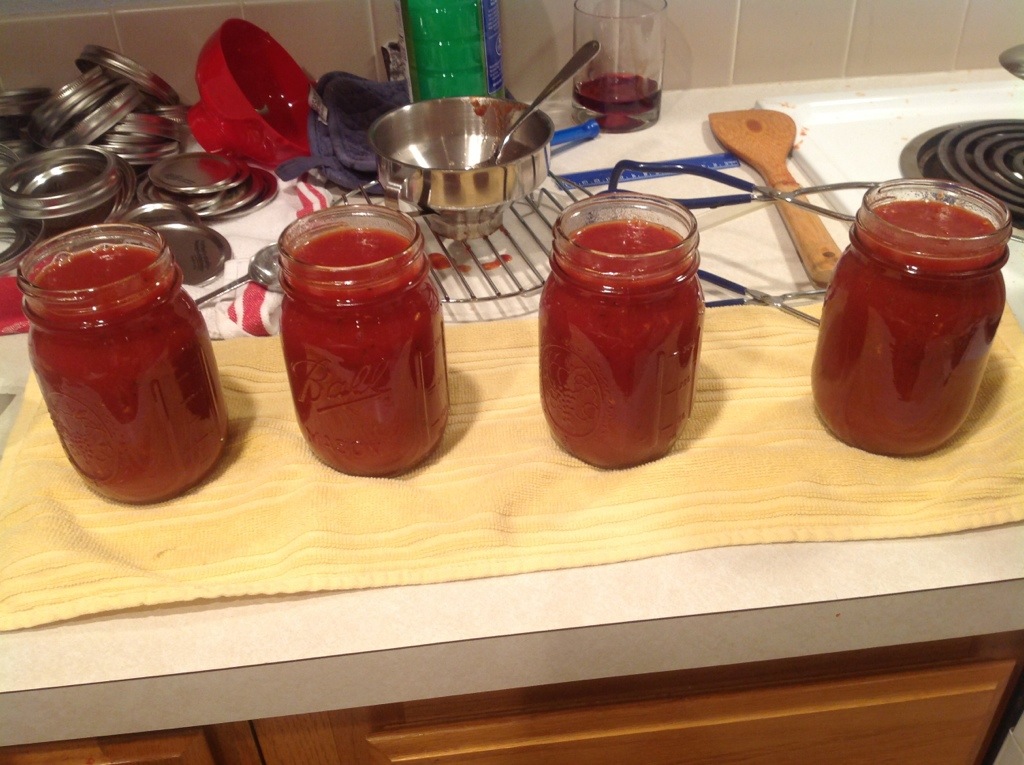
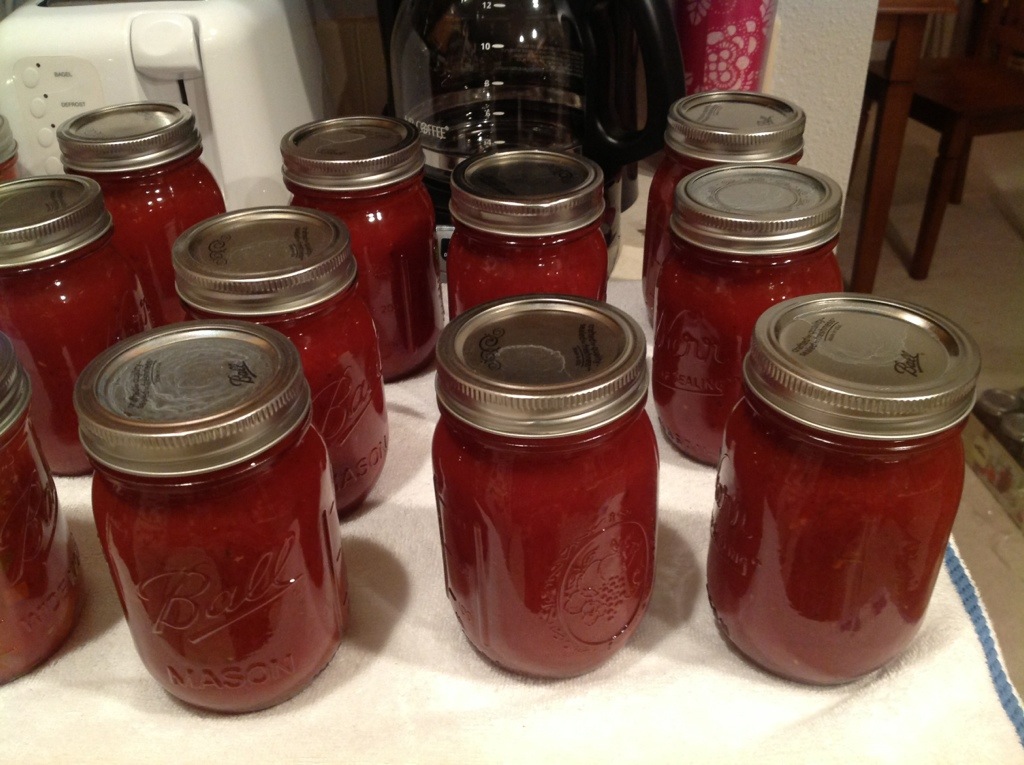
When the sauce is thickened to your satisfaction, it’s jar filling time! Add 1 tbsp of lemon juice to each jar before filling with the hot sauce.

20131003-151441.jpg

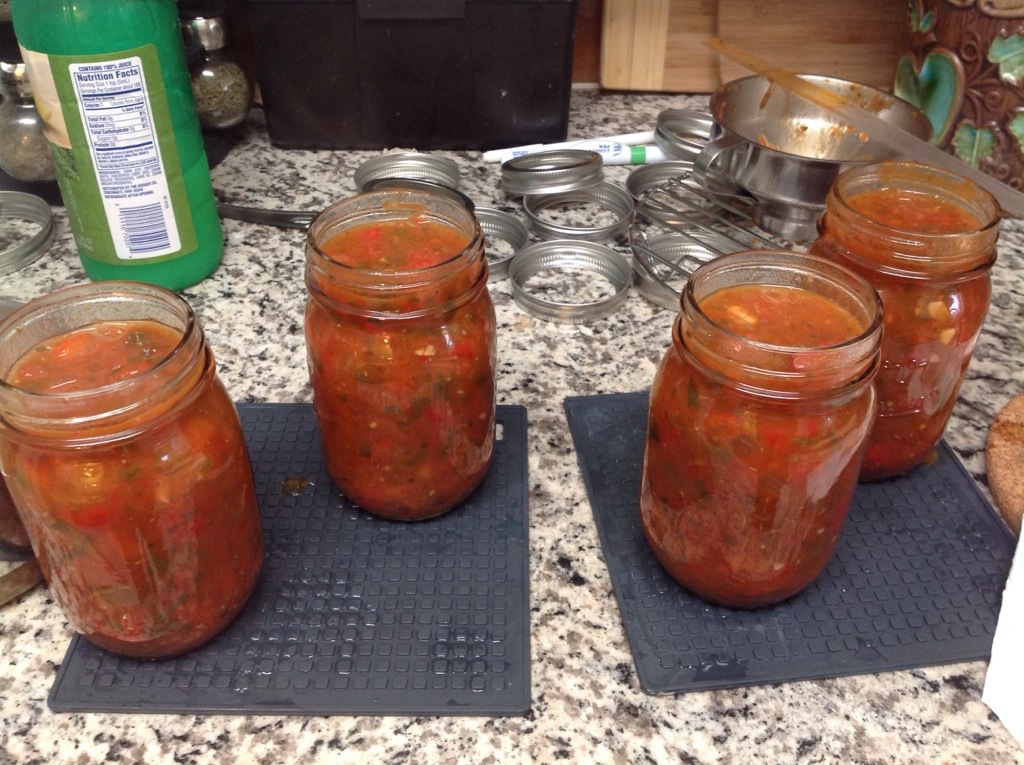
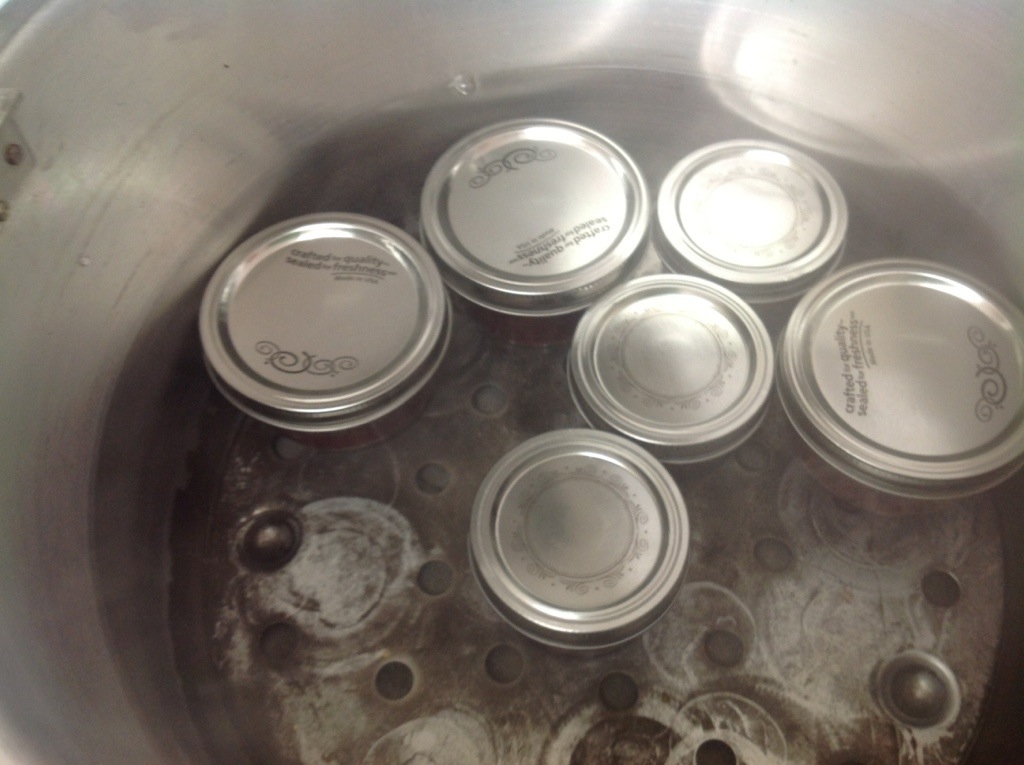
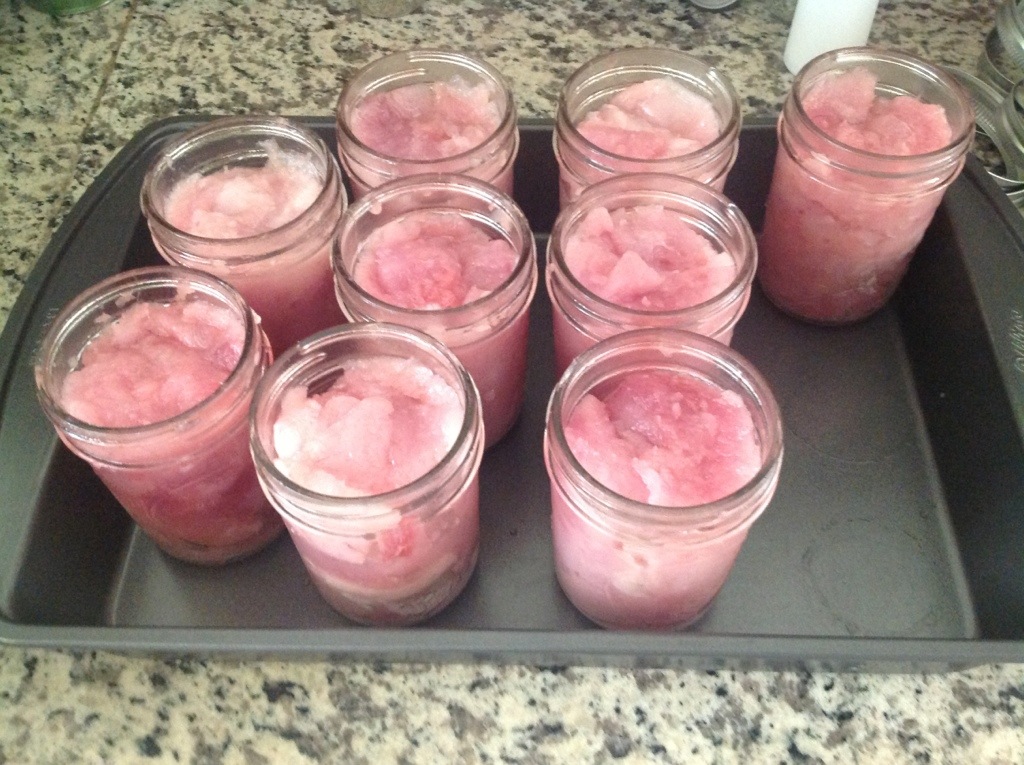
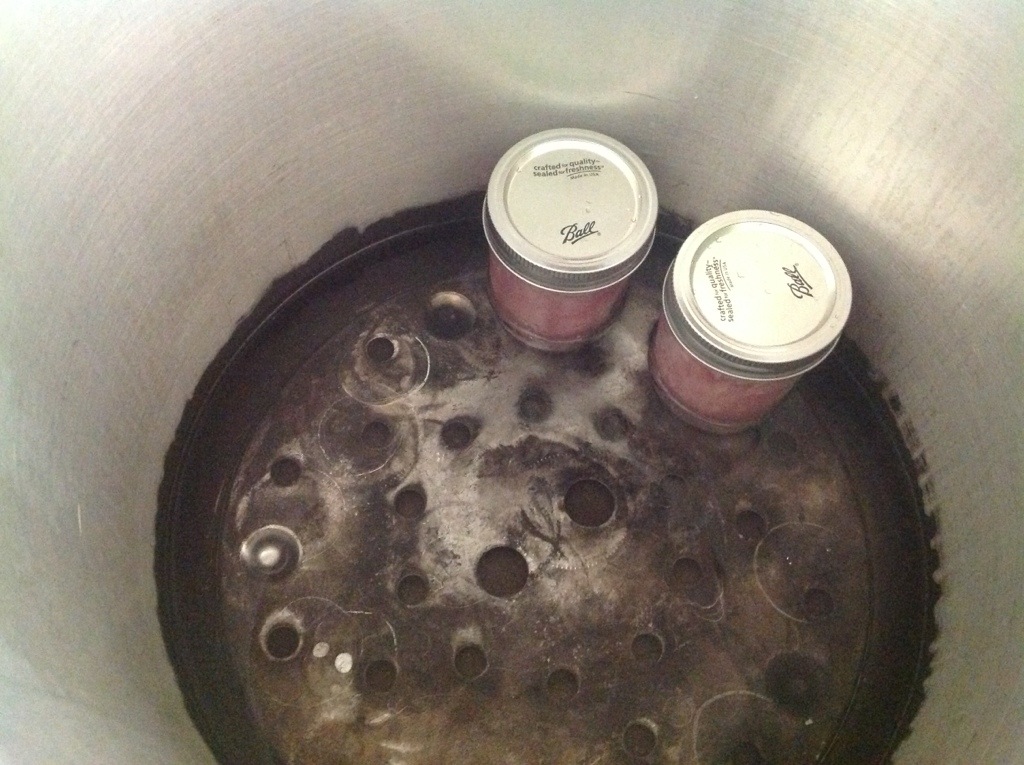
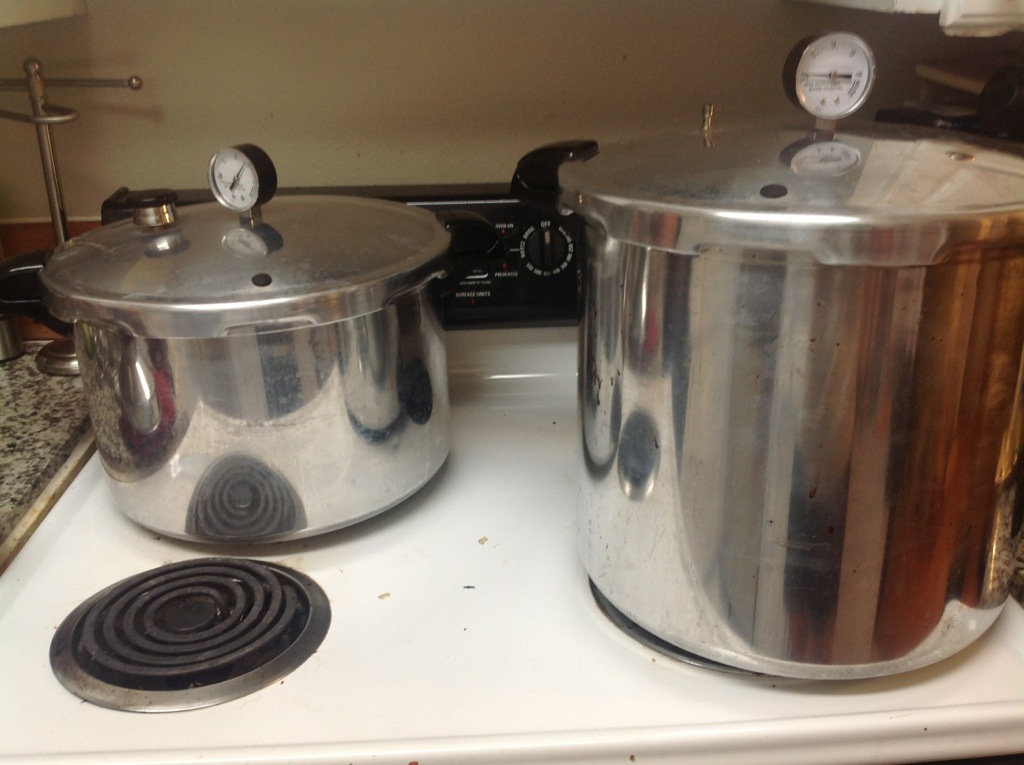
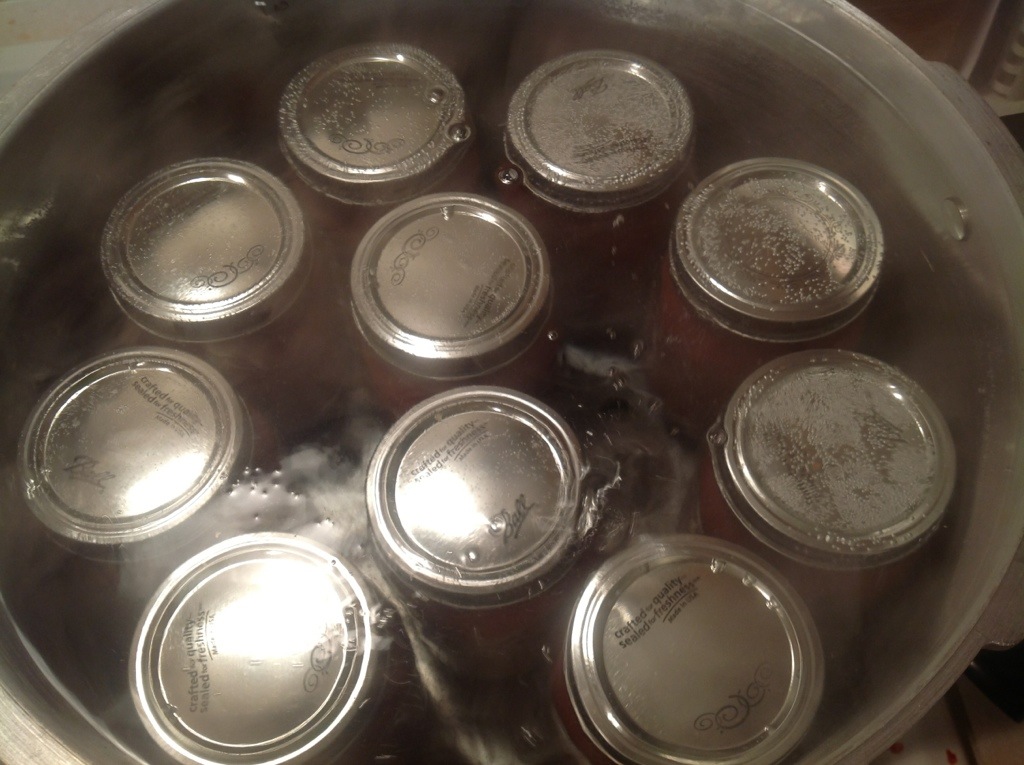
Fill the jars leaving a half inch head space. Wipe the rims, apply the lids, and tighten bands finger tip tight. Place jars in canner, covered by at least 1-2 inches of water. Process at a full rolling boil for 35 minutes.

20131003-151522.jpg

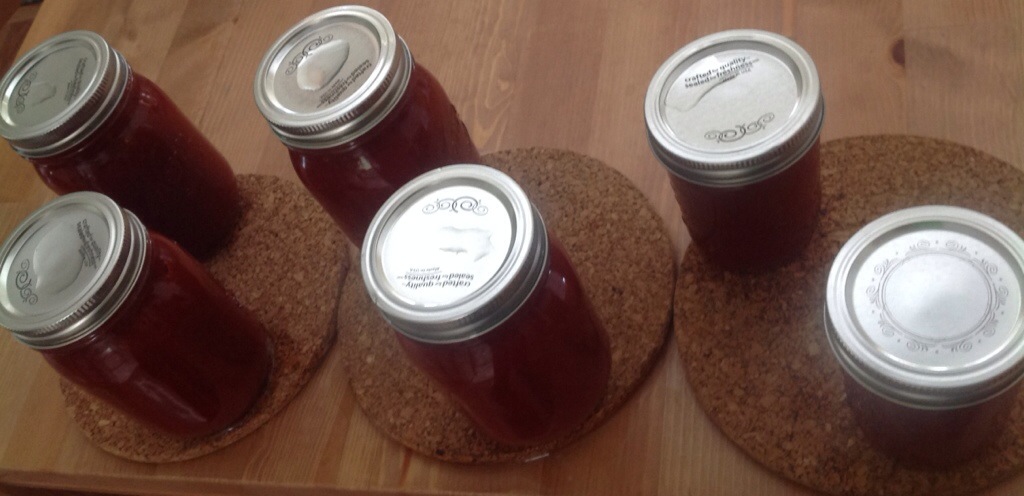
After the 35 minutes is up, turn off the heat, remove canner lid and wait 5 minutes before removing the jars to a hot pad or towel. Wait 12-24 hours for them to cool. Check seals, wipe down the jars, label and store.

20131006-130755.jpg

OK so as promised, here is my safety rant… I mean discussion… about this sauce. As you may notice, there are a LOT of low acid ingredients in this recipe. There is a 2:1 ratio of tomatoes to peppers, and onions on top of that. So, since I really want to be safe in my canning and not make anyone sick, I wanted to check into whether this is acidic enough. My one big reminder here is this: anyone can publish a book/blog/whatever about canning, so always do your research before making a new recipe. Ball for example can be trusted, and so can other books that have actual tested recipes, such as this one, by a university extension service or the USDA. I was a bit wary as to whether this recipe is acidic enough for hot water bath canning, so I referred to some ball ratios to help me decide. I found a salsa recipe that has very similar ratios of tomatoes, peppers and onions. Per tomato amount it has slightly less peppers than this recipe and slightly more onion. When scaled to the quantity of this sauce, it has about 2-3 tablespoons more acid than this recipe, and around a cup more low acid ingredients (onion and pepper). So basically what I am saying here is the recipe seems to be pretty darn close to a trusted recipe I have. And really, all I am saying is stay safe! Definitely do not add more onions or peppers to this recipe! And if you are worried at all, as I was, add a little more acid. I tried a little more lemon juice and think you may start to taste that, but I think upping the vinegar to 2/3 cup would not change the flavour too much, or you could also reduce the peppers or onions a little. All in all I just wanted to remind people not to trust every recipe you see unless they are tested recipes and feel free to be extra safe with a little added acid. OK rant done, now go make some sauce it’s so delicious!

*This post contains affiliate links. Check out the “About the Blogger” page for more information.

Country Western Ketchup

It’s time for some more terrific tomatoes! For this adventure in deliciousness we turned to an OSU Extension Service publication. This is a delicious ketchup with a little more spice than a traditional ketchup, not hot spice, just really flavourful – I personally think it’s freaking fantastic.

20130923-160501.jpg

Ingredients:

24 pounds of tomatoes
5 chili peppers, sliced and seeded
1/4 cup salt
2 2/3 cups vinegar (5%)
1 1/4 cups sugar
1/2 tsp ground cayenne pepper
4 tsp paprika
4 tsp whole allspice
4 tsp dry mustard
1 Tbsp whole peppercorn
1 tsp mustard seeds
1 Tbsp bay leaves

In my opinion, you don’t really want to cut this recipe down at all because cooking down to the consistency of ketchup only leaves you with 6-7 pints. Halving it would only get you 3 or so which would just be sad!

Here is what we did:

Our tomatoes aren’t coming in quite fast enough to have 24 ripe pounds at a time, so I have been chucking them in the freezer. This is the perfect thing to do if you don’t have enough yet, or don’t have time to deal with them. They make great sauce or ketchup still after freezing and it eliminates the need to blanch!

20130923-161000.jpg

Thaw the frozen tomatoes either with patience, your mind power or by running them under hot water, and the skin comes off super nicely! If you didn’t use frozen like me just blanch and peel and put them in your biggest pot.

20130923-161030.jpg

Keep yourself entertained while peeling like we do. Weee it’s a tomato super hero! I will post it to Instagram! Ahem, I mean bring the tomatoes to a boil over medium high heat.

20130923-161224.jpg

Add in all the tomatoes and the chili peppers, mash them up a bit, and simmer uncovered for at least 20 minutes (note: I know what you are thinking, no this picture is not all the tomatoes).

20130923-161455.jpg

Meanwhile prepare the spice bag. Put the spice bag into a pot with the vinegar and bring to a boil. Turn off the heat once it is boiling and let it steep in the vinegar at least 20 minutes. After 20 minutes, remove the spice bag and pour the spiced vinegar in with the tomatoes. Cook at least another 30 minutes.

20130923-161519.jpg

Strain time! Turn off the heat and let the ketchup cool a bit. Then put the mixture through a food mill or strainer. I ran it through the Victorio a couple times.

ASIDE: Make sure you carefully assemble your strainer if this is the type you are using and have the screw tightly attached because at this point we had a TOMATO EXPLOSION! The screw must not have been in tight and the metal grate piece popped off while we were cranking and we lost a few cups of juice to the floor. It was very sad but at least we lost only what was in the hopper and strainer part at the time.

20130923-161556.jpg

Return the mixture to the pot, add the sugar and salt and boil gently until it reaches ketchup consistency. It takes a long time but it is worth the wait! Stir occasionally.

20130923-161919.jpg

This is what ketchup consistency looks like. Sorry for the terrible quality pictures, too much steam! But anyways if it mounds nicely on your spoon and looks generally ketchup like it is ready to be canned. Prepare the canner, jars and lids a little bit before it is ready.

20130923-162007.jpg

Ladle the hot ketchup into hot jars leaving 1/8 to 1/4 inch head space. Wipe the rims, apply the lids and tighten the bands finger tip tight.

20130923-162109.jpg

Process pints or half pints for 15 minutes in a boiling water bath canner. Cover by at least 1-2 inches of water and start timing when the water is at a full rolling boil.

20130923-162310.jpg

After 15 minutes remove the canner lid, wait 5 minutes and remove the jars. Let cool 12-24 hours then remove bands, label and store. Mmmm countrified deliciousness.

20130923-162455.jpg

Beef jerky – with the jerky gun!

Knowing that I got a dehydrator for my birthday, my good pal Kiki got me the jerky gun to go along with it! I finally tried it out last week and am pretty happy with the results. I just did about a pound of ground beef to try it out, which is about what the gun will hold at a time.

20130919-133326.jpg

For this first endeavour I used the spice and cure packets that came with the gun since it came with 4 packets, but in the future I’d really like to try my own recipes. I don’t like that there is really no list of ingredients on the packets. I will report back with delicious recipes in the future! This is tasty trust me, just maybe not the best for you.

20130916-225738.jpg

Here’s how I made it. Mix one pound of lean ground beef (93% lean or more) with one cure packet and one flavour packet. Add a little extra cayenne for spice if you desire (you DO desire it!)

20130916-225956.jpg

Mix it up well. It smelled so good I wanted to eat it all raw! Eww, don’t be tempted.

20130916-230045.jpg

Fill the meat into the jerky gun.

20130916-230110.jpg

Attach the end piece. I picked the one that makes 2 smaller strips.

20130916-230310.jpg

Squirt strips out onto the dehydrator tray! BAM it’s that easy!

Now, to ensure your jerky is safe from bacteria, you have two options. The first would occur here – precooking the meat. Place the meat on a baking sheet instead of directly on the trays, and cook in a preheated oven at 325F until they reach an internal temperature of 160F. Use a thin tipped thermometer to check the temperature. Then finish on the dehydrator. Option 2 is what I did, which is why the strips are going on the dehydrator raw. Option 2 is post drying heating. Once the jerky is done, immediately place them in the oven, preheated to 275F, and cook for 10 minutes. Both options work fine, you choose which you prefer.

Turn the dehydrator on the the highest setting, 160F / 71C. Preheat it for 15-30 minutes.

20130916-230349.jpg

After about an hour or so it is starting to dry but the fat is pooling on it, so pat them dry with a paper towel. Do this a few times, every hour or so. It’s also nice to flip them once, I think I did it after about 2 hours.

20130916-230426.jpg

When they are done, remove to a paper towel and leave them for a couple hours wrapped in paper towel if they still have any fat droplets. They shouldn’t really though if you had lean meat. You can tell they are done by removing a piece and letting it cool a bit. Try to bend it in half, and if it won’t break at all it’s not ready. If it splits but doesn’t snap you are probably good to go. You don’t want to cook until it snaps in half, that’s over done. For me with only one pound of beef on 4 trays it took about 5 hours to be satisfactorily done. Don’t overcook it, especially if you still need to do the 10 minutes post drying heating.

20130917-013523.jpg

Mmmm jerky. “Condition” your jerky by loosely packing it and shaking the container every couple days. This just helps redistribute moisture from moister ones to drier ones. If you see condensation forming, they are under done. Then store! I like to store it in the fridge just so it keeps longer but it will keep 2 weeks unrefrigerated. Plus it honestly probably will never last long enough to go bad! Make a big batch just before a camping trip! nom nom nom!

Love this and want a jerky gun of your own? Click here to purchase. Don’t have a dehydrator? They are totally worth the price! I have this one and so far love it!

*This post contains affiliate links. Check out the “About the Blogger” page for more information.

Blackberry Cinnamon Tequila Jam

It’s blackberry season here in the Pacific Northwest, and mama and I sure took advantage of it with this jam. For this recipe we used the sure jell less sugar pectin, but you can use whatever pectin you prefer and adjust the sugar (more or less as you so desire, according to the package). And that’s the beauty of home made! We found the idea for the flavour mixing here. Check it out, it’s an awesome chart! Thanks Erica! Here it is pictured on ice cream. Oh baby!

20130915-152120.jpg

Ingredients:
5 pints blackberries
4 cups sugar
1 box sure jell less sugar needed pectin
1.5 tbsp tequila
1/4 tsp cinnamon

The flavour of the cinnamon and tequila both go a long way, so try these amounts first before adding too much more.

Here is what we did:

Prepare the canner, jars and lids. The recipe will yield 7ish half pints.

Pick the berries, then wash them.

20130912-212828.jpg

Mash them up with a potato masher.

20130912-212905.jpg

Mix the pectin with 1/4 cup of the sugar and mix it in.

20130912-212940.jpg

Add in the tequila…. Feel free to put an extra bit in your mouth. This can also be added at the end if you prefer.

20130912-213052.jpg

and the cinnamon…

20130912-213118.jpg

Bring to a full rolling boil, stirring constantly. So rapid it’s a blur!

Once at a full boil, add the rest of the sugar and return to a boil, stirring constantly. Boil hard for one minute. Remove from heat and skim off any foam.

20130912-213530.jpg

Fill the hot jars leaving an 1/4 – 1/8 inch head space. Wipe rims, apply lids and tighten the bands finger tip tight. Process for 10 minutes in a boiling water bath canner, covered by at least 1-2 inches of water.

20130912-213551.jpg

After the 10 minutes, turn off the heat and remove the canner lid. Wait 5 minutes and remove the jars on to a towel or hot pad. Check the seals after 12-24 hours when they are cool. Remove the bands, wipe down, label and store. mmm mmm good. Enjoy on ice cream, scones, whatever!

20130912-213915.jpg

Blackberry Cinnamon Tequila Jam on Punk Domestics

Corn!

Some people have asked me, “Why would you bother canning corn, it’s 97 cents at the store?” To those people I say … Uh, shut up. But seriously, anything home canned is worth it. I know my canned corn was freshly picked, immediately canned and contains only corn and water. Plus corn was on sale at the farm stand for 20 cents so I got the 20 ears for $4. And I’m a canning addict. I also like that you can put it in any size jar you like (well within reason, not a half gallon). I just eat a bit at a time, so can in half pints, but if you eat a ton of corn it could be nice to open up a whole quart at a time.

20130915-154313.jpg

Canning corn is as easy as pie. Step one: husk the corn on the porch.

20130915-153205.jpg

Next wash the corn and cut the it off the cob – now I was going to use this nice little $2.99 tool pictured here, but it didn’t work that well and I also saw after buying it that it has that weird cancer warning on it that only California labels things with. Yaaaaaaa. So I just used a knife. Try to cut not quite to the cob, and remove any bad spots.

20130915-153232.jpg

Blanch the corn for 3 minutes. Although when I reread my presto manual I think maybe I was supposed to blanch it on the cob? Meh, I dunno, makes no difference.

20130915-153345.jpg

Meanwhile boil a pot of water to use to pour over the corn. Wash the jars and heat them (just leave them full of hot water after you wash them). Then fill the jars with corn (spoon it out with a slotted spoon). Add boiling water to cover the corn leaving an inch head space.

20130915-153428.jpg

Debubble, wipe the rims, apply the warm lids and tighten the bands finger tip tight. Add 3 quarts of hot water to the canner and place the corn jars in the canner.

20130915-153457.jpg

Once all the jars are ready, close the lid and turn the heat on high. Vent the canner for 10 minutes before applying the weight. After the 10 minute vent period, place the weight on the vent. For a dial gauge canner like mine, bring to 11 pounds of pressure at sea level. Once at pressure process for 55 minutes for half pints or pints and 85 minutes for quarts. After the time is up, turn off the heat and allow the pressure to drop. After the pressure has dropped (and the safety do-hickey drops), remove the weight and wait 10 more minutes. Then remove the lid and the corns. ping ping ping ping!

20130915-153654.jpg

12-24 hours later check the seals, remove the bands and wipe down the jars. Label and store. Nom nom nom!

20130915-153956.jpg

Strawberry Pinot Noir Jam

After the tuna fest, we needed an easy canning project. Something with a short processing time, and something to get the smell of tuna out of the house. This delicious jam did just the trick. Strawberries, gooood. Wine, goooood. Together, oh so good! Believe it or not we actually picked these berries. In September! I know eh? Crazy madness! Anyways, we picked them locally at Fairfield Farm. Which I was going to keep as a secret, but dang I guess I just spilled the beans. The berries were delicious but I am both happy and sad that they were all used for this jam. Might have to go again before they are all gone.

20130913-165158.jpg

This is a pectin free jam so it cooks down for quite a while, but it’s good that is does because it makes the house smell so darn good. I got this recipe from a friend who found it on this liquor store’s website.

Ingredients:
14 cups of strawberries
1 bottle of Pinot Noir
2.5 cups sugar
1 lemon, juiced

For best results, make this jam over two days. The first day wash and hull the strawberries. Combine them with the sugar, wine and lemon juice and bring to a boil over high heat. Either mash the berries a little or cut the larger ones in half or quarters. After boiling for 10 minutes or so, turn off the heat, cool the mixture and store over night. I imagine that you could do the rest of the process now if you want, but to get the berries good and infused with wine, soak overnight.

20130912-211802.jpg

The next day, strain the liquid into the pot and leave the strawberries aside. Reduce that over medium high heat for about 30 minutes, or reduction by about a half. It should reach 215F if you have a thermometer. Then add in the strawberries and continue to cook. I mashed them a little more at this point but you don’t have to. Continue to reduce for about 15 or so more minutes. I did longer I think and still ended up with more than the recipe said I would get which was odd. But get the jam either to 212F if you have a thermometer or until it’s reached a good gel stage (test it on a cold metal spoon or whatever your preferred jam test is).

20130912-211826.jpg

While it reduces, prepare the canner, jars and lids. I got almost 8 half pints, the recipe says you’ll get 6. Mmm look at that delicious jam.

20130912-211928.jpg

Fill the hot jars leaving a half inch head space. Wipe the rims, apply the lids and tighten the bands finger tip tight.

20130912-211956.jpg

20130912-212022.jpg

Place the jars in the canner covered by at least 1-2 inches of water. Process in a boiling water bath canner for 10 minutes.

20130912-212114.jpg

Once the 10 minutes is up, remove the canner lid, wait 5 minutes, and remove the jars to a towel or hot pad. Listen for the jars to go ping. 🙂

20130912-212230.jpg

Enjoy this delightful treat whenever you desire. It makes a great gift, although it may be hard to say goodbye once you’ve tasted it.

20130912-212405.jpg

Homemade Probiotic Deodorant

With canning season starting to wind down soon I’d like to start adding some other types of posts. So, another awesome use for plants is to make home made cosmetics/personal care products. I shall start with this fantastic recipe for homemade deodorant. I got the recipe here from the super great blog “frugally sustainable.” Thanks Andrea! And I don’t want to just tell you about recipes that are already out there only, so now that I have a stockpile of great natural ingredients I will definitely work to come up with some of my own concoctions to share with you. But let’s begin with this tried and tested one. I have made it for a few people now and it really works, just don’t apply too much, a little is enough!

20130913-162451.jpg

Ingredients :
1 tbsp cocoa butter
1 tbsp coconut oil
1 tbsp shea butter
1 tbsp beeswax
2.5 tbsp arrowroot powder
1 tbsp baking soda
1/4 tsp vitamin E oil
15 drops of essential oil (I do half tea tree and half rose absolute)
2 capsules probiotics

Here’s how you make it:

Clean out an old deodorant container that you’ll pour it into, or else buy empty ones online.

In a mason jar or other clean glass jar, melt the beeswax, shea butter, cocoa butter and coconut oil by placing the jar in a small pot of water and heating over medium heat.

20130913-162523.jpg

Heat until all the ingredients are melted and mix together with a chopstick or other stick like thingie.

20130913-162547.jpg

Remove from heat, cool slightly and add the vitamin e, baking soda and arrowroot. Cool further until it’s quite thick (like pudding as Andrea described it) and then add in the essential oils and the probiotic capsules.

20130913-162744.jpg

Mix together well and pour into the container!

20130913-203414.jpg

Stick into the fridge and wait a couple hours and presto you have an all natural awesome smelling deodorant!

20130913-203047.jpg

Love this idea but no idea where to get the ingredients? Here is where I get mine. And while there are multiple ingredients to invest in it is totally worth it because there are many other recipes they can be used for!

Links:
Beeswax – I really like this one because it is a lighter colour so doesn’t make all your products yellowy, and the pellets rather than bars are just easier to measure out.
Shea butter – So many uses! Definitely invest, I have more great ideas to come.
Cocoa butter – You can go without it and just use shea butter in some of the recipes (here and to come) but it is a little harder than the shea so adds a nice bit of hardness to this recipe especially. And adds a great smell.
Probiotics– This is the one I bought, but since unless you plan to take them also this is a lot of capsules, maybe you can find a smaller quantity or share with friends.

For coconut oil check the healthy section of the grocery store. You can also usually find essential oils and vitamin e oil at co-ops and health food stores or from Mountain Rose Herbs. Arrowroot I found in the bulk section (also at Mountain Rose). Enjoy!

*This post contains affiliate links. Check out the “About the Blogger” page for more information.

Tuna Fest

Two weeks ago in canning class we canned Oregon Albacore Tuna. I got to take home one jar, as per usual. ONE JAR – that’s not going to get me through the winter! So it was time for a quest. Mama’s in town so I conned her into helping me process a bunch of tuna. We went to Newport and got three 20 pound fishies! 60 glorious pounds of Albacore Tuna. After filleting that worked out to about 34 pounds of meat.

20130912-210605.jpg

Here we go! Bringing home the tuna from the Chelsea Rose.

20130912-221817.jpg

The first thing we did was can as much as we could fit in my pressure canner – 24 half pints. Tuna needs to be pressure canned for 100 minutes, so you definitely want to do a full load. We filled the jars with raw tuna leaving about an inch head space. You can precook it first if you want, but that just seems silly when it cans for so long. Do you want your house to stink even more than it already will from the canning?

20130912-222145.jpg

It’s probably a good idea to wear gloves. Stinky stinky tuna. Stuffing the jars kinda made me want to vomit all over them, so I had to stop for a drink and make mama do a lot more while I worked on wiping rims and putting on the lids.

20130912-205016.jpg

When the jars are full you can add a little water if you want. We did in some of the jars but you don’t actually have to, just ensure you get as many of the air pockets out as possible.

20130912-201438.jpg

When the jars are full and debubbled to the best of your ability wipe the rims and apply the warm lids. This rim wiping is not just the regular wipe though, those rims are nasty! Use vinegar and many paper towels to get the oils off so that they will seal.

Add 3 quarts of water to the canner. Load it up, 2 layers of 12 (in a 23 quart canner). When stacking, either place a tray between the layers or stack the top layer jars so they are each resting on the rims of two jars.

20130912-201530.jpg

We did a second load in a 16 quart canner so used the wide mouth half pints so we could fit 16 – 8 per layer.

20130912-201600.jpg

Tuna needs to be canned for 100 minutes – that’s 1 hour and 40 minutes! HERE WE GO!

Close the lid. Turn the heat up to high and get the water boiling. Get a steady stream of steam venting and adjust the heat if necessary so it doesn’t get too vigourous. Vent for 10 minutes. After the 10 minutes of venting, place on the weight. Bring the canner to 11 pounds of pressure. Start the time when the pressure is reached. Watch carefully and maintain the pressure over 11 pounds for a full 100 minutes. REMEMBER if it drops below pressure for even a brief moment you MUST restart the time. So keep it over 11 – it sucks to have to start over. And test your pressure gauge every year! Yes I am yelling at you since this is my first pressure canning post and I want you to be safe.

20130912-201637.jpg

When the 100 minutes are up, turn off the heat and carefully remove the canner from the burner. Let the pressure drop completely on its own. After the little pressure button thing drops, remove the weight. Wait 10 more minutes, then remove the lid and the tuna jars. Listen to the PING PING PINGS!!!!

BAM 40 jars of tuna!

20130912-204615.jpg

After 12-24 hours when the jars are cool, remove the bands, check the seals and rinse the jars. There is going to be some nasty residue from the little bits on the outside of the jar so use soap and water to clean the jars. I ended up just chucking the bands since they were so nasty. In other nasty news, I have now washed the towels that we used for this endeavor 5 times and they still stink of tuna, so don’t use your favourite towels. If any one has good suggestions on getting out the stench please let me know.

Label, store and enjoy all winter! I am really excited to eat it, I swear, it’s just kind of a gross process so one needs a break before one starts eating the tuna.

20130912-204836.jpg

The tuna that was left after canning we froze in steaks. I think I will borrow my friends vacuum sealer to avoid freezer burn. Now we are set for winter! In terms of yield, it works out that you’ll need just over 10 pounds to fill 24 half pint jars. So we split this partially with a friend and froze just less than half of the tuna. Now go get some – once you do you’ll never go back to the 99 cent cans in the grocery store.

20130912-230628.jpg

Seasoned Tomato Sauce

Last night was a canning EXTRAVAGANZA! An adventure in awesomeness! A deed of deliciousness! A ….slight screw up on one recipe, but we’ll get to that. I was canning with a friend, so I showed up at her house with 60 pounds of tomatoes! This sauce is what we did with half of them. The recipe is super nice if you don’t like a chunky sauce. You an still reduce it to a thick enough sauce, but it’s not chunky because you run it through a strainer after cooking it. It is also from the Ball Complete Book of Home Preserving like many of my faves.

20130907-190820.jpg

Ingredients:

10 pounds of tomatoes, cored
2.5 cups finely chopped onions
3 cloves minced garlic
1.5 tsp dried oregano (I like more personally)
2 bay leaves
1 tsp salt
1 tsp freshly ground black pepper
1 tsp granulated sugar
1/2 tsp hot pepper flakes

We did 30 lbs so exactly tripled the recipe. However, we got about 11 pints even though the recipe said it would make 6, so we must have reduced it longer.

Here is what we did:

Wash and core the tomatoes. Quarter the tomatoes and fill the pot one layer deep. Crush the tomatoes with a potato masher, or in our case a plastic cup because I forgot the masher, and bring to a boil over high heat. Stir constantly! Here is our mistake, we got some burnage happening on the bottom of the pot. Burnt=bad! Continue adding, crushing, stirring, adding, crushing, stirring, adding, stirring, crushing, adding, stirring, adding, crushing, stirring, adding, stirring, crushing, adding, crushing, stirring, adding, stirring, crushing, adding, stirring, crushing, stirring, until all the tomatoes are in the pot. Maintain a boil the whole time and stir!

20130907-183211.jpg

We had tripled the recipe so had this going in three pots. Once the tomatoes are all added, add the chopped onions and spices (everything but the lemon juice). You are allowed to add more garlic, or oregano, or add some basil or parsley if you desire as well. Reduce the heat to medium after you have it boiling again so you don’t burn the sauce! To get a good consistency, reduce by about half, which takes 2 or so hours. We did another recipe now, so there is certainly time, just watch it and stir so it doesn’t burn.

20130907-183321.jpg

mmm sauce. After it is done reducing, remove it from the heat. Prepare the canner, jars and lids.

20130907-183354.jpg

In batches, run it through a strainer/food mill. Using Mr. Victario we found that not all the good stuff strained out the first go around, so we actually put it through a few times. With just a strainer you are pressing it through I imagine this would be less of an issue.

20130907-183417.jpg

Once you’ve got all the good stuff, return the sauce to a boil. This is important because the processing time is based on hot sauce, not lukewarm sauce, so don’t be lazy and can the warm sauce or you could be making an unsafe product.

20130907-183448.jpg

Before filling each jar with sauce, add one tablespoon of bottled lemon juice (or 1/4 tsp citric acid if you prefer) to each hot jar.

20130907-183512.jpg

Then fill each jar leaving a half inch head space. Wipe the rims, apply the lids, and tighten the bands finger tip tight.

20130907-183533.jpg

Place the jars in the canner, covered by at least 1-2 inches of water and bring to a full rolling boil. Process for 35 minutes (for those of us less than 1000 feet in altitude). After 35 minutes turn off the heat, remove the canner lid, wait 5 minutes, and remove the jars to a hot pad or towel. Listen to the pings! PING PING PING!

20130907-183656.jpg

12-24 hours later, check the seals, remove the bands and wipe down the jars; label and store! Enjoy all winter (or as long as you manage to make them last).

20130907-183737.jpg

*This post contains affiliate links. Check out the “About the Blogger” page for more information.