Zucchini Chips

Are your zucchini exploding out of control? Are you overwhelmed? Need a solution? Try making dehydrated zucchini chips!

Haha. Yes, I meant for that to sound like an infomercial.

Making zucchini chips is so easy and it really makes a great use of your excess, because they keep for a long time once they are dry and compress down a lot for storage. All you need to do is cut them up in evenish slices, which is much easier with a mandolin. Arrange them on your dehydrator trays without overlapping.

IMG_4059 copy

For this, I used two medium large zucchini to fill 4 dehydrator trays. Spice the zucchini if you would like. Here I salted them and added cayenne. Don’t add too much though, they are really hot the way I made them! I’ve also seen people toss the slices in a bowl with a bit of olive oil, salt and pepper before drying, which would be super delicious also.

IMG_4061 copy

Dry the zucchini at 135-140F. I like to dry them until they are pretty dry and crispy but some people like to leave them a little moister, so it’s really up to personal preference. Dried until the are still slightly pliable is most people’s preference.

IMG_4063 copy

Store in an airtight container. This is two zucchini, four fully loaded trays and they don’t even fill one quart jar. Eat and enjoy!

IMG_4100

Want to make this but need a dehydrator? I have this one and love it.

*this post contains affiliate links, please see the “About the Blogger” page for more information

An obsolete tool due to new recommendations

There is big news in the canning world people, hot off the presses! This comes straight from my Master Food Preserver meeting this month, and you’ll start to see the recommendations coming out on the packaging soon. What packaging? Your canning lids! The tool you are looking at pictured below will never be needed again. Yep, that fun lid magnet that is either barely magnetic enough to pick up a hot lid, or so magnetic it picks up 4 (like the one in MFP class) is no longer a necessary tool in your canning kit. We no longer need to preheat our jar lids people!

IMG_4014 copy

According to new recommendations by the makers of Ball and Kerr lids, there is no need to heat your lids anymore. This is the last picture you’ll see on my blog of jar lids warming before they are put on the jars. They’ve been testing the lids, and with the sealing compound they make these days, they don’t seal any better if they are heated before going on the jar. So, you can start skipping that step. Wooohoooo 15 seconds saved! But really, I am quite happy to hear this because it always seemed unnecessary to me, but being a good little rule follower I usually remembered to do it. Or at least remembered at the last second and dipped my lids for a second into the canner that was warming up and figured that was good enough. Hopefully none of you bought this ridiculous tool recently or you’ll be looking for some other use for it. Good luck. That’s $9.14 well wasted. I guess if you ever needed to sterilize the lids for another purpose you could still use it?? Ha. But anyways, the official ruling is to just wash the lids as you would the jars, and use them. Remember, as always, they are still meant for single use. Happy canning!

IMG_2487 copy

Refrigerator Dill Pickles

The beginning and end of pickle season is the perfect time for making refrigerator pickles. My pickling cucumbers are starting to come in, but not in such huge numbers that I want to pull out the canner and process them, so the refrigerator pickle is really the way to go. These pickles also have the benefit of being so quick to make, and are often the crispest pickles you’ll have all year, since they don’t get processed in the canner.

IMG_3968

This recipe is sort of from Ball, but I do it a bit differently, so you are also welcome to check out their recipe if you prefer.

Ingredients (for 1 quart jar):
1 cup water
1 cup vinegar (5% acidity, white or cider are great)
3 tbsp pickling or canning salt
2-4 cloves garlic
2-4 heads of dill or 1 tbsp seed
2-3 tsp mustard seed
1 tsp peppercorns
hot pepper flakes if you want hot pickles

Here’s how I made them:

Pick your cucumbers, wash them and make the pickles as soon as possible for the crispest pickles. Always remove a slice off the blossom end, because it contains enzymes that can soften your pickles. Slice your cucumbers however you desire. If you do spears or try and do whole cucumbers you will use more brine than if you do slices and pack them tightly of course, so usually I cut up my cucs to see about how much I have, then make a little extra brine just in case.

IMG_3953 copy

Combine the water, vinegar and salt in a saucepan and bring to a boil to dissolve the salt. If you want your pickles a little sweeter, add a tablespoon of sugar too. Remove from heat.

Heat your jars up a bit so they don’t break when you add in the brine. I just wash them in really hot tap water then leave them full of hot water while I get out the spices and peel the garlic. Then, empty the water. In each jar place whatever spices you desire. My ingredient list is what I do, but feel free to explore. Use the ratios provided of vinegar, water and salt, but do whatever you like with the spices. Don’t like garlic? (you’re crazy!!) then don’t add any. Want it really dilly? Add more heads of dill, or use both fresh and seeds. Want it spicy? Add a tsp or so of red pepper flakes. Have a pre-mixed pickling spice? Great, just use a tablespoon or so of that.

IMG_3957

Fill the cucumbers into the jars, packing them in fairly tightly. Pour the brine into the jars to cover the cucumbers. Just make sure you either let the brine cool a little, and/or have nice warm jars still, because otherwise you could have jar breakage. The alternative (how Ball does it) is to heat up the brine with some spices in it, then throw the cucumbers in there after boiling it and let that cool to room temperature, then fill the jars. Your choice. If you did it my way, let the jars cool to room temperature, about a half hour or so, then refrigerate. I like to give the jars a bit of a shake a few times too, to distribute the spices more. You can also shake it up a bit every couple days, but it’s not essential. Enjoy the pickles after waiting 2 weeks, and within about 3 months of making them for best quality.

IMG_3962 copy

*this post contains affiliate links, please see the “About the Blogger” page for more information

Watermelon Jelly

Watermelons are a classic summer treat that we usually only get to enjoy for a few months while they are in season. These two delightful jelly recipes will allow you to preserve that taste of summer so that you can enjoy it all year long.

IMG_3889 copy

I made two versions of this recipe, one is the zesty watermelon jelly from the Ball Complete Book of Home Preserving, and the other is my own creation, where I simply subbed lemon juice in for the vinegar and omitted the lemongrass. Remember, lemon and lime juice are both better acidifiers than vinegar, which is why it is safe to sub it here. However, that extra acid is mandatory, watermelon is not acidic enough, and therefore not safe to waterbath can without it.

Ingredients:
6 cups crushed watermelon (enough to make 2 cups juice)
1/2 cup vinegar (use white balsamic, white wine or apple cider – I used apple cider here)
4 tablespoons lemon juice
5 cups sugar
1 stem lemongrass, finely chopped
2 pouches liquid pectin

or

6 cups crushed watermelon (enough to make 2 cups juice)
3/4 cups lemon juice
5 cups sugar
2 pouches liquid pectin

Here’s how to make it:

Crush up the watermelon and heat it gently for about 5 minutes.

IMG_3892 copy

Mash it up some more and strain through a dampened jelly bag, or cheesecloth/muslin with some sort of strainer or funnel like below. I don’t have a legit jelly bag setup, so I just used the hopper from the Victorio strainer and some muslin and strained it into a half gallon jar. This actually strained amazingly quickly, unlike some other juice for jellies. I guess they are called watermelons for a good reason.

IMG_3895 copy

Measure out two cups of the juice. If it’s been sitting a while and some of the sediment has settled out, you can stir it up a bit if you like, so that you get that pink colour. If you pour off the top with a lot of the sediment settled out your jelly will be much lighter.

IMG_3897 copy

Prepare the canner, jars and lids. This recipe yields about 5-6 half pints.

Combine all the ingredients except for the pectin in a deep stainless steel pot. Bring to a full rolling boil over high heat, stirring constantly. When the boil is reached, stir in the two packets of pectin quickly and return to a boil. Maintain a hard boil for 1 minute.

IMG_3915 copy

Remove from heat and quickly skim any foam.

IMG_3918 copy

This jelly starts to set up really quickly, so you need to work fast filling the jars. If you have a helper when you are making this, have them get the hot jars ready as you are stirring so you can fill quick like a bunny. Fill the jars leaving a 1/4 inch head space. Wipe the rims, apply the lids, and tighten the bands finger tip tight.

IMG_3922 copy

Process the jars in a boiling water bath canner for 10 minutes, ensuring the jars are covered by at least 1-2 inches of water, and beginning the time when a full rolling boil is acheived. After the ten minutes, turn off the heat, remove the canner lid, wait 5 minutes, and remove the jars to a hot pad or towel. Cool 12-24 hours, remove bands, check seals, wipe down, label and store.

Pictured here is the zesty watermelon jelly on the left, and on the right is the version with just lemon juice. I think the colour difference is in part due to the cider vinegar, but also because I made the right one second and I think had more of the sediment in that batch. They are both pretty, but I was hoping for pinker, and think I might need to experiment with using less sugar to achieve that. But the flavour is certainly delicious!

IMG_3937 copy

*this post contains affiliate links, please see the “About the Blogger” page for more information

Watermelon Jelly on Punk Domestics

July Garden Tour

I just can’t get over how the garden looks compared to what it looked like one month ago today, in my June garden update. And also compared to last year things are much further along!

The side garden has 4 tomato plants, but they appear to have merged into one mega bush. The peas are basically done, and I will replant those for a fall crop this weekend.

20140722-163059-59459132.jpg

The zucchini is out of control. Time for some more relish soon I think!!

20140722-163208-59528581.jpg

The potatoes have all died back, so I’ll harvest those this week and see what we’ve got. I will likely replant and see what I can get for a second crop too.

20140722-163425-59665123.jpg

Even this tomato, which is only in a 6 inch deep raised bed with pretty rocky and gross soil is kicking butt! I think I can only credit the climate and my ability to water for these successes, I’m not sure what all I’m doing right!

20140722-163555-59755173.jpg

The fig tree that was killed by the cold winter is starting to resurrect!

20140722-163555-59755797.jpg

We’ve got beans and basil galore.

20140722-163815-59895666.jpg

Tons of carrots are ready, and the cucumbers are heading up the trellis. Can’t wait to make some more of these pickled carrots.

20140722-163915-59955425.jpg

Adorable pickling cucs!

20140722-163938-59978129.jpg

I have some mondo beets that I really need to pick. Maybe I’ll make more pickled beets or just grill them up with one of these recipes.

20140722-164552-60352185.jpg

And the kale has been a little neglected as well. Excellent kale salad recipe coming your way soon. Or I’ll make some kale smoothies.

20140722-164710-60430857.jpg

And my pride and joy, more tomatoes!

20140722-164053-60053048.jpg

One of the San marzano plants is actually taller than me!! (not that I’m that tall, ya ya let the short jokes come in). Although, since I fail at pruning (and by that I mean I don’t even try), they are a lot of leaves and maybe not as many maters as there could be. But I can’t really say I expect any sort of shortage 😉

20140722-164255-60175240.jpg

How is your garden looking? Is there anything you are drowning in or anything that isn’t doing so hot? Got any great zucchini recipes you want to share??

Blueberry Lime Jam

I do love blueberries on their own, but sometimes you just need a little something extra to really bring out the flavour of a berry. If you are looking for a jam that really kicks it up a notch, you’ve come to the right place. Adding the juice and zest of a lime or two really enhances the flavour of the blueberries and makes a delicious jam. This recipe is from the Ball Complete Book of Home Preserving. The only change that I make is to use a lower sugar pectin and less sugar, and two limes rather than one, but here it’s written as in Ball.

IMG_3775 copy

Ingredients:
4.5 cups crushed blueberries
5 cups sugar
Zest and juice of 1-2 large limes
1 package of regular pectin (or use low sugar pectin and adjust sugar accordingly)

Here’s what we did:

Prepare the canner, jars and lids. This yields around 6 half pints unless you reduce the sugar.

In a stainless steel pot, combine the crushed berries, lime juice, lime zest, and pectin. Mix well to combine all the ingredients.

IMG_3778 copy

Bring the jam to a full rolling boil over high heat, stirring constantly.

Add the sugar all at once when the boil is reached, and return to a boil. Boil hard for 1 minute, then remove from heat and skim off any foam.

Fill the hot jars leaving a 1/4 inch head space. Wipe rims, apply lids, and tighten the bands finger tip tight.

IMG_3788 copy

Process the jars in a boiling water bath canner, covered by at least 1-2 inches of water for 10 minutes, starting the time when the water reaches a full rolling boil. After the 10 minutes, turn off the heat, remove the canner lid, wait 5 minutes and remove the jars to a hot pad or towel. Cool the jars 12-24 hours, remove bands, check seals, wipe clean, label and store.

IMG_3826 copy

*this post contains affiliate links, please see the “About the Blogger” page for more information

My mini primary fermenter

We have recently ventured into the realm of homemade fruit wines and are love love loving it. However, I have learned at least one lesson the hard way, which of course I will share with you so you don’t make the same mistake. I hope you can learn from my dumbiness, and perhaps get excited by the prospect of making your own wines. I think it’s easier than you might expect. I’ve now posted the full instructions on how to make it, which can be found here.

IMG_3836 copy

Our first fruit wine was strawberry, pictured below. To make a gallon batch (of which we made two), we used about 4 pounds of berries, and placed them with the other ingredients into a gallon glass container. It seemed from the instructions that we were following from our local brew store like this was what they had in mind, but I think we were mistaken.

IMG_3279

Now, I’m a scientist, and not an idiot (at least I thought not), so I’m not sure why I thought this would be just fine, but I did. The problem with making wine like this is that fermentation produces a lot of carbon dioxide bubbles. Especially in the first few days after pitching the yeast, and especially when there is a lot of added sugar, as with these. With a fruit wine, these bubbles get stuck below that mat of fruit floating at the top (called the cap)… pressure builds up… and… yaaaaa I think the photo below says it all (sorry it’s rather blurry). Narrow neck plus mat of fruit plus carbon dioxide equals kaboom! Strawberries on the ceiling. I noticed pressure was building up a bit, so I put them in the kitchen sink thinking that the pressure might cause the top to pop out, but I never expected it to happen with such force. Yes, that’s a whole strawberry on the ceiling. I wish I could say we were home for the incident, but we had to go to school, so sadly I am not sure how loud this was, or when it happened, but both of the corks were violently launched off the bottles and fruit chunks hit the ceiling. We did just top it off with water and still saved the wine (it actually still tastes surprisingly good), but it was time for plan B before attempting raspberry or blueberry, which were about to come into season.

wine explosion copy

Enter the homemade primary fermenter. I bought these containers on amazon actually originally for making dough for bread. This is a whole other story, but I just bought these two books, Artisan Bread in 5 Minutes a Day and Healthy Breads in 5 Minutes a Day, and needed a 6 quart container for that. The one I saw came in a 2 pack, so I was inspired to use the second one to make a mini fermenter. It’s 1.5 gallons, so it’s perfect for filling it to the gallon mark, and leaving a 2 quart head space. If you just want to get them for brewing, this 8 quart version might be even better. All we did was drill a hole in the lid the size of the stopper we have. But as you can see we didn’t have the correct sized bit and kind of burned the edges of the hole to try and fix it and now have an oval, so it’s a bit sketchy, but with a little glue around the edges it’s now perfectly air tight! Really any food grade plastic tub with an air tight lid would work, get a 2 or 3 gallon one! Another thing I love about this one though is that it’s translucent so I can see the brewing in action.

IMG_3854 copy

Ta-da. Now brewing is a breeze! After about a week in the primary fermenter, we strain off the big chunks of fruit and age it in the gallon glass jugs, so you really would just need one or two little ones and multiple glass jugs if you wanted to have a number of things brewing at once. I think this is also great to have for trying out a small batch of a new beer, wine, whatever, of which you aren’t sure you want a full 5 gallons. I love these little batches, a gallon is about 5 regular bottles of wine, then we can decide to make more if we love what we’ve made. Not sure how other people do it, but this has been working great for us! Just don’t fill it too full or you will still get fruit sneaking into the stopper and airlock. Have you ever made fruit wine? What do you use?

IMG_3950 copy

*this post contains affiliate links, please see the “About the Blogger” page for more information

Making a mini primary fermenter on Punk Domestics

Master Food Preserver Class – Week 7

Week 7 of the Master Food Preserver class was a big old meat fest. We made jerky, smoked fish, pickled fish, and cooked up some summer sausage. This post will be the last in the Master Food Preserver series (I know, so sad), as week 8 was just our presentations and planning for the epic events of this summer. But don’t worry, there is still much more knowledge in that massive notebook of mine that I will continue to share with you all.

The first thing we did in class was make beef jerky. Beef jerky can be made safely at home, but there are just a couple of precautions that you need to take to ensure it is safe. The PNW 632  publication (click it for the link) is full of excellent information for making jerky, but I’ll give you the summary version here.

IMG_3664 copy

Bacterial contamination is a concern when making jerky, which is why it needs to be sufficiently heated to ensure any pathogens are destroyed. Three methods can be used to do this: post-drying heating, precooking the meat, and a vinegar soak. The post drying heating is perhaps the easiest, all you do is cook the jerky in the oven at 275F for 10 minutes after it is done. This is the method I tend to use. Preheating is done either by cooking the jerky strips in hot brine for about 1.5-2 minutes, which obviously doesn’t really work for ground meat jerky, or by cooking in the oven at 325F until an internal temperature of 160F (165F for poultry) is reached. You need a nice thin tipped thermometer for this. Lastly, soaking the meat in vinegar has been shown to be effective as well, but of course gives the jerky a very vinegary flavour. It’s also not been tested for game meats. And that’s basically all there is to it for safety. Jerky can be dried at the highest setting in a dehydrator (145-155F) or in an oven. But for the oven you really need to test if it can maintain those temperatures first.

Other notes about jerky:
– Yes, you can use other meats like poultry, fish and game meats.
– Just recently the recommendations have changed and it is okay to use ground meat, so long as you post dry heat it. Get the leanest meat possible, 93% lean or greater. The concern with ground meat is that the bacteria that could have been on the surface is distributed throughout by grinding, so use extra caution when making ground meat jerky.
A jerky gun can be useful for shaping ground meat into strips.
– To easily cut jerky from steaks, partially freeze it so you can cut even strips; aim for about  1/8-1/4 inch thick.
– To test for doneness, cool the jerky slightly and try bending it. If it bends and cracks it is done. You don’t want it to snap right in half or it’s over done but if it is bendy but still doesn’t really break it’s not done. Ya, it sounds a bit wishy washy, but you get the feel for it pretty quickly.
– When the jerky is done, condition it in a jar or other container, loosely packed. Conditioning basically just means they sit there for a couple says and equalize in moisture content. Shake it occasionally. If you see moisture collect in your container, they are not dry enough.
– Store jerky in a cool dark place. I like to just store it in a quart jar. It will keep for 2 weeks at room temperature, 3-6 months in the refrigerator, and up to a year in the freezer.
– Nom nom nom

IMG_3570 copy

The next thing we did for meat week was to learn about smoking fish. As with jerky, this can be done safely at home, but there are precautions you should follow to ensure a safe product. Additionally, products need to be refrigerated or frozen when made at home as a precaution, even though you can find commercial products that are safely stored at room temperature. This is due to us not being 100% certain of the salt and moisture content when making it at home. Canning your smoked fish is also an option.

If you want more information beyond what I provide here, the publication for this one is PNW 238 (again click for the link).

In summary:
– Smoked fish must reach an internal temperature of 150F (preferably 160F) and hold at that temperature for 30 minutes. This is important to kill bacteria such as Clostridium botulinum.
– Fish must be salted or brined, and since at home it is difficult to measure salt content, this is why as an added precaution the product must be refrigerated.
– Salt fish in a solution of 1 part table salt to 7 parts water, by volume. Brine for about an hour, although fatty or larger pieces of fish need 2 hours. Less fat = less brine time. Experiment with your fish – it should taste salty, but not unpleasantly so.
– After brining, fish is air dried until a pellicle (shiny, tacky skin) forms. This is usually at least 1 hour. After it forms it is ready to be smoked.
– Fish should be smoked then cooked. Smoke at 90F for up to 2 hours, then increase the temperature until the internal temperature of 150F is reached and maintained. This means the smoker temperature needs to be around 220-225F. If this cannot be achieved in your smoker, heat the fish in the oven after it’s smoked.
– Use hardwood for smoking, soft woods make unpleasant fish.
– If canning your smoked fish, just smoke the fish lightly, for up to 2 hours, then can immediately. Pints will need to be canned for 110 minutes. For full instructions follow the PNW 450 publication.
– Don’t store longer than 2 weeks in the fridge, freeze or can if you want to store it longer.

IMG_3572 copy

I wish this were full and I got to take it alllllllll home with me.

IMG_3573 copy

Mmmm smoked salmon. Makes me want to take a fishing trip to Alaska so badly!

IMG_3582 copy

Honestly, I didn’t even taste the pickled fish because it seemed gross, but I promise I will, so for now I’m just going to provide you that publication, PNW 183, because I can’t really claim any insight here.

The last and meatiest product we made was summer sausage. In contrast with jerky, for summer sausage you want fatty fatty fattiness. It tastes pretty good, but I have to admit that I was a little bit grossed out making it. Honestly I don’t think it’s something I will really try making at home, but it was interesting to learn about. The extension service publication that you can refer to is SP 50-735. My only real original thought on the subject, since this was the one and only time I’ve experienced homemade sausage, is that I preferred the texture when we cooked it in the oven, as opposed to a pressure cooker. Both tasted very similar, but it was the texture that I found I preferred. So, that’s all I really have to say on that…check out those sausages.

IMG_3577 copy

So! If you’re a meat lover, get out there and make some meaty meaty products!


*this post contains affiliate links, please see the “About the Blogger” page for more information

Beeeeets – some fun facts and two recipes

I feel like beets are one of those things where either you love ’em or you hate ’em, and I definitely love ’em. So today I’d like to try and help you board the beet train; convince you to at least give the beets a chance! I think one reason that people are beetophobic is that they don’t know how to prepare them well. But never fear, the botanist is here! I have two favourite recipes I use when I make beets, and think you should try at least one of them before you write beets off for good. But first – some fun facts about beets!

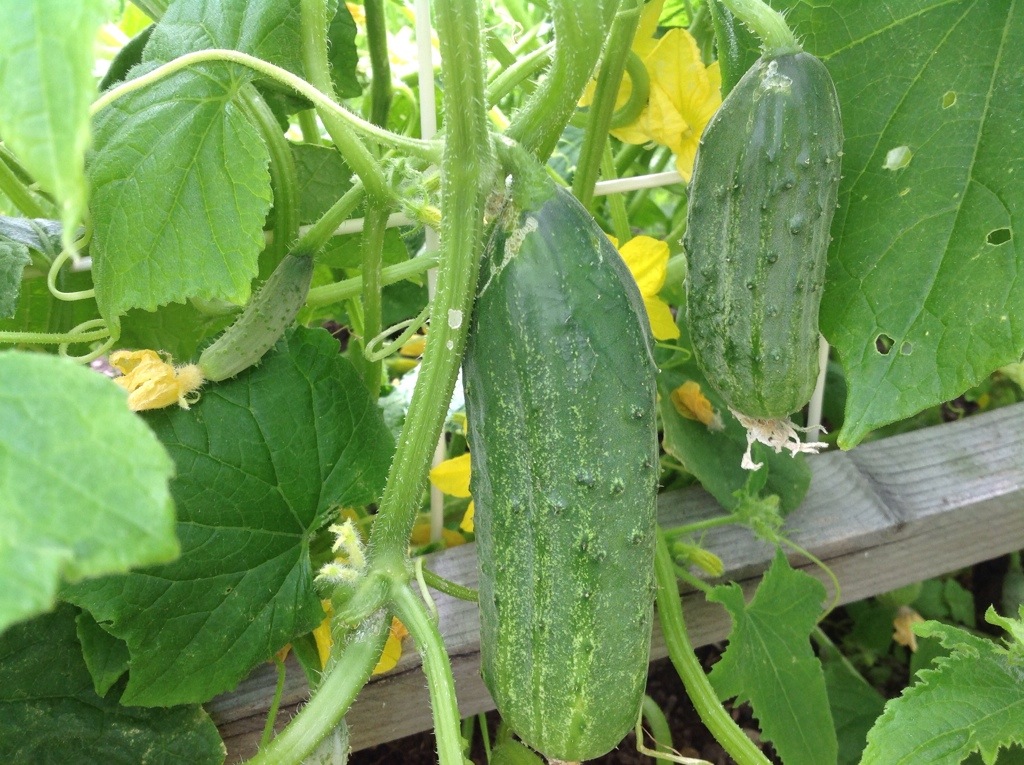
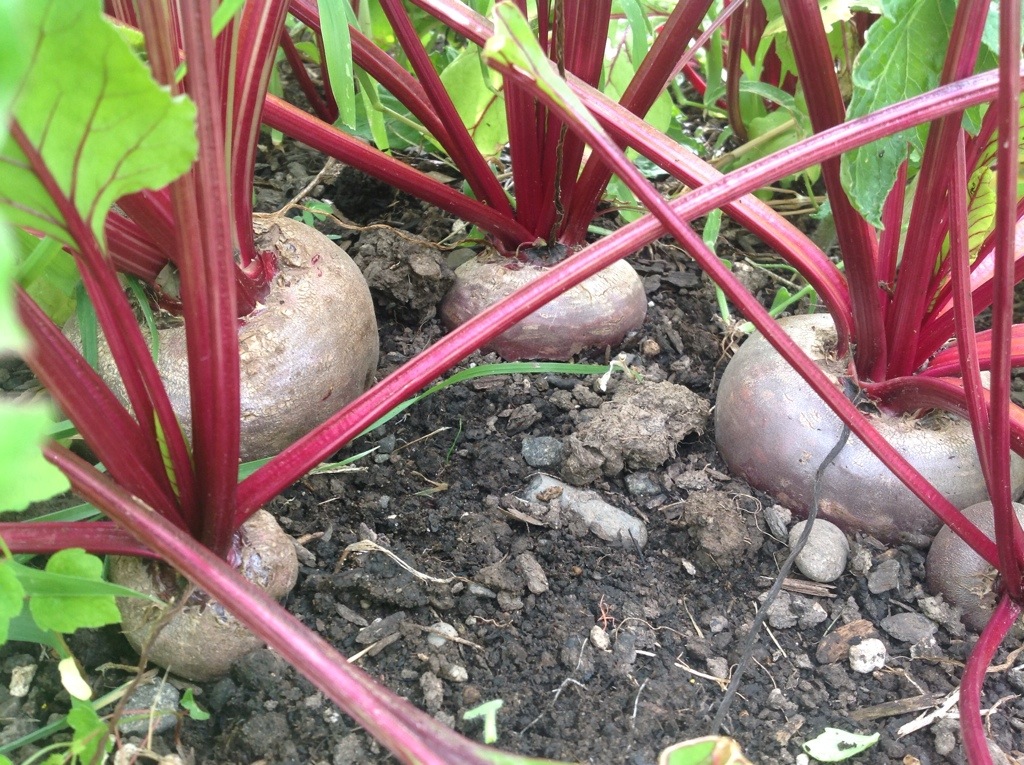
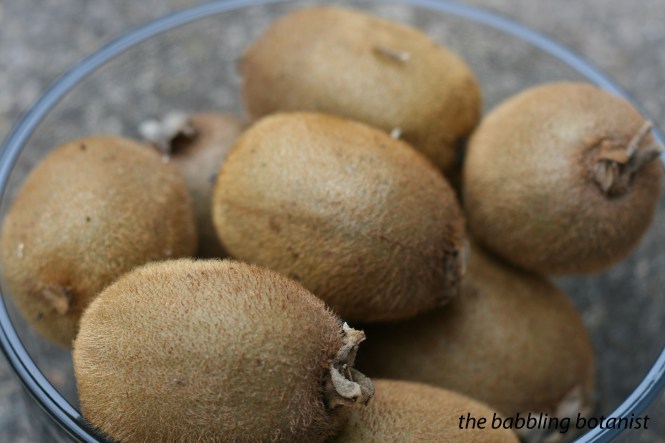
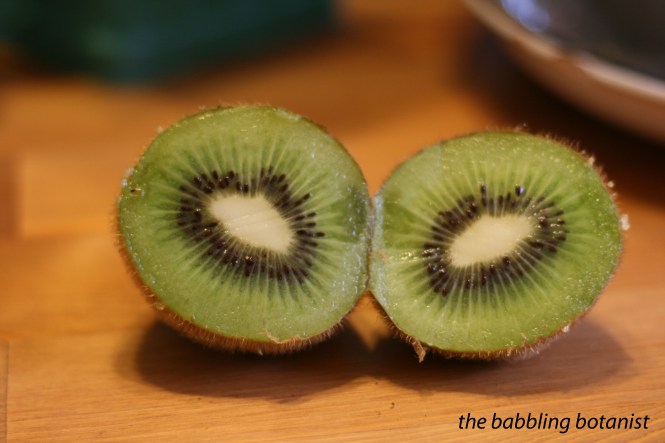
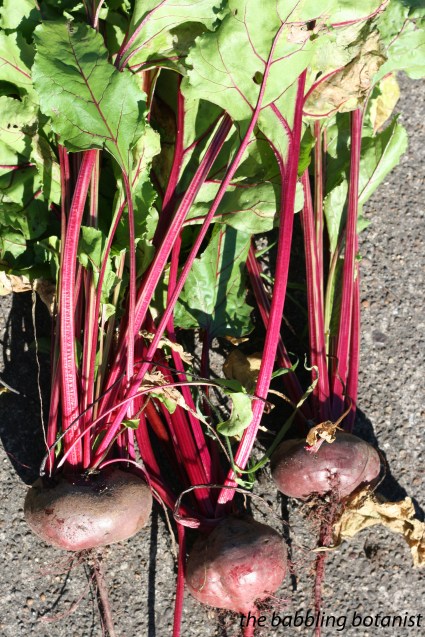
When I think of beets I think of the red root vegetable pictured below, from my garden. The beet plant, Beta vulgaris, however, comes in a few other forms too. Golden beets, and sugar beets, are different cultivars of the same species, as is chard. Sugar beets are grown to make sugar (hence the name), just as sugar cane is, because they contain a high concentration of sucrose.

IMG_3873 copy

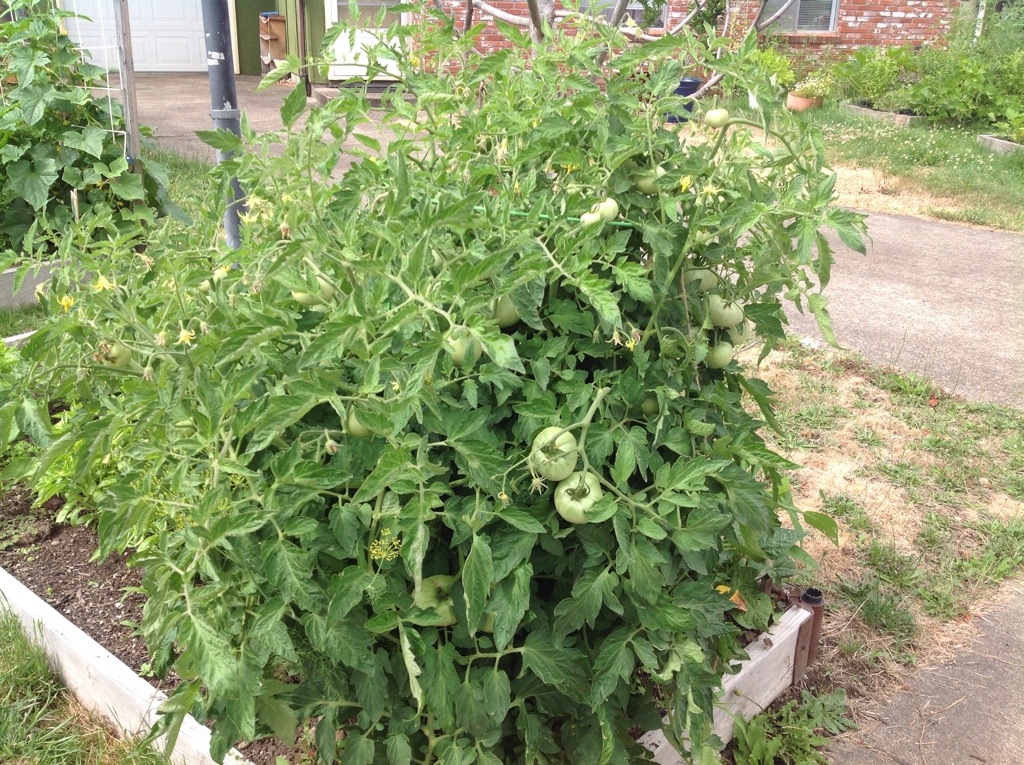
Beets are awesome for a number of reasons. For one, they do well in most climates because they like cool weather, but will also still grow in the summer. I never seem to get them in the garden as soon as I could, and should have been able to harvest way more by now, because they can actually be seeded a month before the last expected frost date for your area. Then you can also get in another crop in the fall or grow them through the winter if you live far enough south.

Beets are also very versatile in how they can be prepared, and are highly nutritious. The website the world’s healthiest foods (click it for link) has some great nutritional info, so I’ll just send you there rather than plagiarize it. I love that both the root and the leaves of the plant are edible, and you can harvest up to a third of a beet’s greens without harming the root, if you want to harvest greens and leave the root to grow larger. Beetroot is delicious on salads, just shredded raw into thin strips, or the roots can also be cooked, which is how I usually eat them. When eating beets (or feeding them to others) it’s also important to remember that they can affect you, ahem… the next day. “Beeturia,” a reddening of the urine, is estimated to occur in 10-15% of people, according to that world’s healthiest foods site, although I think this is probably higher. And I think it reddens something else even more though… so I like to warn people who have never eaten beets before, because even for me who eats them all the time it can be a little startling when you get up in the morning to do your business and are still half asleep. No, you are probably not bleeding internally, you just ate beets yesterday!

OK, so now let’s talk now about my two favourite ways to prepare beets. Yep, going to do it right after the bathroom talk. Sorry, it was either discuss it before or after the recipe, so I went for before. Beets can be steamed or boiled, but my favorite method is to roast them, either in the oven, or most of the time I do it on the barbecue. Oh and don’t forget, they can also be pickled!

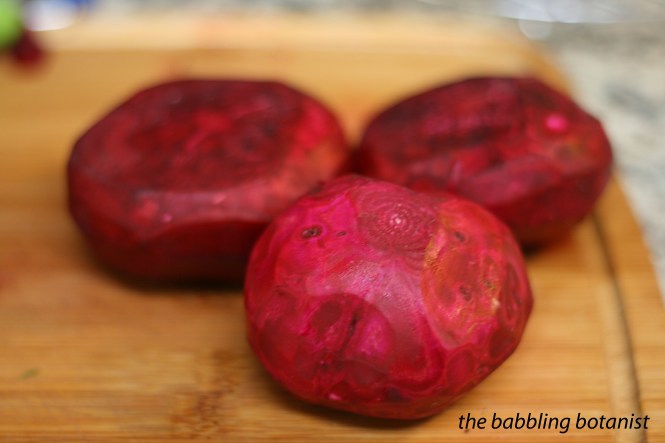
Step one for both these recipes is to rince the beets, cut off the tops and roots and peel them.

IMG_3875 copy

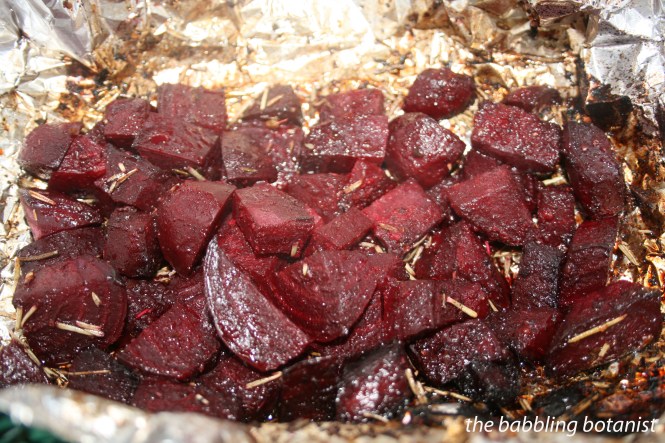
For recipe number 1, which we’ll call “Beet Treats,” because I think they taste like candy, I like to cube the beets. Then place them either on aluminum foil if you plan to grill them, or in an oven dish if you plan to do them in the oven. All I add is oil, vinegar and spices. For 2-3 medium beets I add a couple tablespoons of coconut oil (olive is great too) and a couple tablespoons of vinegar (I like balsamic or red wine vinegar). Then add salt, pepper, garlic powder, rosemary and oregano to taste. I usually also add a couple tablespoons of water too because the liquid can boil off. So watch them so they don’t burn and rotate them around a bit if they are more than a layer deep. Close the aluminum foil around them to keep the liquid in, and cover the pan with foil if you make this is the oven.

IMG_1644 copy

They take about a half hour or so on the grill to soften to perfection. Sometimes a little longer if they are multiple layers deep and larger pieces.

IMG_1648 copy

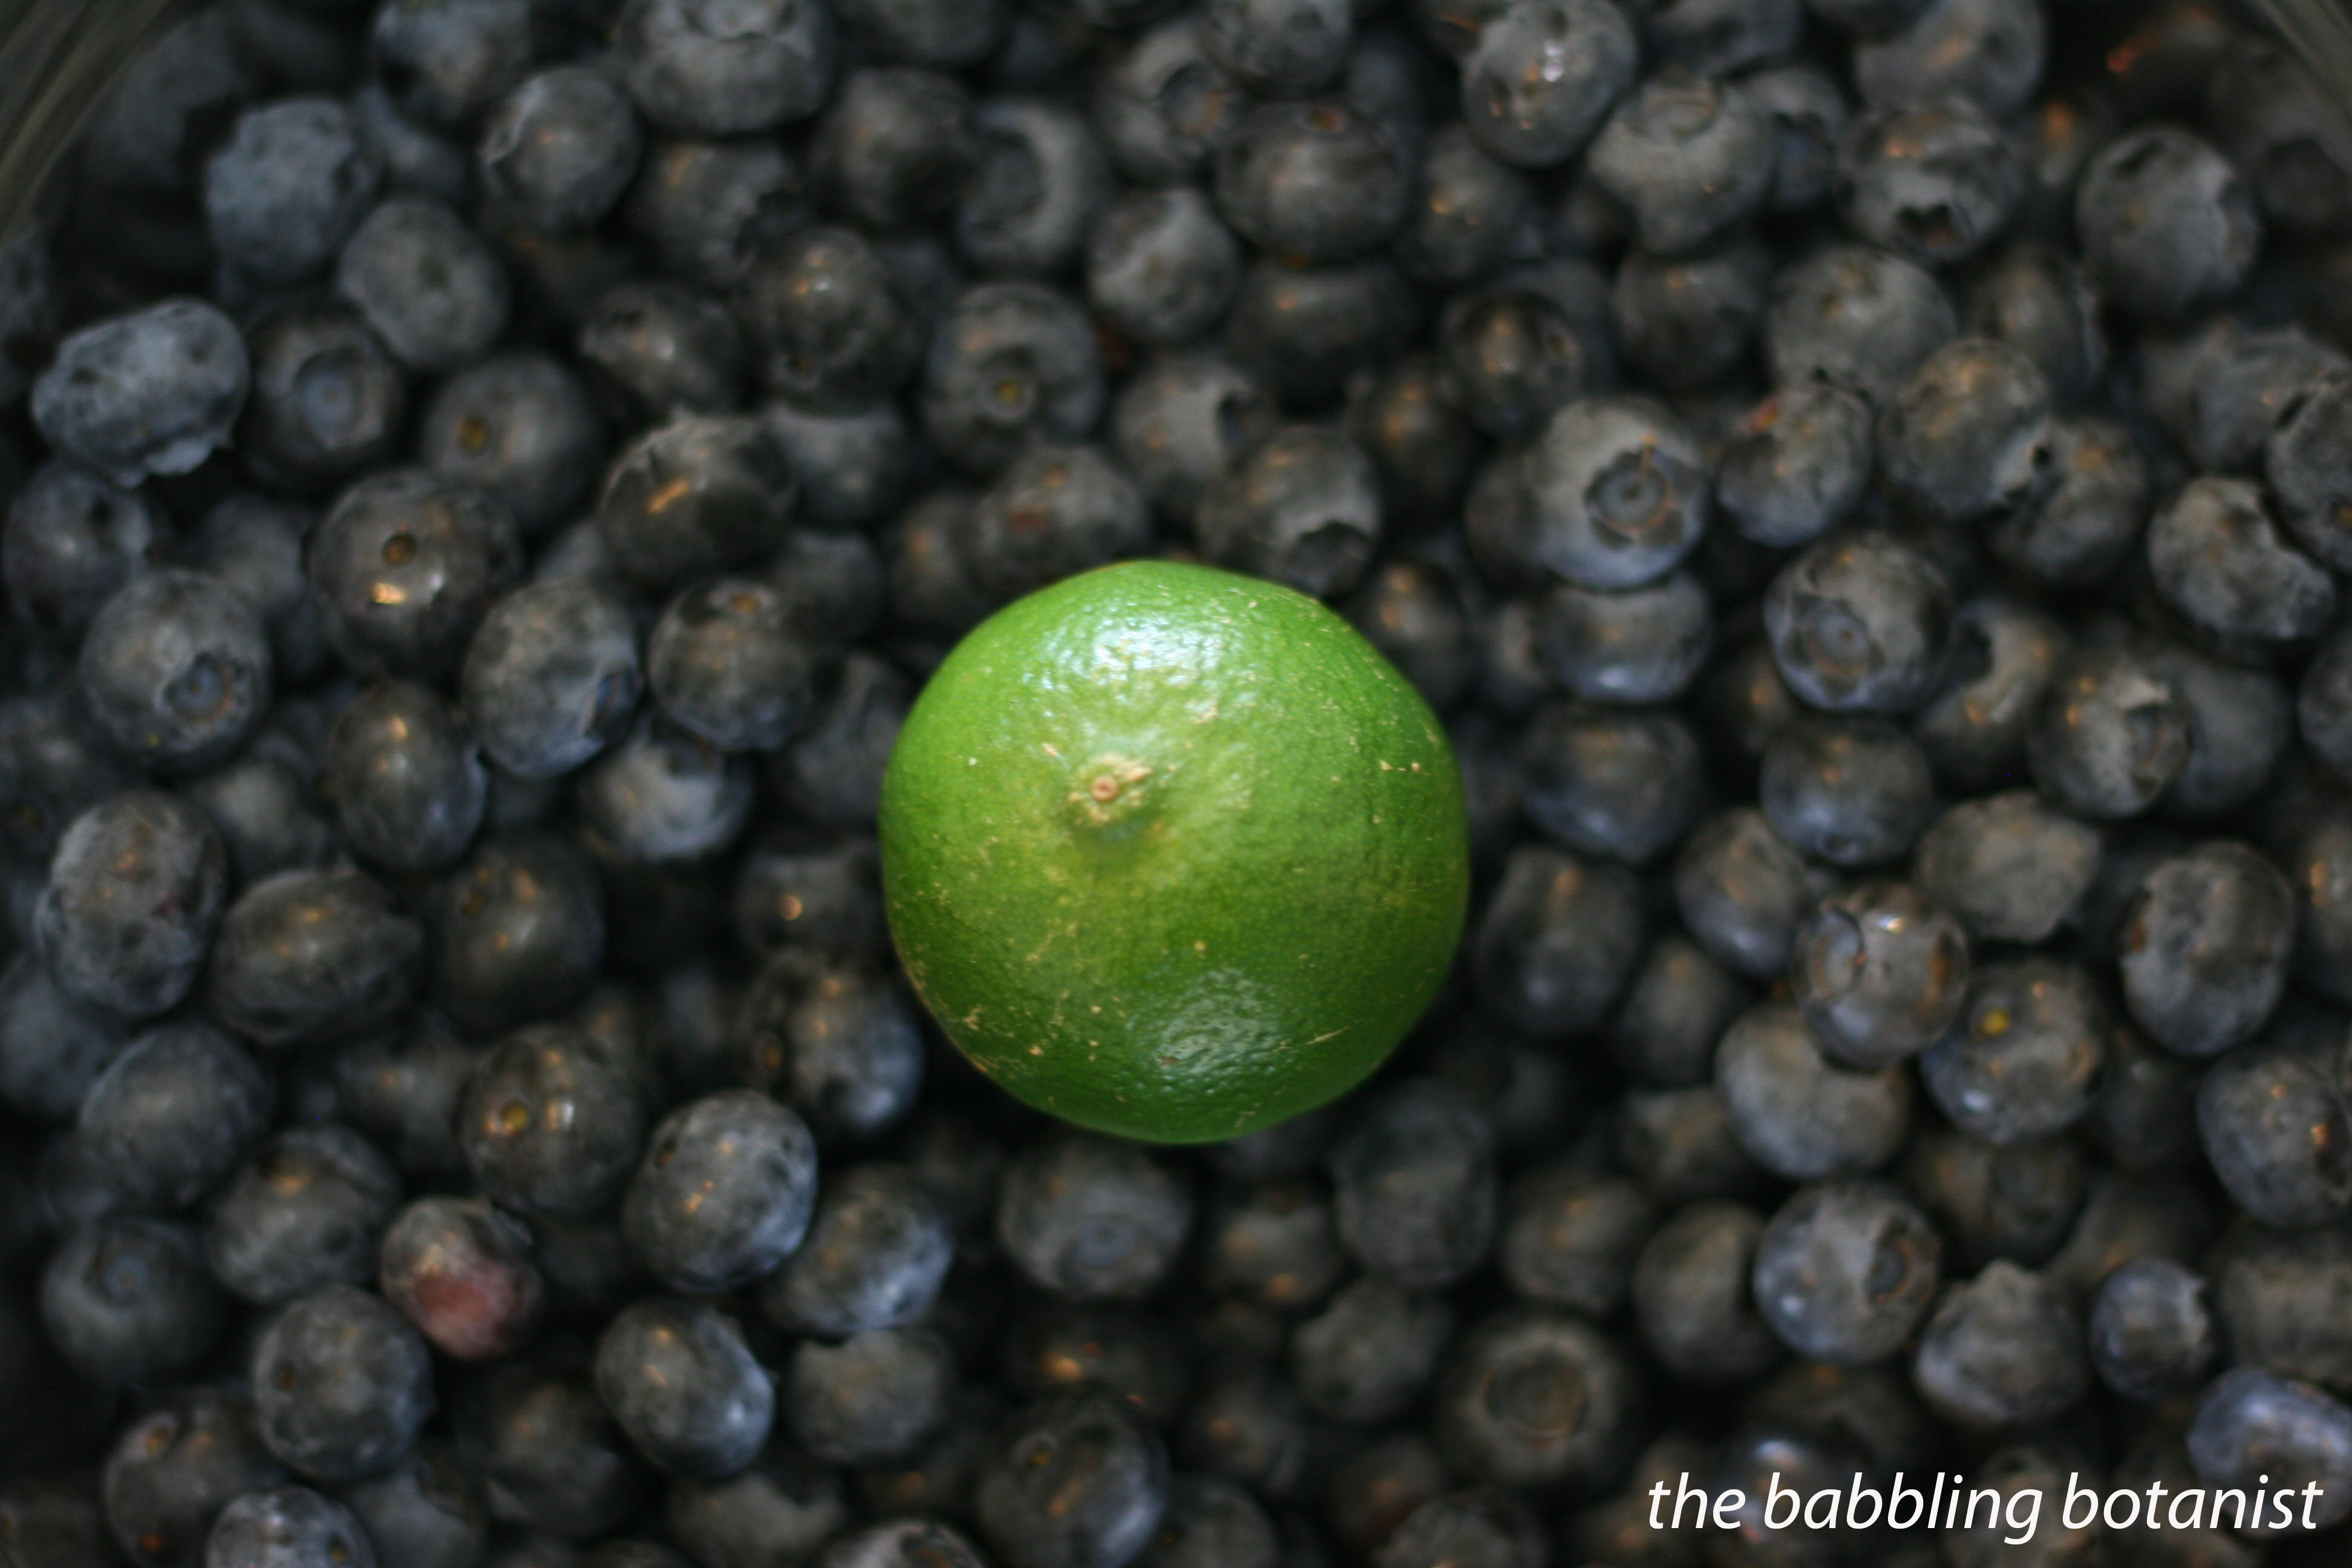
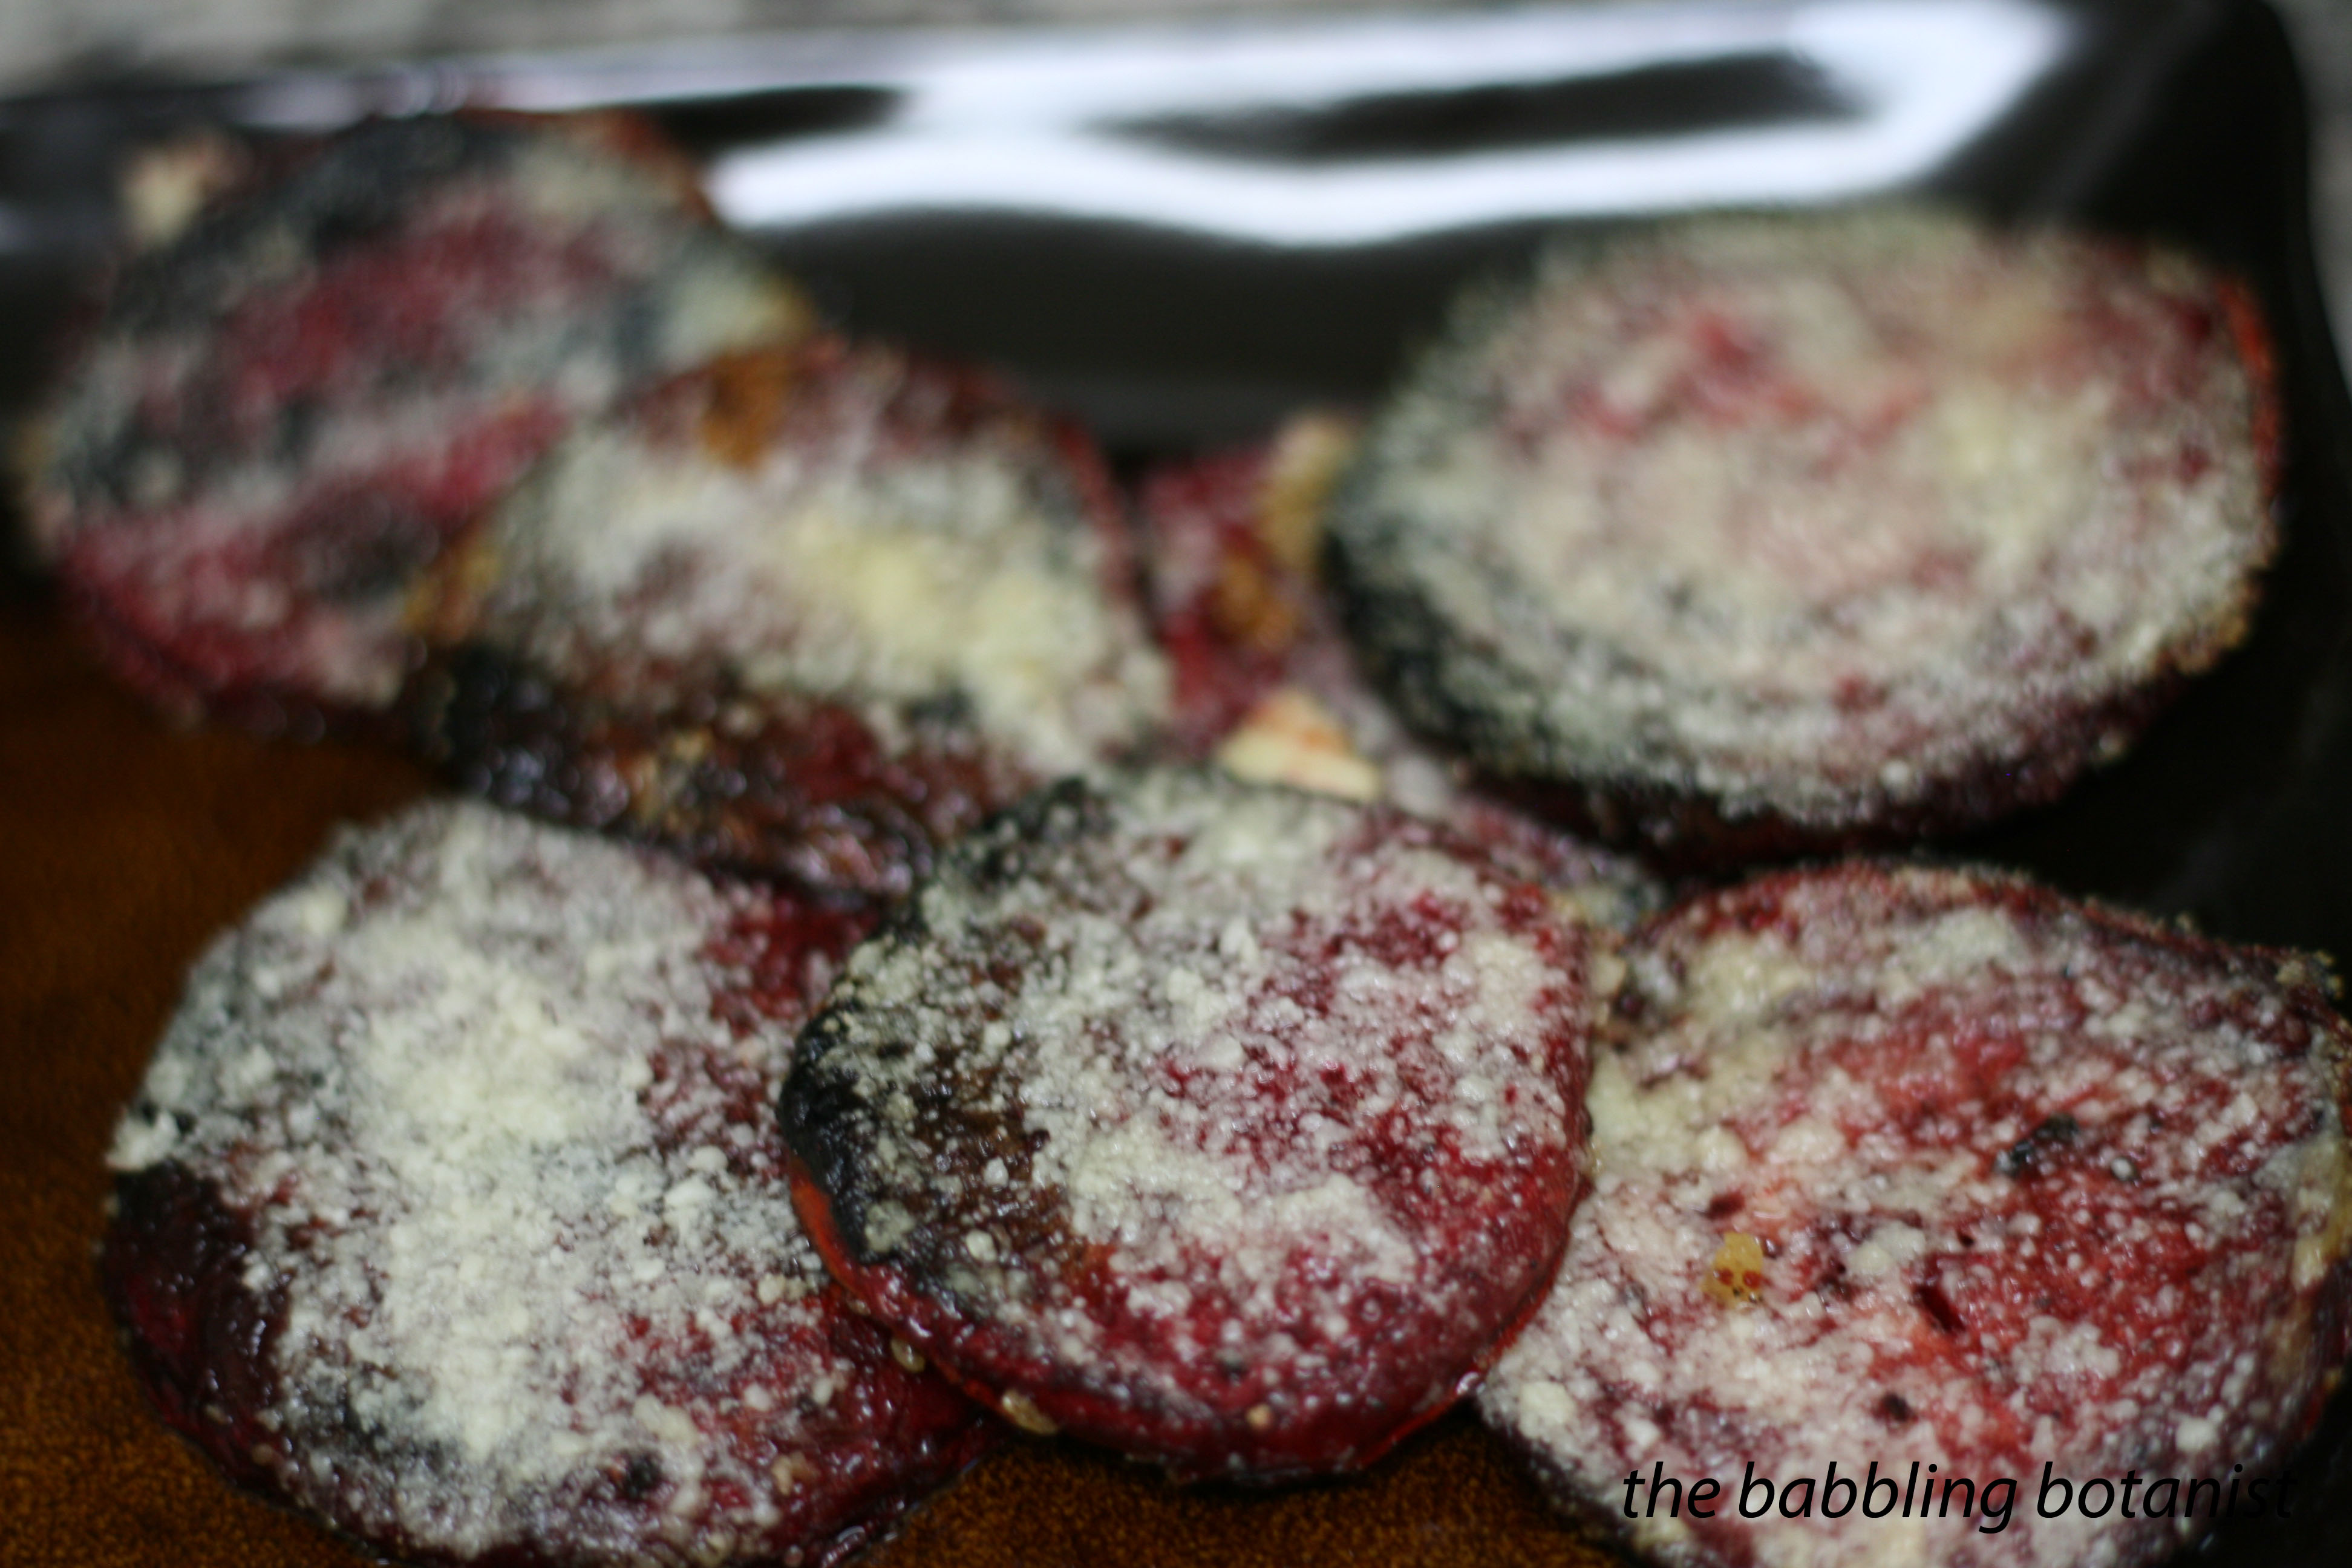
Recipe number 2 was inspired by The Flavor Bible, a book recently acquired by Kiki as a wedding present. We were purusing the bible for an unrelated topic, and were in the B section looking for an interesting flavour combination we could do for blueberry jam, when we stopped upon beets. Cheese was listed as an excellent flavour pairing for beets, something I don’t think I ever would have thought to try. So the next day I harvested some beets and tried them out with Parmesan cheese, and thus this recipe for “Beet Parmesan” was born. Oh. My. God. is this ever good. And I think it’s fitting to use the lord’s name here, as the bible helped me create this recipe. You could even call it divine. 

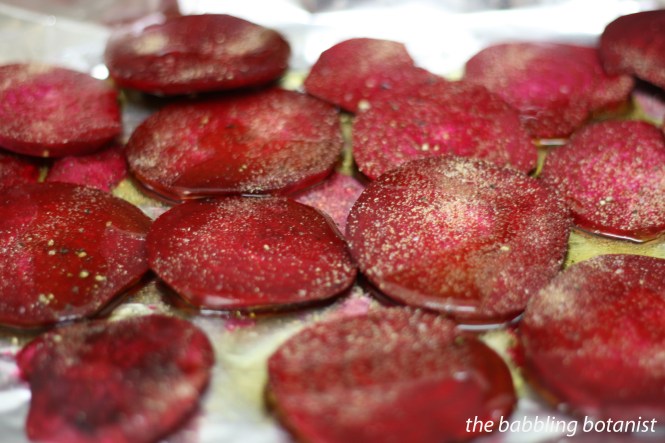
So here it is! For this recipe I think it’s best to cut the beets into coins, thinly-ish but not too thin.

Drizzle aluminum foil with olive oil and place the beet coins on in a single layer. Sprinkle a little more oil on top, along with salt, pepper and garlic powder.

IMG_3878 copy

Roast the beets for 10 or so minutes, depending on how thin you cut them, and then flip. You can test for doneness by stabbing them careflly with a fork.

IMG_3882 copy

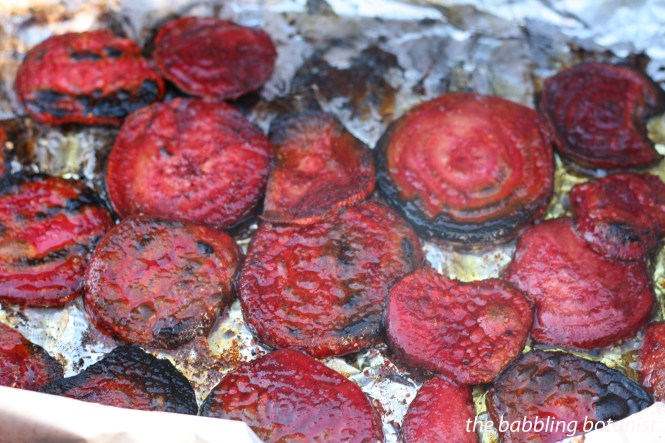
Roast them a few more minutes, and then when they are almost done, sprinkle on the Parmesan cheese. Close the lid of the grill and roast just long enough to melt the cheese.

IMG_3885 copy

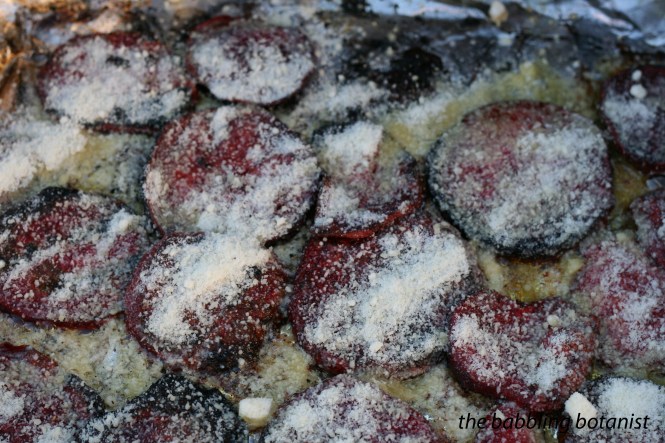
Remove from the heat and gobble them up! Now to get across how delcious this recipe is, and how much you need to try it, here’s a little story of the aftermath of feeding these beets to the boy. Now he’s been complaining ever since I found my love for beets. I think the third time I ever served them, he said ” beets AGAIN,” but with this recipe the tides shifted. After dinner, he told me we needed to have a talk, and the talk was really a confession, a confession that he had enjoyed the beets! He was almost ashamed to admit it, being a classic beet hater, but as I looked at his plate I could see that while even a small piece of steak remained, every last beet was gone. So let this be a lesson to all you beet haters out there, give the beets another chance!

IMG_3887 copy


*this post contains affiliate links, please see the “About the Blogger” page for more information

Kiwi Daiquiri Jam

The other day they had local kiwis for sale at one of my favourite farm stands just outside of town. “Local Kiwis! Whaaat. Don’t mind if I do,” I thought to myself. So of course, despite having any idea what I might do with them, other then eat a few, I bought a box. Luckily, I found this recipe for Kiwi Daiquiri Jam in my Ball Complete Book of Home Preserving.

IMG_3623 copy

Kiwis are so pretty! Doesn’t it look like eyes with really long lashes?

IMG_3632 copy

Ingredients:
2 cups crushed, peeled kiwifruit
2/3 cups unsweetened pineapple juice
1/3 cup lime juice
1 package regular powdered pectin
3 cups granulated sugar
1/4 cup rum (plus a shot for yourself)

Here’s how we made it:
Prepare the canner, jars and lids. This yields about 4-5 half pint jars.

Peel and crush the kiwi. Combine in a stainless steal pot with the pineapple juice, lime juice and pectin. Premeasure the sugar into another bowl for later, the rum into a measuring cup, and a shot for yourself into a shot glass (and one for your helper if you have one).

IMG_3633 copy

Heat the jam to a boil over high heat, while stirring frequently. Once you reach a boil that can’t be stirred down, add the sugar all at once. Return to a boil, and boil for one minute, starting the time once a full boil is reached. After the one minute, pour the 1/4 cup of rum into the jam, and take your shot. Stir it in, and remove from heat.

IMG_3647 copy

Fill the jars, leaving a quarter inch head space. Wipe rims, apply lids, and tighten bands finger tip tight. Process in a boiling water bath canner for 10 minutes covered by at least 1-2 inches of water, starting the time when a full rolling boil is reached.

IMG_3656 copy

After 10 minutes, turn off the heat, remove canner lid, wait 5 minutes and remove the jars to a hot pad or towel. Cool 12-24 hours, check seals, remove bands, and wipe clean. Label and store.

Gosh dang that’s a pretty jam. This one would make a really pretty gift. And the combo of pineapple, lime and kiwifruit makes for a lovely, tropical flavour.

IMG_3733 copy


Kiwi Daiquiri Jam on Punk Domestics

*this post contains affiliate links, please see the “About the Blogger” page for more information